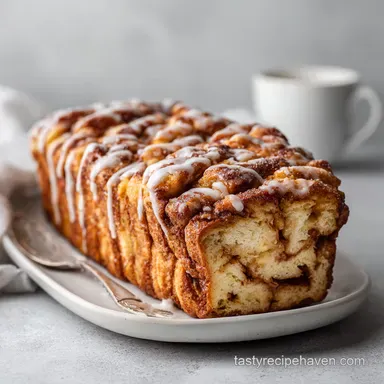
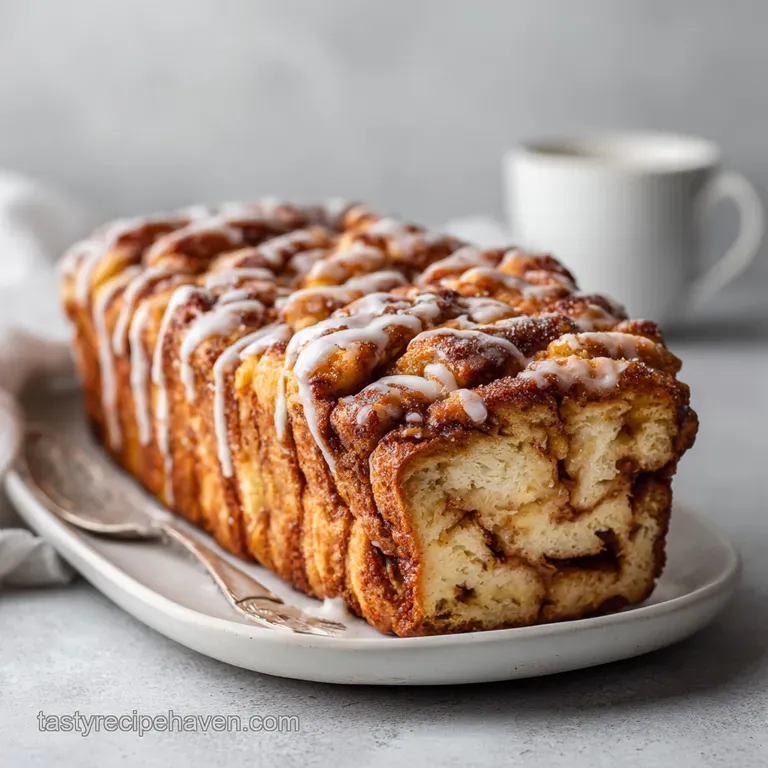
Apple Fritter Bread: Cinnamon Swirl Loaf Cake

- Ditch the Deep Fryer: The Comforting Genius of Apple Fritter Bread (Use 1)
- Assembling Your Bakery Case: Essential Ingredients and Clever Substitutions (Use 8)
- The Cracking Method: Step-by-Step Guide to the Perfect Cinnamon-Apple Swirl
- Expert Tips from the Kitchen: Troubleshooting Your Loaf
- Preserving the Freshness: Storage and Freezing Your Baked Goods
- Perfect Pairings: Elevating Your Apple Loaf Experience
- Recipe FAQs
- 📝 Recipe Card
Ditch the Deep Fryer: The Comforting Genius of Apple Fritter Bread (Use 1)
Oh, hello! Can you smell that? It's the aroma of a weekend well spent, filling your kitchen with cinnamon, butter, and sheer autumnal joy. Seriously, this loaf is a sensory hug, delivering all the sticky, spicy goodness of an old-fashioned doughnut shop classic without ever dirtying a pot of oil.
You get that crispy, crunchy texture on top, a tender, moist interior, and rivers of caramelized apples swirled throughout. This isn't just a cake; it’s an experience, and frankly, making this Apple Fritter Bread is my new favorite autumn ritual.
Why mess with a deep fryer when you can cheat this flawlessly? Traditional fritters are brilliant, yes, but they require timing, temperature monitoring, and a massive cleanup job afterward. This quick bread method eliminates all that fuss.
It’s a perfect lifesaver for last minute guests, cheap to make with pantry staples, and forgiving enough for even a novice baker to nail. Trust me, the sheer speed at which you can whip up this luxurious Apple Fritter Bread will shock you.
Right then, let's crack on with the good stuff. We’re going to dissect the 'fritter' flavor profile and inject it seamlessly into a beautiful, buttery loaf. We'll talk about the right apples to use, the secret to achieving that perfect, messy swirl, and why this particular Apple Fritter Bread recipe is guaranteed to be the best you’ve ever tried.
(Use 2)
What Makes the 'Fritter' Flavour Profile in a Loaf? (Use 3)
A great apple fritter relies on three things: yeasty tang, sweetness, and a crisp exterior. Since we are using a quick bread method (no yeast here!), we have to simulate that depth.
We achieve the fritter vibe through extreme cinnamon concentration, a buttery quick bread structure, and a sticky glaze that mirrors the sugary crust of a fried doughnut.
The sheer amount of cinnamon and brown sugar coating the diced apples ensures the entire loaf screams "fritter." We're not just making an apple loaf; we're making legitimate, deep flavor Apple Fritter Bread . (Use 4)
Why We Love the Quick Bread Method (No Frying Mess) (Use 5)
The beauty of a quick bread is its simplicity: cream butter and sugar, add eggs, alternate dry and wet ingredients. Done. This method is incredibly forgiving compared to yeast risen doughs. It guarantees a perfectly tender, slightly dense crumb that holds up beautifully to the heavy, moist apple filling.
Plus, let's be honest, cleaning up a sticky loaf pan is infinitely better than scraping solidified fat out of a deep fryer. This easy Apple Fritter Bread recipe requires minimal effort for maximum payoff. (Use 6)
The Perfect Pairing: From Breakfast to Afternoon Tea (Use 7)
One of my favourite things about the Homemade Apple Fritter Bread is its versatility. It’s rich enough to stand in for dessert, especially when served warm with a scoop of vanilla ice cream. But it’s humble enough to be sliced thick and served for brunch alongside bacon and eggs. Because the crumb is dense and moist, it holds up brilliantly to being dunked I prefer it with a strong, black coffee or, if I'm feeling fancy, maybe a refined sipper like the Rum and Pineapple Juice: The Refined Tiki Sipper (5 Min Prep) for an afternoon treat.
Assembling Your Bakery Case: Essential Ingredients and Clever Substitutions (Use 8)
Every great bake starts with great ingredients, but sometimes, life throws you a curveball. Maybe you forgot the milk, or maybe you only have those strange, mealy apples from last week. Don't panic! Here’s how we make the best Apple Fritter Bread work, no matter what you have on hand.
Choosing the Right Apple: Texture and Tartness Guide (Use 9)
This is crucial. You want apples that hold their shape during the long bake time and offer a nice tart counterpoint to all the sugar. Avoid soft apples like Red Delicious, as they turn to mush.
I swear by Braeburn or Honeycrisp because they remain firm and slightly crisp even after 60 minutes in the oven. If you prefer a tart note in your Apple Fritter Bread , go for Granny Smith, though I recommend balancing it out with a few tablespoons more brown sugar in the filling.
Flour Power: Cake Flour vs. All-Purpose Considerations
I typically call for all-purpose flour here because it gives a reliably sturdy crumb, essential for holding up that moist apple swirl. However, if you want a softer, more delicate texture, you can absolutely substitute 1/4 cup of the all-purpose flour with cornstarch (or use cake flour entirely).
Just remember that if you use cake flour, your mixing must be even more gentle to avoid compromising the structure of the final Apple Fritter Loaf .
Dairy Swaps: Making Your Loaf Lactose Friendly (Use 10)
| Ingredient Needed | Suggested Substitute | Notes |
|---|---|---|
| Whole Milk | Oat Milk or Almond Milk | Ensure it’s unsweetened. The fat content in oat milk is excellent for quick breads. |
| Unsalted Butter | Ghee or high-quality Vegan Butter Stick | Use a brand designed for baking, not soft spread. |
If you run out of milk entirely, you can use plain Greek yogurt thinned slightly with water. Just make sure your replacement is room temperature; cold ingredients are the enemy of a tender quick bread crumb, especially when making something as crucial as this perfect Apple Fritter Bread .
(Use 11)
The Cracking Method: step-by-step Guide to the Perfect Cinnamon Apple Swirl
This is where the magic happens and where a lot of people mess up. The trick isn't just mixing the ingredients; it’s layering them correctly to create that gorgeous, marbled effect that screams "bakery quality." Following these steps ensures your Cinnamon Apple Fritter Bread bakes evenly.
(Use 12)
Phase I: Preparing the Cinnamon Sugar Apple Core
First, peel and dice your apples small (about 1/4 inch). I learned this the hard way: I once used big chunks, and they released too much water, making the middle of the loaf gummy. Don't skip the pre-mixing step.
Combining the diced apples with brown sugar, cinnamon, and melted butter allows the sugar to start pulling out excess moisture (osmosis, hello!) before the apples even hit the batter. This small effort drastically improves the texture of your finished Apple Fritter Bread . (Use 13)
Phase II: Folding and Layering the Batter for Maximum Marbling
This is a three layer technique, easy peasy. Spoon in half the batter, making sure it coats the bottom evenly. Then sprinkle half the apple mixture over that layer. Top with the remaining batter. Crucial step: Sprinkle the remaining apples right on top.
Now, take a knife and gently slice through the batter 2 or 3 times in an S-shape. That’s it! You want the apples on top to sink slightly and the apples in the middle layer to stay suspended. This ensures every slice of the finished Apple Fritter Bread has that glorious, visible swirl.
(Use 14)
Phase III: Baking to Golden Perfection and the Tenting Technique
A standard 9x5 loaf pan requires about 55- 60 minutes at 350°F (175°C). Since the apples introduce significant moisture, the internal temperature takes longer to reach safe doneness. Around the 30 minute mark, check the colour. If the top is golden brown, it's time for the foil tent.
Loosely covering the Apple Fritter Quick Bread prevents the crust from burning while the middle catches up. Remember to check for doneness by inserting a skewer into the centre; if it comes out clean (minus melted sugar), you're golden. (Use 15)
Expert Tips from the Kitchen: Troubleshooting Your Loaf
I have made every mistake in the book. I've had loaves sink, burn, and taste like rubber. Here are the 3 major pitfalls when making Apple Fritter Bread and how to sidestep them elegantly. (Use 16)
Avoiding the Dreaded Dry Loaf: Don't Overmix the Batter
If your finished loaf is tough or dry, the culprit is likely overmixing. Once the flour hits the wet ingredients, gluten starts to develop rapidly. We don't want a chewy bread like Sourdough Bread Bread Machine: Easy Artisan Loaf ; we want a tender cake! Mix only until the flour streaks disappear a couple of small lumps are fine. Gentle folding is key to achieving that moist, rich crumb in your Apple Fritter Bread . (Use 17)
Solving the Sunk Filling Problem: Draining Excess Apple Moisture
If your apples sink to the bottom, making a heavy, wet layer, two things went wrong. First, the dice size was too large. Second, you didn't drain the apples. Even after coating them in sugar and cinnamon, they will release juice while they sit.
Before you sprinkle the apples onto the batter layers, quickly blot them or drain off any visible liquid. This little pre-drainage step makes all the difference to the structural integrity of your Homemade Apple Fritter Bread . (Use 18)
The Glaze Wait: Applying the Sticky Top Coat for Optimum Adhesion
I know, I know. You want to pour that glorious, vanilla scented glaze over the loaf the second it comes out of the oven. Don't do it! Applying the glaze when the Apple Fritter Bread is scorching hot will cause it to melt right off, soaking into the crust instead of creating that beautiful, slightly crisp shell we want.
Wait until the loaf is completely cool or at least just slightly warm to the touch before drizzling.
Chef's Note: If you want a thicker, opaque glaze like the kind you find on bakery doughnuts, substitute the milk in the glaze recipe with heavy cream, and ensure your powdered sugar is thoroughly sifted. This Apple Fritter Bread with Glaze should look stunning! (Use 19)
Preserving the Freshness: Storage and Freezing Your Baked Goods
The only downside to quick breads is that they can dry out faster than traditional yeast breads. But don't worry, I have methods for keeping this Easy Apple Fritter Bread fresh and delicious for days. (Use 20)
Airtight Longevity: Keeping the Loaf Moist for Days
Once the glaze is set, wrap the entire loaf tightly in plastic wrap, then store it in an airtight container or Ziploc bag at room temperature. Kept like this, your Apple Fritter Bread will stay moist and wonderful for 3 to 4 days.
If you keep it in the refrigerator, it will extend the shelf life to about a week, but the cold air can dry it out faster, so bring it to room temperature before slicing or reheating. (Use 21)
Freezing the Apple Fritter Loaf for Future Cravings
Yes, you can absolutely freeze this! Baking large batches of Apple Fritter Bread and freezing them is one of my favourite tricks. Crucial freezing tip: Freeze the loaf without the glaze.
Wrap the cooled, unglazed loaf tightly in plastic wrap, then wrap it again in foil. It will last perfectly in the freezer for up to 3 months. When you're ready to eat, thaw it overnight at room temperature and then make a fresh batch of glaze.
Warm slices of reheated Apple Fritter Loaf are just divine. (Use 22)
Perfect Pairings: Elevating Your Apple Loaf Experience
We've mastered the bake, but how do we serve this magnificent thing? The richness and spice of this Cinnamon Apple Fritter Bread mean it pairs well with ingredients that offer contrast or warmth. (Use 23)
Beverage Complements: Pairing with Coffee, Tea, and Cider
For breakfast, a strong, bitter coffee is the ideal counterpoint to the sweet glaze and spiced apples. If it's afternoon tea time, a hearty black tea or even a warming mug of spiced chai is perfect.
And, obviously, during the autumn season, nothing beats a slice of warm Apple Fritter Bread alongside a glass of cold, crisp cider. It’s the ultimate seasonal synergy. (Use 24)
If you somehow found yourself making this Apple Fritter Bread as a dessert, try serving it with a spoonful of slightly tart, homemade crème fraîche. It’s heaven. Honestly, once you nail this simple quick bread technique, you might just skip deep frying forever.
This is the Apple Fritter Bread you’ll be making all year long. (Use 25)
Recipe FAQs
What kind of apples work best for this loaf?
The best choices are firm, crisp apples that hold their shape well when baked, such as Granny Smith (for tartness), Honeycrisp, or Fuji. Avoid soft varieties like McIntosh, which tend to break down completely and release too much moisture into the batter.
If you use Granny Smith, you might want to slightly increase the sugar in the main batter for balance.
Why is my Apple Fritter Loaf dense or dry?
Dryness and density usually result from overmixing the batter after adding the flour, which develops the gluten too much. Ensure you mix only until the flour streaks have just disappeared, otherwise, you risk toughing up the crumb.
Also, always double check your oven temperature with an oven thermometer, as overheating is a common culprit for dry edges.
My cinnamon swirl sank to the bottom. How do I prevent this?
Sinking often happens if the batter is too thin or if the filling mixture is too heavy. Ensure your quick bread batter has a thick consistency so it can support the weight of the apple and cinnamon filling.
When layering, make sure to gently distribute the filling, and use a generous layer of plain batter on top to help anchor the swirl.
Can I use this recipe to make muffins instead of a loaf?
Absolutely, this recipe adapts wonderfully to muffins or even a square 8x8 inch pan; simply adjust the baking time accordingly. For standard muffins, reduce the time to about 20 25 minutes, checking for doneness with a toothpick inserted into the center.
Be sure to shorten the baking time significantly to prevent drying out the smaller portions.
How should I store the finished Apple Fritter Loaf?
Stored properly in an airtight container at room temperature, this loaf remains beautifully moist and delicious for 3 to 4 days. If the loaf is glazed, it is best to store it loosely covered or on a cake plate rather than in a fully sealed container, as the moisture can make the glaze tacky or weep.
Avoid refrigerating quick breads, as this speeds up the drying process.
Can I freeze this loaf for later?
Yes, the loaf freezes exceptionally well, but you must do so before applying the glaze. Once the loaf is completely cooled, wrap it tightly in plastic wrap, followed by a layer of aluminum foil, and freeze for up to three months.
To thaw, unwrap the loaf and let it sit at room temperature for several hours, then prepare the glaze just before serving.
Can I make this recipe gluten-free or dairy-free?
Yes, for a gluten-free loaf, substitute the standard flour with a high-quality 1:1 gluten-free baking blend that includes xanthan gum. To make it dairy-free, swap the butter for a plant based baking stick or coconut oil, ensuring you use a reliable plant based milk replacement for the wet ingredients.
Apple Fritter Bread Loaf Recipe