Peanut Butter Cookies: the Classic Crisscross Recipe
- Welcome to the Ultimate Classic Peanut Butter Cookie Recipe
- Decoding the Perfect Peanut Butter Crisscross Texture: Why This Recipe Works
- Ingredients Spotlight: Building Optimal Peanut Flavor from the Base Up
- The Method: Baking Perfect Crisscross Peanut Butter Treats
- Troubleshooting and Expert Tips from the Chef's Kitchen
- Storage Solutions and Freezing Options for Maximum Freshness
- The Best Pairings for These Salty-Sweet Delights
- Recipe FAQs
- 📝 Recipe Card
Welcome to the Ultimate Classic Peanut Butter Cookie Recipe
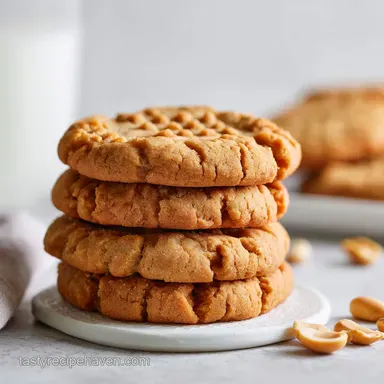
You know that scent, right? That deep, nutty aroma mingled with caramelized brown sugar that floods the kitchen the moment the oven door opens? That’s the smell of pure, unadulterated comfort, and it means the best batch of Peanut Butter Cookies is officially baking.
These aren’t some fussy, pretentious bakery item; this recipe is about delivering the textbook definition of the perfect cookie: delightfully chewy centres, slightly crisp edges, and that famous, satisfying crisscross texture.
Seriously, if you need a win in the kitchen right now something fast, cheap, and guaranteed to earn you adoration this is your recipe. We’ve all been there, trying three ingredient versions that taste dry or ones that spread into oblivion. Forget all that drama.
This method results in thick, rich, and truly exceptional homemade Peanut Butter Cookies every single time, requiring just 15 minutes of prep before chilling.
We’re going back to basics today, but we’re employing a few expert level secrets I picked up after years of baking mishaps. Get your stand mixer ready, grab the jar of peanut butter, and let’s crack on with making the only Peanut Butter Cookies recipe you will ever need.
Decoding the Perfect Peanut Butter Crisscross Texture: Why This Recipe Works
This recipe isn't complicated, but the precise balance of fats and sugars is what elevates these from mere biscuits to the best Peanut Butter Cookies you’ve ever had. We need that perfect structure that allows them to spread just enough to get those lacy edges without becoming thin wafers.
It's truly a science.
What Makes These Cookies So Nostalgic and Beloved?
The magic lies in the sugar ratio and the fact that we use commercial style peanut butter. Granulated sugar provides the necessary structure and promotes crisping around the edges. Brown sugar, on the other hand, is key for retaining moisture; it ensures the centres stay beautifully chewy.
When you combine those two, you get the absolute best of both worlds in your Peanut Butter Cookies .
Preparation Time and Easy Difficulty Breakdown
I rate this recipe as easy, but you must respect the chill time. Active preparation is quick you’re mostly just creaming butter and scraping down the bowl. The most challenging part, honestly, is waiting the 30 minutes for the dough to firm up before baking.
This wait is crucial for managing the fat content and preventing your classic Peanut Butter Cookies from turning into puddles of melted grease.
Essential Kitchen Equipment Checklist
You don't need fancy tools, but a stand mixer makes this exponentially faster. If you're doing this by hand, ensure your butter is genuinely soft, or you'll be mixing until your arms ache!
A cookie scoop is my secret weapon for consistency; it ensures every single one of your homemade Peanut Butter Cookies bakes at the same speed.
The Role of Brown Sugar vs. Granulated Sugar in Chewyness
I’m firm on this 2:1 brown sugar to white sugar ratio. Brown sugar contains molasses, which is naturally acidic and helps the baking soda activate more efficiently, contributing to a slightly puffier rise and that characteristic chewiness. Granulated sugar provides the necessary spread and crispness.
If you want truly chewy Peanut Butter Cookies , do not skimp on the brown sugar!
Why the Dough Chill Time is Non-Negotiable
Have you ever baked a cookie that just melted into a huge, flat disc the second it hit the hot pan? That’s what happens when the butter in the dough is too warm. Chilling the dough solidifies the fat, ensuring the cookies hold their shape while baking.
It’s also about flavor the ingredients mingle in the fridge, resulting in richer, more complex tasting Peanut Butter Cookies . Trust me on this one; skip the chill, regret the spread.
Mastering the Signature Crisscross Pattern: Functionality vs. Aesthetics
The famous fork cross isn’t just cute; it’s a necessary function! The high fat and low-moisture content of this dough means it won't spread as much as, say, a traditional sugar cookie or a flatter drop cookie.
Pressing the fork gently onto the dough ball flattens it slightly, ensuring that the middle cooks completely without the edges burning. It guarantees a perfectly cooked, golden brown batch of classic Peanut Butter Cookies .
Chef's Note: Always dip your fork in granulated sugar between pressing each cookie. It stops the dough from sticking to the tines and adds a lovely crystalline crunch right on top of the finished product.
Ingredients Spotlight: Building Optimal Peanut Flavor from the Base Up
The ingredient list is short and sweet, exactly how it should be for true classic Peanut Butter Cookies . We are aiming for pure flavor here, so quality ingredients, particularly the peanut butter itself, really matter.
Choosing Your Peanut Butter: Creamy, Crunchy, and Consistency Matters
I know, I know, you love that artisanal, natural peanut butter with the oil separation. But hear me out: do not use natural peanut butter for this recipe. Natural peanut butter is too oily and inconsistent; the structural integrity of these Peanut Butter Cookies relies on the stabilisers found in processed brands (like Jif or Skippy).
Use creamy for the classic texture, or crunchy if you want little bits of texture explosion throughout.
| Ingredient | My Recommendation | Viable Substitution |
|---|---|---|
| Butter | Unsalted (you control the salt!) | high-quality plant based butter sticks |
| Peanut Butter | Stabilized, creamy (Jif/Skippy) | Must be stabilized; almond butter works but changes the name! |
| Brown Sugar | Light brown sugar, packed | Half granulated sugar + 1 tsp molasses (if desperate) |
| Eggs | Large, room temperature | Flax eggs (3 Tbsp water + 1 Tbsp flax meal per egg) |
The Secret to Balancing Saltiness in Sweet Baked Goods
Salt is the flavour enhancer, not just a seasoning. Since peanut butter is already salty, you might think you should skip the salt, but that’s a rookie mistake! The half teaspoon of fine sea salt prevents the finished product from tasting overwhelmingly sweet and makes the nutty flavor truly pop.
It’s the essential counterpoint that makes these Chewy Peanut Butter Cookies addictive.
Alternative Flours and Sugars: Handling Dietary Swaps
If you need to make these gluten-free, use a high-quality 1:1 gluten-free baking blend that includes xanthan gum. You might need to slightly increase the liquid (maybe a teaspoon of milk) if the dough feels too dry. For a completely vegan version, swap the butter for plant butter and use flax eggs, as noted above.
These substitutions work, though they slightly change the texture compared to the original, which uses traditional butter and eggs for structure.
Can I Use Different Sugars to Affect the Spread?
Yes, absolutely, but be careful! If you use all granulated sugar, your Peanut Butter Cookies will spread thinner and be much crisper, lacking that beloved fudgy centre. If you use all brown sugar, they will be extremely soft and might struggle to hold their shape fully outside the oven.
Stick to the ratio for the most reliable results.
The Method: Baking Perfect Crisscross Peanut Butter Treats

Making these Peanut Butter Cookies is one of the most therapeutic kitchen activities. It requires simple steps, but precision in timing and mixing technique is key. Pay attention to the creaming stage; it dictates the final texture!
Creaming the Butter and Sugars for Optimal Dough Aeration
This step is where you incorporate air into the mixture, which is vital for lift and chewiness. Beat the softened butter, brown sugar, and granulated sugar together on medium speed for a full 3 to 4 minutes.
You are looking for a mixture that is significantly lighter in colour and much fluffier in volume. Do not rush this step, or your Peanut Butter Cookies will be dense. Once the mixture is light and aerated, you can beat in the peanut butter until everything looks uniform and creamy.
Forming Uniform Dough Balls and Getting the Crisscross Right
Once the dough has chilled (don’t forget the chill!), scoop and roll each portion into a smooth ball. Place them 2 inches apart on the prepared baking sheet. Grab that sugar dipped fork and make the signature cross. Start by pressing down gently, then turn the fork 90 degrees and press again.
This should flatten the dough ball significantly, but not completely smash it. The dough for these Easy Peanut Butter Cookies should still feel firm and hold the imprint beautifully.
Baking Time and Visual Cues for Doneness
Bake these at 375°F (190°C). This higher temperature ensures the edges set quickly while the centre remains soft. Your Peanut Butter Cookies are done when the edges look firm and golden brown, but the very centre still looks slightly soft or even undercooked. This softness is critical.
They will continue to set as they cool. Do not overbake! If you wait until the centres look dry and set in the oven, you will end up with hard, dry biscuits later.
Cooling Rack Essentials: Achieving the Crisp Edge
When they come out, leave the Peanut Butter Cookies right there on the hot baking sheet for 5 minutes. This allows the internal temperature to stabilize, preventing them from collapsing or crumbling when you move them.
After the rest, gently transfer them to a wire rack to cool completely. The air circulating underneath the rack helps the bottoms crisp up perfectly, giving you that ideal contrast.
Troubleshooting and Expert Tips from the Chef's Kitchen
I’ve had my share of cookie disasters, from flat, greasy messes to crumbly, dry bricks. I learned the hard way that a few small adjustments make all the difference in achieving the Best Peanut Butter Cookies .
Fixing Common Dough Issues (Too dry or too sticky)
If your dough feels too dry after mixing the flour, it’s usually because you added too much flour (always weigh it!). Try adding milk, one teaspoon at a time, until the dough holds together when squeezed but is still firm.
If the dough is too sticky, it might be that your butter was too warm, or perhaps you measured too much peanut butter. The best fix for overly sticky dough is chilling it for an extra 30– 60 minutes; cold dough is always easier to handle and less sticky.
Preventing Your Cookies from Spreading Too Thin
The culprits here are warm butter and lack of chilling. If you followed the chill time and they still spread too thin, check your oven temperature (see below). Another common cause is using baking powder instead of baking soda, or using old leaveners.
Also, if you’re using natural peanut butter, stop! It will always cause excessive spread in Homemade Peanut Butter Cookies .
The Importance of Oven Temperature Calibration
Oven thermometers are cheap, and they are lifesavers. Most home ovens are wildly inaccurate, often running 25 50 degrees cooler or hotter than the display says. If your cookies are spreading too thin or taking too long to bake, verify that 375°F (190°C) is truly 375°F inside your oven.
Getting the heat right is the final frontier in mastering these spectacular Peanut Butter Cookies .
Storage Solutions and Freezing Options for Maximum Freshness
You rarely have leftovers of these, but in the unlikely event you do, proper storage is key to keeping your Chewy Peanut Butter Cookies in peak condition.
A Guide to Maximum Freshness: Countertop vs. Fridge Storage
Store completely cooled Peanut Butter Cookies in an airtight container at room temperature for up to 5 days. I usually slip a half slice of plain bread into the container; the cookies absorb the moisture from the bread, keeping them soft and fresh longer.
Do not store baked cookies in the fridge; the cold temperature tends to dry them out very quickly.
Freezing Unbaked Dough for Future Batch Baking
This is my favourite secret weapon for future dessert cravings! Prepare the dough exactly as written, scoop the balls, and apply the crisscross pattern. Place the formed dough balls on a small tray and freeze until solid. Once frozen, transfer them to a zip-top freezer bag. They will keep for up to 3 months.
When you’re ready to bake, just place the frozen dough directly onto the prepared sheet and add 2– 4 minutes to the total bake time for the perfect, freshly made Peanut Butter Cookies .
Reinvigorating Day-Old Peanut Butter Cookies
If your cookies have gotten a little stiff, don't throw them out! Pop them on a baking tray and warm them in a 300°F (150°C) oven for about 5 minutes. The gentle heat will re-soften the butter and sugar, making them chewy and delicious again almost like they just came out of the oven. This little trick works wonders on almost any kind of cookie, including my favorite Chocolate Chip Cookies: Ultimate Chewy Crispy Recipe .
The Best Pairings for These Salty Sweet Delights
The rich, slightly salty flavor of these Homemade Peanut Butter Cookies demands a contrasting beverage or accompaniment. They are incredibly versatile!
We often serve them simply with a tall glass of milk, but for an adult indulgence, try pairing them with a dry port or a strong espresso shot. If you want to get really decadent, melt some semi sweet chocolate and dip the cooled cookies halfway in.
The dark chocolate provides a wonderful bitterness that cuts through the intense sweetness of the Peanut Butter Cookies , making them simply irresistible.
Recipe FAQs
Why did my cookies come out dry and crumbly instead of chewy?
This is usually the result of over baking or accidentally using too much flour. Ensure you use the "spoon and level" method when measuring flour to avoid compaction, and remember to remove the cookies immediately when the edges look golden, even if the centers still appear slightly soft.
Is the fork crisscross pattern necessary, or is it just for decoration?
The crisscross indentation is actually crucial for this dense peanut butter dough, which does not spread naturally. Pressing the pattern flattens the dough slightly and provides venting, ensuring uniform thickness and allowing the cookies to bake evenly from the center to the edges.
Can I use natural, oil-on-top style peanut butter in this recipe?
It is strongly advised to stick to standard processed creamy peanut butter (like Jif or Skippy) for this recipe. Natural peanut butter separates and has a different fat ratio that can cause the cookies to be excessively greasy, flat, and inconsistent in texture.
My cookies spread too much and ended up very thin. What went wrong?
Excessive spreading often occurs if the butter was too soft or if the dough was not chilled adequately. Always ensure your butter is only cool room temperature, and if your kitchen is warm, chill the formed dough balls for at least 30 minutes before baking.
How should I store these cookies, and can I freeze them?
Store cooled, baked cookies in an airtight container at room temperature for up to five days to maintain freshness. For longer storage, the dough freezes beautifully: simply form the dough balls, crisscross them, and freeze them raw for up to three months in a freezer bag.
Can I make these classic cookies gluten-free?
Yes, you can substitute the all-purpose flour using a high-quality 1:1 gluten-free baking blend that includes xanthan gum. No other major ingredient modifications should be required, but you may need to watch the baking time closely as GF flours can sometimes brown faster.
What is the best way to scoop the dough for uniform size?
Using a standard cookie scoop (usually 1.5 tablespoons size) ensures all your cookies are exactly the same size, which guarantees consistent baking time. If you do not have a scoop, use a measuring spoon and roll the dough tightly into smooth, uniform balls before dipping the fork.
Classic Chewy Peanut Butter Cookies