Cornmeal Mush: Grandmas Golden Slice Recipe
- The Culinary Transformation of Simple Cornmeal
- Essential Components for Golden Slices (Ingredients & Substitutions)
- Step-by-Step: From Porridge to Perfectly Sliced Mush
- Expert Frying Techniques and Common Mush Mistakes
- Preparation Ahead: Storage and Freezing the Cornmeal Loaf
- Dressed Up or Down: Creative Ways to Serve Crispy Fried Mush
- Recipe FAQs
- 📝 Recipe Card
The Culinary Transformation of Simple Cornmeal
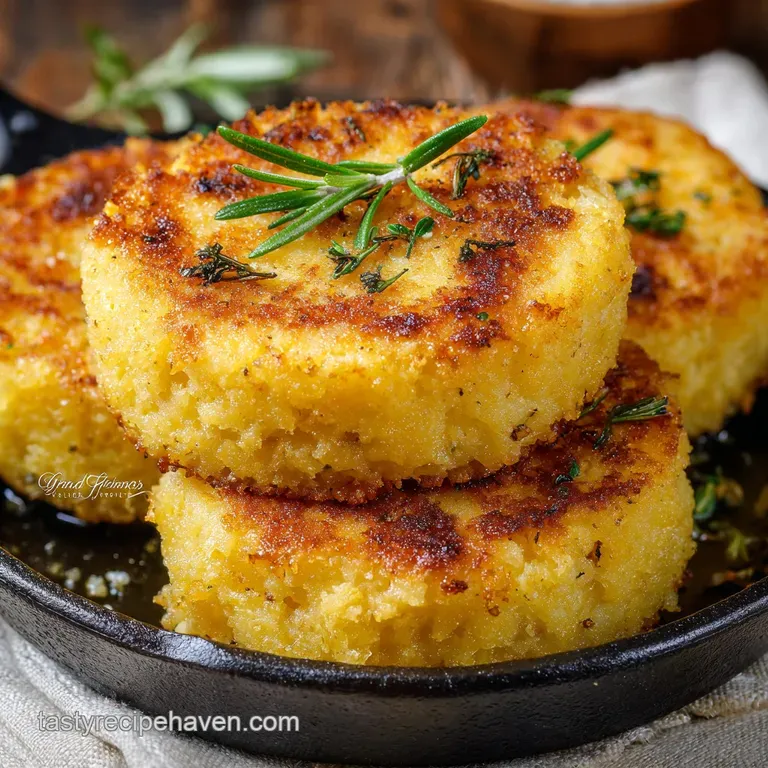
You know that feeling when the kitchen smells like pure, golden comfort? That's what happens when you make Cornmeal Mush . It's thick, earthy, and strangely soothing while it bubbles away on the stovetop.
But the real magic isn’t the porridge itself it’s the crispy, caramelized crust you get when you slice it up and shallow fry those beautiful pieces the next morning.
This humble dish is a total lifesaver. It takes less than five minutes of actual hands-on prep, it uses two ingredients you already have (cornmeal and water), and it can feed a crowd for practically nothing. Why spend a fortune on fancy breakfast ingredients when this simple staple delivers big flavor?
So, forget the idea that mush is a boring or difficult dish. We are going to dive headfirst into the process, ensuring your resulting fried slices are crisp, golden, and genuinely unforgettable. Get ready for the best Fried Cornmeal Mush you’ve ever tasted.
What Exactly Is Cornmeal Mush? (And Why You Should Fry It)
At its heart, Cornmeal Mush is just a highly concentrated corn porridge. Think of it as the American cousin to Italian polenta or the Yankee version of Southern grits.
The crucial difference here is the cooking time and the ratio of liquid to grain; we cook this until it's much, much stiffer than your morning bowl of oatmeal. This intense hydration of the cornmeal starch is what allows it to firm up perfectly when chilled.
The chill time is the key to unlocking its potential. Once solidified, you cut it into slices, which gives you maximum surface area for frying. We fry it hard in fat butter is a must, obviously until the edges are crunchy and the inside is piping hot and wonderfully creamy.
That crisp-to-creamy texture is why this homemade Cornmeal Mush Recipe is such a massive hit.
The History of the Golden Slice Comfort Food
This dish has deep roots in American history, particularly in the mid-Atlantic and Appalachian regions, where it was a staple food for farmers and early settlers. It’s an exercise in extreme economy. You start with cheap cornmeal, cook it in bulk, and use the soft porridge for dinner one night.
Then, you slice the leftovers and fry them for breakfast the next day! This delicious dual purpose method ensures nothing goes to waste.
It’s often called "Fried Mush" or "Scrapple Without the Meat," but I prefer "Golden Slice." My grandmother used to serve this every Saturday morning, drizzled with sorghum molasses. It’s pure, uncomplicated comfort food the ultimate testament to making something magnificent out of almost nothing.
Essential Equipment Checklist for Preparing the Mush Base
You don’t need anything fancy to make classic Cornmeal Mush . In fact, simplicity is the name of the game.
- Heavy Bottomed Saucepan: Non-negotiable! The thick bottom prevents the mush from scorching, which it loves to do as it gets thick. Trust me, I learned this the hard way with a few burned batches of Homemade Mush Recipe .
- A Solid Wooden Spoon or Spatula: Once it thickens, a whisk is useless. You need a sturdy tool to push and scrape the mixture as it cooks down.
- Loaf Pan: An 8x4 inch standard metal loaf pan is perfect for shaping the mush into a neat block for slicing.
Essential Components for Golden Slices (Ingredients & Substitutions)
To get perfect Crispy Fried Mush , you must start with the right ingredients and ratios. Here’s what you need, along with the essential substitution tips I've picked up over the years.
Choosing Your Cornmeal: Fine vs. Coarse Grind
This is where things can go wrong if you grab the wrong bag. I always recommend using a medium or regular ground yellow cornmeal for this Cornmeal Mush recipe.
| Ingredient Type | Grind Type | Result | Substitution |
|---|---|---|---|
| Yellow Cornmeal (Standard) | Medium | Optimal texture, creamy but firm set. | Coarsely ground polenta, though you may need more liquid. |
| Instant Cornmeal | Fine | Sets too quickly; texture can be grainy. | Avoid if possible; reduces cooking time dramatically. |
| Stone Ground | Very Coarse | Requires much longer cook time (up to 90 minutes). | Use if you prefer a rustic, chewy texture. |
Crucial Tip: If you use a finer grind than recommended, reduce your liquid by 1/4 cup to ensure a firm set.
Liquid Options: Water, Milk, or Broth?
While the classic recipe calls for pure water, don't limit yourself! The liquid dictates the ultimate flavor profile of your Cornmeal Mush .
- Water: Simple, classic, and allows the corn flavor to shine.
- Whole Milk: Makes an incredibly creamy, luxurious base, perfect for sweet applications. Substitution: If you don't have whole milk, use half water, half heavy cream.
- Chicken or Vegetable Broth: An absolute game changer for savory preparations. This is how you make the ultimate Savory Cornmeal Recipes . Substitution: Use powdered bouillon mixed with water for a quick flavor boost.
Salt and Flavor Adjustments for Sweet or Savory Bases
Please, please, salt your cooking water. Even if you plan on drenching the resulting slices in syrup, you need salt to cut through the richness and make the cornmeal actually taste like something. I use 1 teaspoon of Kosher salt per 4 cups of liquid.
If you’re leaning savory, whisk in garlic powder or onion powder before you add the cornmeal. If you're going sweet, skip the additional flavorings in the mush itself, but stir a tablespoon of butter into the cooked mush before chilling it adds richness and a beautiful yellow hue.
Selecting the Right Fat for Maximum Frying Crunch
You need two fats here: one for heat stability and one for flavor. Pure butter tends to burn before you get the slice truly crisp. I start with a high smoke point oil (canola, grapeseed, or sunflower) and then add a tablespoon of butter.
> Chef's Note: The combination of oil and butter raises the overall smoke point of the fat mixture while still giving you that irresistible nutty, browned butter flavor that makes the crust on the Amish Fried Cornmeal Mush so delectable.
Step-by-step: From Porridge to Perfectly Sliced Mush
This process is straightforward, but timing is everything. Once the porridge starts to thicken, you cannot walk away!
Preparing the Initial Porridge (A Lumpy Free Technique)
First, boil your salted liquid in that heavy pot. Once it’s at a rolling boil, reduce the heat slightly. Now, this is the most critical step for making excellent, lump free Cornmeal Mush . Slowly, so slowly , rain the cornmeal into the liquid while constantly whisking.
Keep whisking until the mixture is uniform and starting to thicken slightly.
Switch to a wooden spoon. Drop the heat immediately to the lowest setting possible a bare simmer. You need to stir consistently for the first 5 to 7 minutes to prevent scorching the bottom.
Then, cover it and cook for the remainder of the time, stirring vigorously every 5 minutes. The Cornmeal Mush is done when it’s so thick your spoon can stand up in it and it pulls cleanly away from the sides of the pan.
This usually takes 30 to 40 minutes, minimum.
Shaping the Loaf: The Cooling Container and Preparation
Once the mush is cooked, it needs a home to set. Lightly grease your loaf pan or line it with parchment paper (the parchment is easier for unmolding, trust me). Working quickly, scrape all of the hot mush into the pan. This stuff sets fast!
Press it firmly with the back of a damp spoon or spatula to eliminate any air pockets. We want dense, uniform slices of Cornmeal Mush later.
Why the Chill Time is Non-Negotiable (Starch Retrogradation)
Patience, my friend, is a virtue when making this classic. The long chill time allows for starch retrogradation, which is just a fancy way of saying the starches in the cornmeal align and bond tightly.
If you try to slice the loaf before it’s completely firm about 4 hours or, ideally, overnight it will crumble and fall apart into a sticky mess when you try to fry it. You simply cannot rush perfect Fried Cornmeal Mush .
The Frying Process: Temperature Control for the Signature Crust
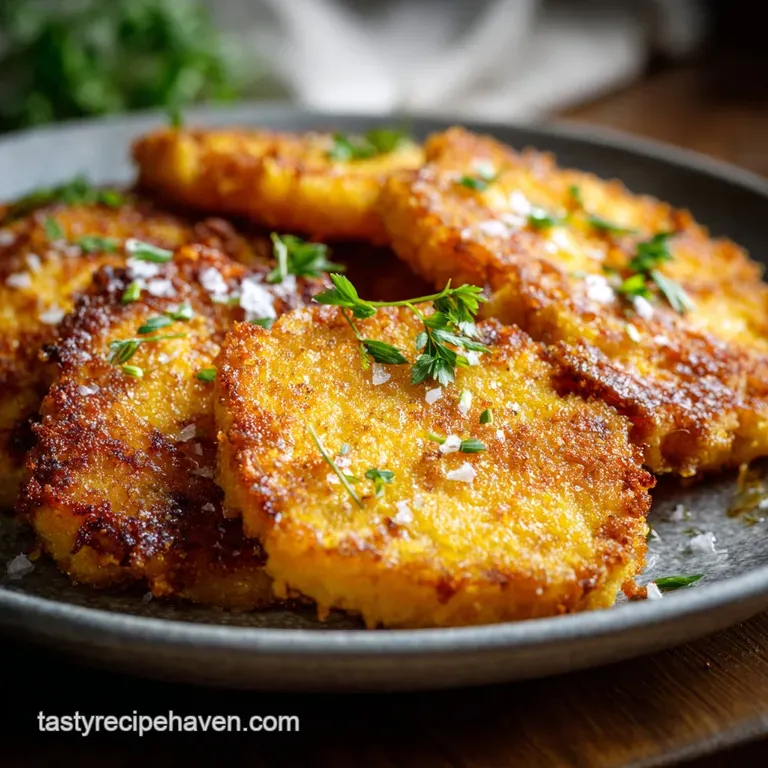
Once the loaf is chilled and unmolded, slice it into uniform 1/2 inch thick pieces. Now, let's fry. Heat your oil and butter mixture in a large skillet (cast iron works best) over medium high heat until the fat is shimmering but not smoking.
Place the slices into the hot fat without crowding the pan. If you overcrowd, the temperature drops, and you steam the slices instead of frying them. Cook for about 4– 6 minutes per side. You are looking for a deep, crunchy, golden brown crust.
When I first started making this Recipe For Fried Mush , I used too little heat and ended up with greasy, soggy slabs. Don’t do that! Use sufficient fat and a proper medium high temperature.
Expert Frying Techniques and Common Mush Mistakes
This is where I share the mistakes I’ve made so you don't have to repeat them. Making truly crispy Cornmeal Mush takes a couple of specific, high impact moves.
Troubleshooting Sticky Slices and Crumbling Edges
If your loaf is sticking to the cutting board or the slices are falling apart before they hit the pan, you have a density problem. Either the mush wasn't cooked long enough, or it didn't chill fully.
If it's merely sticky on the outside, a light dusting of flour can help, but that brings us to the next, better solution.
The Importance of Drying the Slices Before Frying
Moisture is the enemy of crispiness. Even if your loaf is perfectly set, condensation can form in the fridge. Before frying, lay your slices of Crispy Fried Mush base out on a wire rack or on paper towels for 10– 15 minutes at room temperature.
This allows any surface moisture to evaporate. This simple step makes a huge difference in the final texture of the crust.
Why Your Cornmeal Mush Didn’t Set Properly
There are only two culprits here:
- Not Enough Cook Time: You must cook it for the full 30– 40 minutes until it's thick as paste and pulls away from the pot. If it looks like watery polenta, keep cooking.
- Too Much Liquid: If you used a fine grind cornmeal but used the coarse grind liquid ratio (4 cups), the mush will be too watery to set firmly. For your next attempt at Cornmeal Mush , slightly reduce the liquid if your cornmeal is fine.
Preparation Ahead: Storage and Freezing the Cornmeal Loaf
One of the great joys of making this meal is the ability to prepare it entirely in advance. It's a fantastic meal prep item!
Refrigerator Shelf Life and How to Freeze Unfried Slices
Once cooked and chilled, the solid loaf of Cornmeal Mush will keep beautifully in the refrigerator for up to 5 days, tightly wrapped in plastic wrap. You can slice it all at once or slice off pieces as needed.
But does it freeze well? You bet. To freeze, slice the chilled loaf into your desired portions. Place the slices on a parchment lined baking sheet and freeze until solid (about 2 hours).
Transfer the frozen slices to a freezer safe zip-top bag, separating layers with wax paper to prevent sticking. Frozen slices of Cornmeal Mush are good for 3 months. Fry them directly from frozen, adding 2– 3 minutes to the cooking time per side.
Dressed Up or Down: Creative Ways to Serve Crispy Fried Mush
The beauty of Fried Cornmeal Mush is its versatility. Because the base is relatively neutral (just corn and salt), it acts as the perfect canvas for wildly different flavor profiles.
Sweet Pairings: Syrups, Sugar, and Fruit Compotes
The classic way to eat this dish is sweet. Pour a generous amount of real maple syrup over the hot slices. The syrup soaks into the warm interior while the crust remains perfectly crunchy.
- Elevated Sweetness: Try fruit compotes! A tart raspberry or cherry compote cuts through the richness beautifully.
- Simple & Delicious: Dust the slices with powdered sugar and serve alongside a tiny dish of melted butter for dipping.
- The Spice Route: Mix brown sugar, cinnamon, and a tiny bit of melted butter, and brush this mixture onto the slices before the final flip in the pan.
Savory Applications and Complementary Breakfast Proteins
While many only consider the sweet side of Cornmeal Mush , the savory applications are truly stunning. If you made the base with broth instead of water, you’re already halfway there.
- The Benedict Base: Use a fried slice of mush instead of an English muffin as the base for eggs Benedict. It adds a wonderful corn flavor and texture!
- Farmhouse Breakfast: Serve hot Crispy Fried Mush alongside crispy bacon or breakfast sausage. It acts like a perfect hash brown replacement.
- A Simple Savory Finish: Top the hot slices with melted sharp cheddar cheese and a few shakes of hot sauce. The creamy corn interior and crunchy crust make this a profoundly satisfying, cheap, and easy meal. Enjoy this perfect Cornmeal Mush anytime of the day!
Recipe FAQs
Why won't my cornmeal mush firm up enough to slice?
This is usually due to an incorrect liquid-to-cornmeal ratio or insufficient chilling time. Ensure you use the exact liquid amount specified and compact the mush firmly into the loaf pan while hot. The loaf must be chilled uncovered for a minimum of 6 hours, but ideally overnight, to allow the starches to fully set.
My cooked mush tastes gritty instead of smooth. How can I fix this?
Grittiness means the cornmeal has not cooked long enough to fully hydrate. After the mixture thickens, you must continue to simmer it gently for 20 to 30 minutes, stirring frequently, until the mixture is visibly pulling away from the sides of the pot.
If using a very coarse grind of cornmeal, the cooking time may be even longer than specified.
Can I use milk or broth instead of water when preparing the mush?
Absolutely; using milk results in a richer, creamier flavor that is excellent for sweet applications. If you plan to serve the fried slices as a savory side, substituting vegetable or chicken broth adds desirable depth. Be aware that cooking with milk requires lower heat and more diligent stirring to prevent scorching.
My fried slices aren't getting crispy, they're just soaking up the oil. What went wrong?
Lack of crispiness is usually a heat issue. Ensure your pan is heated to medium high and the oil is shimmering hot before adding the slices. Do not overcrowd the pan, as this immediately lowers the oil temperature and causes the slices to steam and become soggy instead of forming a crust.
How far in advance can I prepare the cornmeal loaf?
The cooked and chilled loaf is quite stable and can be prepared up to 4 to 5 days in advance. Keep it tightly wrapped in plastic wrap or an airtight container in the refrigerator until you are ready to slice and fry. Do not attempt to freeze the raw mush loaf, as the texture will become grainy upon thawing.
Can I add flavorings to the mush before chilling it?
Yes, flavoring the mush is a great way to customize the recipe. For a sweet loaf, stir in ingredients like cinnamon, brown sugar, or vanilla extract just before pouring it into the mold. For a savory version, mix in dried herbs like sage or thyme, black pepper, or perhaps some grated cheddar or Parmesan cheese.
Is this recipe naturally gluten-free, and how can I ensure it's vegan?
Yes, cornmeal mush is naturally gluten-free, but always confirm your specific brand of cornmeal is certified free of cross contamination. To make the dish vegan, simply use water or a plant based milk substitute during the cooking stage, and fry the slices exclusively in vegetable or coconut oil instead of butter.
Crispy Fried Cornmeal Mush Recipe