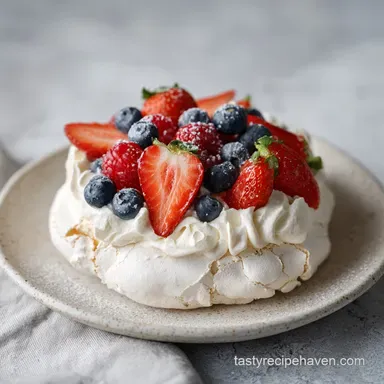
Keto Pavlova: Sugar Free and Crisp
- Time: Active 20 minutes, Passive 4 hours 30 mins, Total 4 hours 50 mins
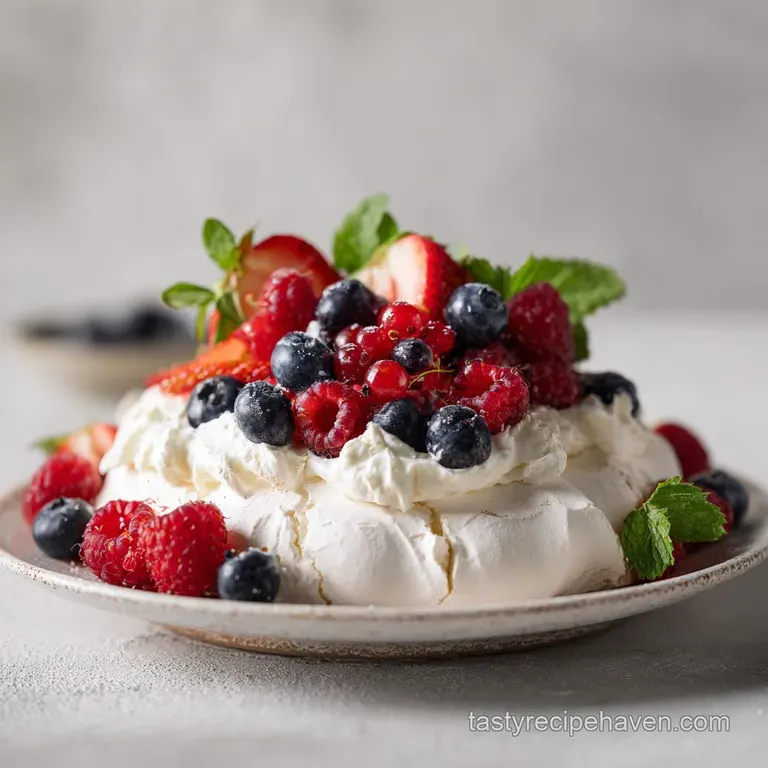
- Flavor/Texture Hook: A crisp, airy shell that gives way to a velvety, cloud like interior topped with tart berries.
- Perfect for: Elegant dinner parties, summer celebrations, or anyone following a strict low carb lifestyle.
- Delicious Keto Pavlova Recipe for Low Carb Lovers with Fresh Berries
- Mastering Meringue Without Traditional Sugar
- Precise Timings for Meringue Success
- Selecting the Best Keto Elements
- Essential Tools for Precise Results
- Critical Steps for Meringue Construction
- Expert Strategies for Flawless Textures
- Creative Low Carb Flavor Variations
- Optimal Storage and Preservation Methods
- Elegant Presentation and Serving Ideas
- Recipe FAQs
- 📝 Recipe Card
Delicious Keto Pavlova Recipe for Low Carb Lovers with Fresh Berries
Pavlova is more than just a dessert; it’s a cultural icon that has sparked decades of friendly rivalry between Australia and New Zealand. Named after the famous Russian ballerina Anna Pavlova during her tours in the 1920s, this dessert was designed to be as light and ethereal as her movements on stage.
Traditionally, it relies heavily on the chemical bond between egg whites and massive amounts of white sugar to create that signature structural integrity. Discover our truly delicious keto pavlova, a perfect low carb delight bursting with fresh berries, which honors this heritage while stripping away the carbohydrates.
In the southern hemisphere, a "Pav" is the centerpiece of every Christmas table and summer garden party. It represents the height of hospitality, usually towering with whipped cream and whatever fruit is currently in season.
Growing up, I watched my grandmother treat the oven like a sacred vault, never dare opening the door for fear of the dreaded "collapse." That cultural obsession with the perfect, snowy white disc is exactly what we are recreating here, just with a modern, keto friendly twist that won't kick you out of ketosis.
Traditional recipes use sugar not just for sweetness, but as a structural mortar that holds the egg white proteins together. When we remove that sugar, we have to rely on precision and the right alternative sweeteners to mimic that glassy, crisp finish.
We aren't just making a "diet" version; we are crafting a sophisticated meringue that stands on its own merits. It’s about achieving that specific contrast the shatter of the crust followed by the cool, velvety cream and the bright pop of a fresh raspberry.
Mastering Meringue Without Traditional Sugar
Most home cooks struggle with sugar-free meringues because they treat them exactly like traditional ones. The biggest mistake is the "dump and pray" method, where sweetener is added too quickly, causing the egg proteins to seize or the mixture to become grainy.
In a keto environment, we don't have the luxury of sugar’s moisture binding properties, so our timing must be impeccable. If your previous attempts turned out like flat, weeping pancakes, it’s likely due to moisture intrusion or improper protein stabilization.
Another common pitfall is ignoring the cooling phase. A pavlova is essentially a dried foam. If you take it out of the oven too soon, the sudden temperature change causes the air pockets inside to contract faster than the walls can support them, leading to a structural failure.
We avoid this by using a long, slow cooling period inside the oven, allowing the meringue to reach room temperature gradually. This patience is what separates a professional looking dessert from a pile of sweet crumbs.
Why This Works
- Stabilization Chemistry: The cream of tartar lowers the pH of the egg whites, which prevents the protein strands from over coagulating and collapsing.
- Thermal Dehydration: Starting at a higher temperature sets the outer crust immediately, while the drop to 120°C slowly dries the interior.
- Glycemic Control: Using an Allulose based blend ensures the meringue browns slightly like real sugar without the bitter aftertaste of pure stevia.
- Surface Tension: Adding the sweetener one tablespoon at a time allows it to dissolve completely, creating a glossy, stable foam that won't "weep" liquid.
| Method | Total Time | Texture Result | Best Usage |
|---|---|---|---|
| Traditional Slow Bake | 4 hours 50 mins | Crisp shell, soft center | Authentic Pavlova experience |
| Quick Dehydration | 2 hours 10 mins | Crunchy throughout | Meringue cookies or "Eton Mess" |
| No Bake Shortcut | 15 minutes | Soft and foamy | Immediate topping for berries |
The table above illustrates why we commit to the slow bake method. While shortcuts exist, they never quite capture that dual texture magic that defines a true pavlova. By taking the time to let the oven do the work, you ensure the interior remains like a soft marshmallow rather than drying out into a hard biscuit.
Precise Timings for Meringue Success
When we talk about meringue, we are really talking about the science of air. We are mechanically forcing air into egg white proteins (albumen) to create a foam. Because keto sweeteners like monk fruit don't have the same molecular weight as sucrose, our measurements and temperatures must be exact to prevent the foam from deflating under its own weight.
It’s a game of precision where a few degrees or a greasy bowl can change everything.
| Component | Science Role | Pro Secret |
|---|---|---|
| Egg Whites | Protein Structure | Use room temperature whites for maximum volume and faster aeration. |
| Allulose Blend | Bulking Agent | This specific sweetener mimics the "melt" of sugar better than pure erythritol. |
| Cream of Tartar | Acidic Stabilizer | Prevents the proteins from bonding too tightly, which keeps the foam flexible. |
| White Vinegar | Texture Modifier | Ensures the center stays marshmallow soft while the outside stays crisp. |
The interaction between the vinegar and the egg proteins is particularly fascinating. While the cream of tartar stabilizes the initial foam, the vinegar (added at the end) helps to ensure that the interior of the pavlova doesn't dry out completely. This leaves you with that classic "squish" in the middle that contrasts so beautifully with the berries. If you're looking for other ways to use these stabilizing techniques, you might find my guide on silky Vanilla Mousse helpful for mastering egg based textures.
Selecting the Best Keto Elements
For the base, you need 6 large Egg Whites. They must be at room temperature; cold whites have tighter protein bonds and won't expand as much. You'll also need 1 cup Granulated Monk Fruit Sweetener (Allulose blend).
Why this? Pure erythritol can be gritty and cooling, while Allulose browns and dissolves like real sugar.
To ensure stability, 1 tsp Cream of Tartar is non negotiable. For flavor and further stabilization, we use 1 tbsp Vanilla Extract and 1 tsp White Vinegar.
The topping requires 1.5 cups Heavy Whipping Cream and 2 tbsp Powdered Erythritol. Why this? Powdered sweetener prevents the whipped cream from feeling "sandy" on the tongue. Finally, we need 0.5 tsp Vanilla Bean Paste for those beautiful black specks and a trio of 1 cup Strawberries, 0.5 cup Raspberries, and 0.25 cup Blueberries.
| Original Ingredient | Substitute | Why It Works |
|---|---|---|
| White Vinegar | Lemon Juice | Same acidity levels. Note: Adds a very slight citrus note to the meringue base. |
| Monk Fruit/Allulose | Xylitol | Similar sweetness and bulk. Note: Toxic to dogs; does not brown as well as Allulose. |
| Heavy Cream | Coconut Cream | High fat content. Note: Must be chilled overnight; adds a strong tropical flavor. |
Adding a touch of espresso powder to the meringue is a trick I sometimes use to deepen the flavor, though it will turn the meringue a light tan color. For this berry version, we want to keep it as white and pristine as possible to make the colors of the fruit pop.
Essential Tools for Precise Results

A stand mixer, such as a KitchenAid, is your best friend here. While you can use a hand mixer, your arm will likely give out before the meringue reaches the necessary stiff peaks. The bowl of the mixer must be glass or stainless steel; plastic bowls often retain a microscopic film of oil that will prevent your egg whites from ever reaching their full potential.
You will also need a fine mesh sieve if your sweetener is at all clumpy, and a silicone spatula for the final folding steps. A large baking sheet lined with high-quality parchment paper is essential do not use wax paper, as it will smoke in the oven and stick to your dessert.
I also recommend a kitchen scale to ensure your egg whites are roughly equal in volume, as "large" eggs can vary significantly in size.
Critical Steps for Meringue Construction
- Preheat your oven to 150°C. Line a flat baking sheet with parchment paper. Wipe your mixing bowl and whisk with a bit of lemon juice to ensure they are 100% grease free.
- Place the 6 room temperature egg whites and 1 tsp cream of tartar into the mixer bowl. Beat on medium speed until the bubbles are small and the mixture looks like soft clouds.
- Increase the speed to medium high. Gradually add the 1 cup of monk fruit sweetener, one tablespoon at a time, until the mixture becomes thick, glossy, and holds a stiff peak. Note: This usually takes about 5 to 8 minutes of continuous beating.
- Stop the mixer and use a spatula to gently fold in 1 tbsp vanilla extract and 1 tsp white vinegar. Work slowly to avoid popping the air bubbles.
- Spoon the meringue onto the parchment paper. Use your spatula to shape it into an 8 inch disc, building up the sides to create a "nest" shape.
- Slide the tray into the oven and immediately turn the temperature down to 120°C. Bake for 90 minutes without opening the door for any reason.
- Turn off the oven. Leave the pavlova inside to cool for at least 3 hours until the oven is completely cold to the touch.
- Whip 1.5 cups heavy cream with 2 tbsp powdered erythritol and 0.5 tsp vanilla bean paste until it forms stiff, billowy peaks.
- Pile the cream into the center of the cooled meringue. Top with the sliced strawberries, raspberries, and blueberries just before you plan to serve it.
Expert Strategies for Flawless Textures
The biggest challenge with any meringue is humidity. Egg whites and sugar (or sugar substitutes) are hygroscopic, meaning they pull moisture directly out of the air. If you try to make this on a rainy day, you might find your pavlova becoming sticky or soft.
If you must bake in high humidity, increase the bake time by 15 minutes and let it sit in the oven even longer.
Solving the "Sticky Meringue" Issue
If your meringue feels tacky to the touch after cooling, it usually means the sweetener hasn't fully integrated or moisture has gotten in. This is often caused by adding the sweetener too fast. The "rub test" is a pro move: take a tiny bit of the raw meringue and rub it between your fingers.
If you feel any grit, keep whisking. It should be perfectly smooth.
| Problem | Root Cause | Solution |
|---|---|---|
| Meringue "Weeping" | Undissolved sweetener | Beat longer on medium speed to ensure all granules are fully incorporated. |
| Flat Meringue | Fat/Grease in bowl | Re clean equipment with vinegar or lemon juice before starting. |
| Browned Surface | Oven too hot | Check oven calibration or lower the initial temperature by 10 degrees. |
Common Mistakes Checklist
- ✓ Never use egg whites from a carton; they are pasteurized in a way that often prevents stiff peaks.
- ✓ Ensure not a single speck of yellow yolk gets into the whites, or they won't whip.
- ✓ Avoid opening the oven door during the 90 minutes; the heat loss is devastating for the crust.
- ✓ Let the pavlova cool in the oven; a fast temp drop is the number one cause of deep cracks.
- ✓ Only add the fruit and cream right before serving to prevent the base from getting soggy.
Creative Low Carb Flavor Variations
If you want to move away from the traditional berry profile, there are several ways to pivot this recipe. A citrus twist is always popular; you can fold a teaspoon of lemon or lime zest into the meringue base just before baking.
This cuts through the sweetness and pairs beautifully with a dollop of keto lemon curd swirled into the whipped cream.
The Summer Garden Pairing
For a more sophisticated flavor profile, try macerating your berries in a tablespoon of rose water or adding a few leaves of fresh mint. The floral notes of the rose water elevate the fresh berries without adding any extra carbs. You could also serve this alongside my Keto Dirt Cake recipe for a fun "high low" dessert spread at a party, offering guests both a refined meringue and a playful chocolate treat.
Dairy-free Meringue Topping
For those who are both keto and dairy-free, you can replace the heavy whipping cream with chilled, full fat coconut cream. Be sure to only use the thick part at the top of the can and whip it exactly like heavy cream.
The fat content is similar enough that it will hold its shape, though it will have a distinct tropical flavor that actually pairs quite well with the raspberries.
Optimal Storage and Preservation Methods
The meringue base is notoriously fragile and does not like the refrigerator. If you have leftovers, store the meringue (without the cream) in a truly airtight container at room temperature for up to 2 days. Once you have added the whipped cream and berries, the clock starts ticking.
The moisture from the cream will begin to dissolve the meringue, turning that crisp shell into a soft foam within about 4 hours.
- Fridge
- 24 hours (fully assembled), though the base will soften significantly.
- Freezer
- Not recommended for the assembled dish. You can freeze the baked meringue base alone for up to 1 month, but it is extremely prone to breaking.
- Zero Waste Tip
- If your pavlova cracks or breaks during assembly, don't toss it! Break it into pieces, layer it in glasses with extra whipped cream and berries, and call it a "Keto Eton Mess." It tastes exactly the same and looks intentionally rustic.
Elegant Presentation and Serving Ideas
To serve this keto pavlova, I recommend placing it on a flat cake stand or a large wooden board. The contrast between the white meringue and the vibrant red and blue berries is naturally beautiful, so don't over complicate the plating.
A light dusting of powdered erythritol over the top of the berries just before it hits the table can give it a professional "snowy" finish.
When it's time to eat, don't try to cut it with a standard cake knife. Use a long, serrated knife and use a gentle sawing motion. This helps to break through the crisp outer shell without crushing the delicate interior. I like to serve each slice with a few extra berries on the side and perhaps a sprig of mint.
It’s a light, refreshing end to a meal that feels incredibly indulgent while keeping your macros perfectly in check. Trust me, even your non keto friends will be asking for the recipe once they hear that satisfying "crunch" of the first bite.
Recipe FAQs
Is it true the oven door must remain closed during the entire 90-minute bake?
Yes, keeping the door shut is critical. Opening the oven door causes a sudden temperature fluctuation that will deflate your meringue and lead to a collapsed structure rather than a light, airy center.
How to ensure the meringue doesn't crack while cooling?
Leave the meringue inside the turned off oven for at least 3 hours. This slow, gradual temperature drop allows the structure to set completely, preventing the cracks that occur when cooling too quickly in room air.
How to achieve the perfect stiff peaks with monk fruit sweetener?
Add your sweetener one tablespoon at a time only after soft peaks have formed. This steady, slow incorporation ensures the monk fruit dissolves properly, creating a glossy, stable mixture capable of holding its shape.
Is it mandatory to use fresh berries?
Yes, stick with fresh berries. Frozen fruit releases excess moisture once thawed, which will dissolve your delicate meringue shell and create a soggy, unappealing texture.
Can I prepare the meringue base ahead of time?
Yes, bake the base up to 24 hours in advance. Store the cooled meringue in an airtight container at room temperature to keep it crisp until you are ready to add the whipped cream and berries.
How to know when the whipped cream is ready for topping?
Whisk until the cream forms firm, upright peaks. If you enjoyed mastering the delicate aeration in this meringue, you can apply the same whisking and texture control skills to achieve the perfect consistency for your cream topping.
Is a grease free bowl really that important?
Yes, any trace of oil will prevent the egg whites from whipping properly. Even a microscopic amount of fat interferes with the protein structure, meaning your meringue will never reach the necessary volume and stability.
Keto Pavlova With Berries