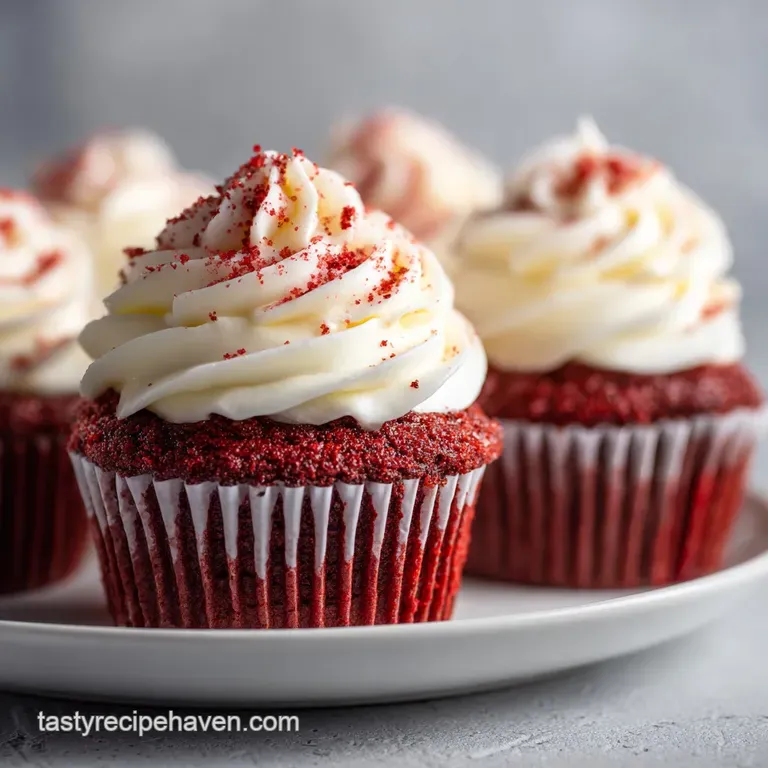
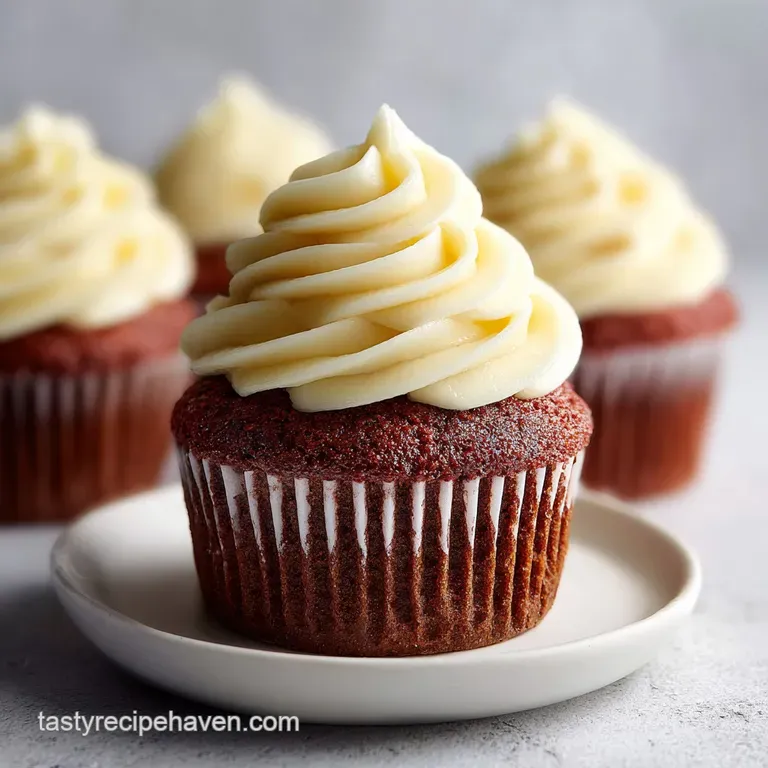
Red Velvet Cupcakes with Cream Cheese Frosting
- Time: Active 15 minutes, Passive 20 minutes, Total 35 minutes
- Flavor/Texture Hook: Tangy, velvety, and buttery
- Perfect for: Galentine's parties, birthdays, or a sweet weekend treat
- The Science Behind the Crumb
- Essential Specs for Better Results
- Deep Component Analysis
- Quality Ingredients and Smart Subs
- Simple Equipment for Busy Cooks
- Reliable Step-by-Step Instructions
- Fix Common Baking Mistakes
- Tasty Variations and Substitutions
- Storage Tips and Zero Waste
- Beautiful Presentation Ideas
- Recipe FAQs
- 📝 Recipe Card
The moment I pull these out, the kitchen fills with a scent that’s part chocolate, part vanilla, and entirely cozy. I remember my first batch years ago; I tried to get fancy with melted chocolate and ended up with a heavy brick.
I learned quickly that the secret isn't in the gadgets, but in how the buttermilk dances with the vinegar.
You don't need a massive stand mixer or a culinary degree to nail these. We're keeping things simple, using a whisk and a couple of bowls to get that iconic, tight knit crumb that practically melts. If you've ever struggled with dry cakes or frosting that feels like sand, you're in the right place.
We are going for a texture that is so soft it feels like biting into a cloud. It’s about being smart with the oil and letting the chemical reaction do the heavy lifting for us. Let’s get into why this specific balance works so well.
The Science Behind the Crumb
The Physics of the Rise
The reaction between the acidic vinegar and alkaline baking soda creates a flurry of gas bubbles that expand instantly in the heat. This rapid aeration is exactly what gives the cake its signature light as-air feel and tight structure.
- The Acid Kick: Vinegar and buttermilk react with baking soda to create carbon dioxide, ensuring a light rise.
- Oil for Moisture: Unlike butter, vegetable oil stays liquid at room temperature, keeping the crumb supple for days.
- The Cocoa Bloom: A tiny amount of cocoa powder reacts with the acid to deepen the red hue naturally.
- Protein Structure: The single egg provides just enough structure to hold the bubbles without making the cake tough.
Calculated Servings for Every Party
| Servings | Ingredient Adjustments | Pan Size | Cook Time |
|---|---|---|---|
| 12 cupcakes | Standard recipe | 12 cup muffin tin | 20 minutes |
| 24 cupcakes | Double ingredients | Two muffin tins | 22 minutes |
| 48 cupcakes | Quadruple ingredients | Four muffin tins | 25 minutes |
If you are planning a bigger party or a festive spread, check out my 20 MustTry New recipe for more inspiration. It helps to have a few reliable options when you're baking for a crowd.
Essential Specs for Better Results
Precision is what separates a good cake from one that people talk about for weeks. You want to make sure your ingredients are at the right temperature so they emulsify correctly. If your buttermilk is cold, the oil might clump, and you'll lose that silky finish.
| Method | Texture | Best For |
|---|---|---|
| Standard Oven | Domed and velvety | Classic look and feel |
| Stovetop (Steamed) | Ultra moist and dense | Small kitchens with no oven |
| Toaster Oven | Crispy edges | Small batches of 4-6 |
Don't skip the cooling time. A common mistake is frosting a warm cupcake, which turns your beautiful cream cheese whip into a runny mess. Let them sit on a rack until they are completely cool to the touch.
Deep Component Analysis
Getting the right ingredients makes all the difference in the final texture. We are looking for a balance of fat, acid, and sugar to create that classic flavor profile.
| Ingredient | Science Role | Pro Secret |
|---|---|---|
| Buttermilk | Tenderizes gluten | Use room temp for easy mixing |
| Baking Soda | Leavening agent | Sift it to avoid bitter clumps |
| Vegetable Oil | Fat source | Whisk thoroughly for a silky batter |
| Distilled Vinegar | Activates soda | Adds a subtle, necessary tang |
Chef Tip: Grate your cold butter for the frosting if you forgot to take it out of the fridge. The small pieces will soften to room temperature in minutes, saving you hours of waiting.
Quality Ingredients and Smart Subs
For these Red Velvet Cupcakes, we are using pantry staples that pack a punch. Stick to the measurements for the best results, especially with the leavening agents.
- 1.5 cups all purpose flour (190g)
- Substitute: Cake flour (1.5 cups) for a finer, more delicate crumb.
- Why this? Provides the essential structure for the cupcake base.
- 1 cup granulated sugar (200g)
- Substitute: Light brown sugar for a deeper, caramel like sweetness.
- 0.75 cup vegetable oil (180ml)
- Substitute: Melted coconut oil for a subtle tropical hint.
- 1 cup buttermilk (240ml), room temperature
- Substitute: 1 cup milk plus 1 tbsp lemon juice if you're out.
- Why this? The acidity is vital for tenderizing and color.
- 1 tbsp red food coloring gel
- Substitute: 2 tbsp beet juice for a more natural, muted color.
- 8 oz cream cheese (225g), softened
- Substitute: Mascarpone for a richer, less tangy frosting.
- Why this? The classic partner for red velvet's flavor profile.
These treats are a fantastic addition to a Cute Galentine s recipe spread. They look stunning on a platter and the individual portions make them so easy to serve at a party.
Simple Equipment for Busy Cooks
You really don't need much to get started. I usually stick to the basics to keep the cleanup fast and the process stress free.
- Large Mixing Bowl: For combining your wet ingredients and sugar.
- Medium Mixing Bowl: To sift and whisk your dry ingredients together.
- Whisk: This is your best friend for aerating the batter without overmixing.
- Muffin Tin: A standard 12 cup tin works perfectly here.
- Spatula: Essential for folding in the last bits of flour and scraping the bowl.
- Hand Mixer: While not strictly required, it makes whipping the frosting much easier.
Reliable step-by-step Instructions
For the Red Velvet Base
- Preheat and Prep. Set your oven to 350°F and line a 12 cup muffin tin with paper liners. Note: This ensures the batter hits a hot environment for an immediate rise.
- Whisk Dry Ingredients. In your medium bowl, combine 1.5 cups all purpose flour, 1 cup sugar, 1 tsp cocoa powder, 1 tsp baking soda, and 0.5 tsp salt. Whisk until no clumps remain.
- Mix Wet Ingredients. In the large bowl, whisk 0.75 cup vegetable oil, 1 cup buttermilk, 1 large egg, 1 tbsp red food coloring, 1 tsp vinegar, and 1 tsp vanilla extract. Continue until the color is uniform.
- Combine. Gradually pour the dry ingredients into the wet. Whisk gently until just combined. Note: Stop as soon as the flour streaks disappear to avoid a tough cake.
- Fill the Liners. Divide the batter evenly, filling each liner about 2/3 full. This leaves room for a perfect dome.
- Bake. Slide the tin into the oven and bake for 20 minutes until a toothpick comes out clean.
- Cool Down. Let the cupcakes rest in the tin for 10 minutes, then move them to a wire rack to cool completely.
For the Tangy Cream Cheese Frosting
- Whip the Fats. Beat 8 oz softened cream cheese and 0.5 cup softened butter together until light and airy.
- Add Sugar. Gradually mix in 3 cups powdered sugar, 1 tsp vanilla, and a pinch of salt. Whip until the texture is velvety and smooth.
- Frost. Use a knife or a piping bag to top your cooled cupcakes. Garnish with a few crumbs if you're feeling fancy.
Fix Common Baking Mistakes
To Correct Grainy Frosting
If your frosting feels gritty, it’s usually because the powdered sugar wasn't sifted or the butter was too cold. You can try beating it for another two minutes on high speed to see if the friction melts the sugar crystals. If that fails, a tiny splash of heavy cream can help smooth things out.
To Fix Sunken Centers
Cupcakes usually sink because the oven door was opened too early, causing a sudden temperature drop. If this happens, don't worry you can easily hide the dip with an extra dollop of cream cheese frosting. No one will ever know the difference once they taste that velvety crumb.
| Problem | Root Cause | Solution |
|---|---|---|
| Sunken center | Oven door opened early | Keep door shut for at least 15 mins |
| Grainy frosting | Cold butter clumps | Use truly softened, room temp butter |
| Dry crumb | Overbaked past 20 mins | Check with a toothpick 2 mins early |
Common Mistakes Checklist
- ✓ Room temperature ingredients are non negotiable for a smooth emulsion.
- ✓ Sift the cocoa powder to avoid tiny dark spots in your red batter.
- ✓ Don't overfill the liners; 2/3 full is the sweet spot for a neat dome.
- ✓ Let the cupcakes cool entirely before frosting to prevent melting.
- ✓ Measure your flour using the "spoon and level" method to avoid packing it.
Tasty Variations and Substitutions
If you want to change things up, red velvet is surprisingly versatile. You can lean into the chocolate side or keep it strictly traditional.
- For a Richer Mahogany Color: Swap the 1 tsp of cocoa for 2 tbsp. The cake will be darker and more chocolate forward.
- For a Natural Color Twist: Use roasted beet puree instead of food coloring. It adds a subtle earthy note and keeps the cake incredibly moist.
- For a gluten-free Alternative: Use a 1 to-1 gluten-free flour blend. The crumb might be slightly denser but will still taste great.
| Original Ingredient | Substitute | Why It Works |
|---|---|---|
| Vegetable Oil (0.75 cup) | Melted Butter (0.75 cup) | Adds a richer flavor but a slightly firmer texture |
| Buttermilk (1 cup) | Sour Cream (1 cup) | Creates an even thicker, more decadent crumb |
| White Vinegar (1 tsp) | Apple Cider Vinegar (1 tsp) | Provides the same acidity with a fruiter undertone |
If you find yourself with extra cocoa powder after this, why not try a Chocolate Christmas Cookies recipe? It’s a great way to use up your baking supplies during the holidays.
Storage Tips and Zero Waste
These cupcakes hold up beautifully if you store them right. Because of the cream cheese in the frosting, you need to keep them chilled if you aren't eating them right away. They actually taste even better the second day as the flavors have time to meld.
- Fridge
- Place in an airtight container for up to 5 days. The oil keeps them from drying out in the cold.
- Freezer
- You can freeze unfrosted cupcakes for up to 3 months. Wrap them individually in plastic wrap and then foil.
- Reheating
- If you like a room temp cupcake, take it out of the fridge 30 minutes before serving. Don't microwave them or the frosting will melt into a puddle.
Zero Waste Tips: Don't throw away those cupcake tops if they didn't come out perfectly. Crumble them up and use them as a topping for yogurt or mix them into vanilla ice cream. You can also toast the crumbs in a pan with a little butter to make a "cake soil" garnish for other desserts.
Beautiful Presentation Ideas
Making these look like they came from a high end bakery is all in the finish. Since we are keeping tools minimal, you don't need fancy piping tips to make an impact.
Use a small offset spatula or even the back of a spoon to create a beautiful "swirl" on top of the frosting. Start in the center and spiral outward, pressing down slightly to create a ridge. This gives the frosting a rustic but intentional look that catches the light.
For a final touch, take one sacrificial cupcake and crumble it into fine red dust. Sprinkle these crumbs over the white frosting for a stunning color contrast. It’s a simple trick that makes the cupcakes look professional without any extra ingredients.
If you want to get really festive, a single fresh raspberry on top adds a bright, tart pop that complements the cream cheese perfectly.
Recipe FAQs
What makes a red velvet cupcake distinct from a chocolate cupcake?
Buttermilk and vinegar reaction. Red velvet is traditionally very mildly chocolate flavored, but its defining characteristics are the slight tang from buttermilk/vinegar and the vibrant red color.
What are common red velvet cupcake mistakes?
Opening the oven door too early is the primary error. This sudden temperature drop causes the delicate, gas-filled structure to collapse, resulting in sunken centers.
What should I fill my red velvet cupcakes with?
Cream cheese frosting is the traditional and recommended topping. The sharp, tangy profile of the frosting perfectly balances the sweet, soft crumb of the cake.
What is the secret to a perfect red velvet?
Using oil instead of all butter creates superior moisture. Oil remains liquid at room temperature, ensuring the crumb stays exceptionally tender and velvety for days.
How do I ensure my batter achieves that signature velvety texture?
Whisk the wet and dry ingredients separately before combining gently. Overmixing develops gluten, leading to a tough crumb; stop mixing the moment the flour streaks disappear.
Is it true that I must use red food coloring for red velvet?
No, the original recipe relied on a chemical reaction. Historically, the reaction between the natural cocoa and acidic buttermilk produced a reddish brown hue; modern recipes use gel coloring to achieve the bright red consumers expect.
How can I achieve a stable cream cheese frosting that won't run?
Ensure both the cream cheese and butter are softened, but not warm. If you mastered controlling the emulsion stability in this frosting, you can apply the same technique when making our Cheesecake Stuffed Strawberries recipe for perfect results.
Moist Red Velvet Cupcakes Recipe

