Baked Red Velvet Donuts with Cream Cheese Glaze

- Time: Active 15 minutes, Passive 10 minutes, Total 25 minutes
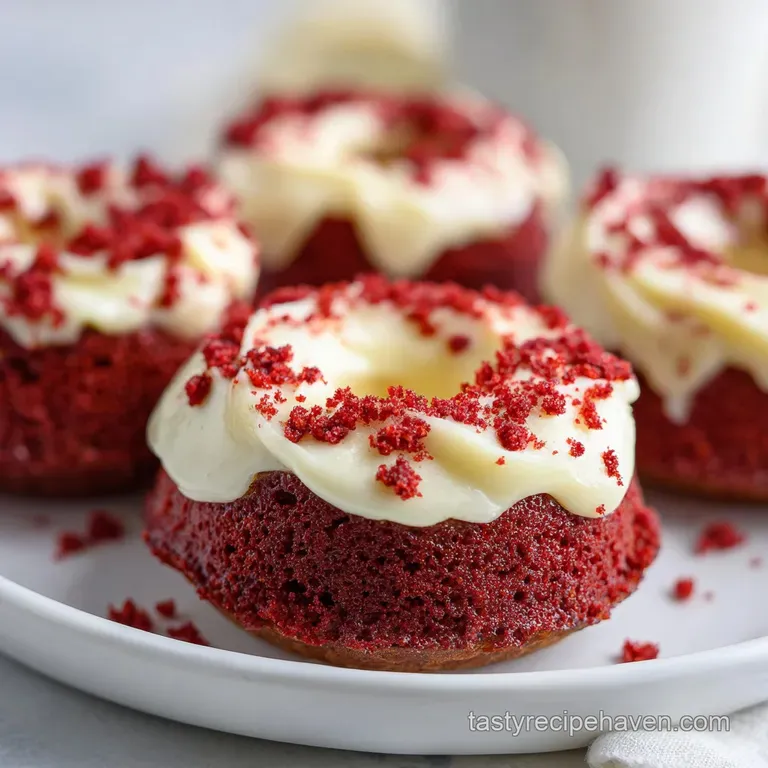
- Flavor/Texture Hook: A velvety, tight crumb with a crackling cream cheese glaze
- Perfect for: Valentine’s Day brunch or a cozy weekend treat
- The Best Homemade Baked Red Velvet Donuts
- The Science Behind the Red Crumbs
- Three Steps for Successful Baking Success
- Sourcing Your Essential Baking Components
- Tools for a Smooth Baking Session
- The Full Step by Step Process
- Fixing Common Red Velvet Baking Issues
- Easy Flavor Twists and Scaling Tips
- Keeping Your Donuts Fresh and Moist
- Styling Tips for a Professional Finish
- Recipe FAQs
- 📝 Recipe Card
The Best Homemade Baked Red Velvet Donuts
The first time I pulled a tray of these out of the oven, the aroma of Dutch processed cocoa and sweet vanilla filled my entire kitchen. It wasn't that heavy, oily smell you get from fried dough, but something much more refined and cozy.
I remember watching the glaze hit the warm surface of a donut, watching it slide down the sides and set into a translucent, crackling shell. It felt like a small victory in a week that had otherwise been a bit of a mess.
We’ve all had those dry, disappointing store-bought versions that taste like nothing but red dye and regret. These are the complete opposite. They have that specific, tangy bite that only comes from real buttermilk and a hint of vinegar, which is the heart of any true red velvet treat.
Trust me, once you see how easy it is to pipe these into a pan and have them ready in ten minutes, you'll never look at a drive thru donut the same way again.
The texture here is what really wins people over. It's soft and slightly dense, much like a pound cake but lighter, designed to hold onto that thick cream cheese icing. Whether you are making these for a special occasion or just because you have a craving on a Tuesday, this recipe delivers that bakery style finish without requiring any fancy equipment or a gallon of frying oil.
The Science Behind the Red Crumbs
Acid Base Reaction: The combination of buttermilk and white vinegar reacts with the baking soda to create carbon dioxide bubbles, which ensures a light and airy lift despite the heavy cocoa.
Cocoa Anthocyanins: Using Dutch processed cocoa provides a deep base color, but the acidic buttermilk helps maintain the vibrant red hue by preventing the red gel coloring from turning brownish during the bake.
Starch Gelatinization: The egg and all purpose flour work together during the quick 10 minute bake to set the structure quickly, trapping moisture so the donuts stay velvety rather than crumbly.
Emulsification Stability: Vegetable oil is used instead of butter to keep the crumb moist at room temperature, as oil remains liquid and provides a smoother mouthfeel than solid fats.
| Method | Time | Texture | Best For |
|---|---|---|---|
| Baked | 10 mins | Cake like, velvety | Quick morning treats |
| Fried | 15 mins | Crispy, airy | Traditionalists |
| Donut Holes | 8 mins | Dense, poppable | Kids' parties |
The choice between baking and frying really comes down to the texture you prefer. While frying gives you that golden crust, baking these allows the delicate cocoa notes to shine through without being overshadowed by oil. It is also significantly easier to clean up afterward, which is always a win in my book.
Three Steps for Successful Baking Success
| Spec | Metric | Visual Cue |
|---|---|---|
| Bake Temp | 180°C (350°F) | Steady heat for even rise |
| Bake Time | 10 minutes | Surface springs back when touched |
| Cooling | 5 minutes | Donut edges pull away from pan |
Sourcing Your Essential Baking Components
| Ingredient | Science Role | Pro Secret |
|---|---|---|
| Buttermilk | Provides acidity | Use full fat for the richest crumb |
| Dutch Cocoa | Adds earthy depth | Sift it to avoid bitter lumps |
| Baking Soda | Primary leavener | Ensure it is less than 6 months old |
Right then, let's talk about the actual ingredients you'll be grabbing from the pantry. Precision is everything when you're working with a cake based batter like this.
- 250g all purpose flour: The foundation for our structure. Why this? Provides enough protein for a sturdy donut that doesn't fall apart.
- Substitute: 1:1 gluten-free baking flour (must contain xanthan gum).
- 150g granulated sugar: For sweetness and moisture retention. Why this? Sugar liquifies as it bakes, keeping the "velvet" texture soft.
- Substitute: Caster sugar for an even finer crumb.
- 2 tbsp unsweetened Dutch processed cocoa powder: For that classic mild chocolate undertone.
- Substitute: Natural cocoa powder (will result in a slightly lighter color).
- 1 tsp baking soda: Our lifting agent.
- Substitute: 3 tsp baking powder (but the texture will be slightly more "bready").
- 0.5 tsp fine sea salt: To balance the sugar and enhance the cocoa.
- 180ml buttermilk, room temperature: The secret to the tang.
- Substitute: 180ml whole milk + 1 tbsp lemon juice (let sit for 5 mins).
- 1 unit large egg, room temperature: Binds everything together.
- Substitute: 1/4 cup unsweetened applesauce for a denser result.
- 60ml vegetable oil: For long lasting moisture.
- Substitute: Melted coconut oil (adds a very slight nutty flavor).
- 1 tsp white vinegar: Activates the soda and brightens the red.
- 2 tsp vanilla extract: Rounds out the flavors.
- 1 tsp red gel food coloring: For that iconic "stoplight" red look.
- Substitute: 2 tbsp beet juice (note: the color will be more muted/earthy).
- 115g cream cheese, softened: The base of our glaze.
- 30g unsalted butter, softened: Adds shine and richness to the topping.
- 180g powdered sugar, sifted: Sweetens the glaze without grittiness.
- 3 tbsp whole milk: Adjusts the glaze thickness.
- 0.5 tsp vanilla bean paste: For those beautiful little black specks of flavor.
If you enjoy the flavor profile of this batter, you really should try my Red Velvet Cupcakes Recipe as well. It uses a similar chemistry but results in an even fluffier, cloud like texture that is just divine for parties.
Tools for a Smooth Baking Session
You don't need a professional kitchen to make these, but a few specific items make the process much cleaner. A standard 6 cavity or 12 cavity donut pan is the only "special" item you really need. I highly recommend using a non stick version, but even then, don't skip the greasing step!
A piping bag (or a large Ziploc bag with the corner snipped off) is your best friend here. Trying to spoon the batter into those narrow donut rings is a recipe for a mess and uneven baking. Piping ensures the batter is distributed evenly, which means every donut comes out the same size.
You'll also want a balloon whisk to get the lumps out of the dry ingredients and a cooling rack so the bottoms don't get soggy while the glaze sets.
The Full step by step Process
- Preheat and Prep. Set your oven to 180°C (350°F) and grease your donut pan thoroughly with non stick spray or a little extra oil. Note: This ensures the delicate "skin" of the donut doesn't tear when removing them.
- Sift Dry Ingredients. In a large bowl, whisk together 250g all purpose flour, 150g sugar, 2 tbsp cocoa powder, 1 tsp baking soda, and 0.5 tsp salt. Note: Sifting the cocoa is vital as it tends to clump in the box.
- Mix Wet Ingredients. In a separate jug, whisk 180ml buttermilk, 1 egg, 60ml vegetable oil, 1 tsp vinegar, 2 tsp vanilla, and 1 tsp red gel food coloring. Whisk until the color is vibrant and uniform.
- Combine Carefully. Pour the wet ingredients into the dry. Fold together using a spatula until just combined. Do not overmix, or the donuts will become tough and rubbery.
- Fill the Pan. Transfer the batter to a piping bag. Pipe the batter into the prepared cavities, filling each about three quarters full.
- Bake the Donuts. Place in the center of the oven for 10 minutes until the tops are springy and a toothpick comes out clean.
- Initial Cooling. Let the donuts rest in the pan for 5 minutes. This allows the structure to firm up before you move them.
- Prepare the Glaze. While cooling, beat 115g cream cheese and 30g butter until smooth. Gradually add 180g powdered sugar, 3 tbsp milk, and 0.5 tsp vanilla bean paste. Whisk until the glaze is velvety and pourable.
- The Glazing Stage. Dip the top of each cooled donut into the glaze. Lift straight up and give it a little swirl to catch any drips.
- Final Set. Place the glazed donuts on a wire rack for 10 minutes until the glaze shatters slightly when bitten.
Fixing Common Red Velvet Baking Issues
If Your Donuts Stick to the Pan
This is usually caused by either under greasing the pan or trying to remove them while they are still piping hot. The steam trapped between the donut and the metal acts like glue if they don't have a moment to "shrink" away from the edges.
| Problem | Root Cause | Solution |
|---|---|---|
| Cracked Tops | Oven temp too high | Reduce heat by 10°C; check oven calibration |
| Dull Color | Natural cocoa used | Use gel coloring and Dutch processed cocoa |
| Rubbery Texture | Overmixing the batter | Mix until the last streak of flour disappears |
If the Glaze is Too Runny
A runny glaze often happens if the butter or cream cheese was too cold, leading you to add too much milk to get it smooth. It can also happen if you glaze the donuts while they are still warm, which melts the fat in the frosting.
Chef's Tip: If your glaze is too thin, add powdered sugar one tablespoon at a time. If it's too thick, use a literal teaspoon of milk to thin it out. Small adjustments go a long way!
- ✓ Always use room temperature buttermilk and eggs to prevent the batter from curdling.
- ✓ Pipe the batter in a steady circle to avoid air pockets in the finished donut.
- ✓ Let the donuts cool completely on a rack before glazing for the best "crackling" finish.
- ✓ Tap the filled donut pan on the counter twice before baking to release large air bubbles.
- ✓ If using liquid food coloring instead of gel, you may need to add an extra tablespoon of flour.
Easy Flavor Twists and Scaling Tips
If you find yourself wanting to make a smaller batch, scaling this down is quite simple. To halve the recipe, use 125g flour and 75g sugar. For the egg, beat it in a small bowl first and then use exactly half of the liquid (usually about 2 tbsp).
This ensures the fat to protein ratio remains correct for that velvety texture.
For a fun variation, you can skip the full donut shape and make Red Velvet Donut Holes. Just use a mini muffin tin and reduce the baking time to about 7-8 minutes. These are perfect for snacking or for the little ones who find a full donut a bit too much to handle. If you're looking for a different classic texture, you might love the crinkly finish of a Snickerdoodle Cookies Recipe, which provides a great cinnamon contrast to the cocoa here.
| Original Ingredient | Substitute | Why It Works |
|---|---|---|
| Buttermilk (180ml) | Greek Yogurt (180g) | High acidity and fat. Note: Results in a slightly thicker, sturdier donut |
| Vegetable Oil (60ml) | Melted Butter (60ml) | Better flavor. Note: Donuts will be slightly firmer when cold |
Keeping Your Donuts Fresh and Moist
These donuts are at their absolute best on the day they are made, but they do keep well if stored correctly. Put them in an airtight container and keep them at room temperature for up to 2 days.
If your kitchen is particularly warm, move them to the fridge, where they will stay fresh for about 5 days just be aware that the cold can make the cream cheese glaze a bit sweaty.
To freeze them, I recommend freezing the donuts without the glaze. Wrap them individually in plastic wrap and then place them in a freezer bag for up to 2 months. When you're ready for a treat, thaw them at room temperature for an hour, then whip up a fresh batch of glaze.
For zero waste, if you have leftover glaze, it makes an incredible spread for toasted bagels or even a dip for fresh strawberries!
Styling Tips for a Professional Finish
To get that true "bakery" look, don't just pour the glaze over the top. Dipping the donuts gives you a much cleaner, more even line around the edge. If you want a bit of contrast, reserve a few crumbs from one of the donuts (maybe the one that didn't come out quite as pretty) and sprinkle the red crumbs over the wet glaze.
It looks sophisticated and hints at the flavor inside.
Another trick is to use vanilla bean paste instead of liquid extract in the glaze. Those tiny black specks of real vanilla bean look gorgeous against the white cream cheese and make the donuts look far more expensive than they actually are.
If it's a holiday, a few white chocolate curls or even some silver sprinkles can take these from a simple breakfast to a show stopping dessert. Just remember to add any toppings while the glaze is still wet so they stick properly!
Recipe FAQs
Can I substitute baking powder for baking soda in this recipe?
No, you should use baking soda. Baking soda is necessary here because it reacts with the buttermilk and vinegar to provide the signature lift and tang; substituting baking powder will result in a slightly breadier, less velvety texture.
How to achieve the signature crackling texture on the cream cheese glaze?
Dip the warm donuts quickly, then allow them to fully set on a wire rack. The rapid cooling and setting of the sugar against the residual heat of the cake traps moisture just below the surface, causing that satisfying crack.
Is it true that using oil instead of butter results in a less authentic flavor?
False. Oil is intentionally used here because it remains liquid at room temperature, ensuring the crumb stays soft and moist longer than butter would, which is essential for a velvety texture like you find in a proper Applesauce Coffee Cake Recipe.
How to make this recipe dairy-free?
Substitute buttermilk with a non-dairy milk and acid mixture. Use almond or soy milk mixed with white vinegar; for the glaze, use vegan cream cheese and butter alternatives, which behave similarly in this context.
What is the best way to pipe batter into the donut pan without making a mess?
Transfer the combined batter into a large zip-top bag and snip one corner off. This homemade piping tool gives you maximum control for filling the molds three quarters full quickly and evenly, which is the same stable emulsification principle used when making a rich dressing.
Can I use liquid red food coloring instead of gel coloring?
Yes, but you must adjust the dry ingredients. Liquid coloring adds unwanted moisture, so if you use it, you will likely need to add an extra tablespoon of flour to keep the batter at the correct consistency.
How can I scale the recipe down for a smaller batch without ruining the texture?
Halve all dry and wet ingredients proportionally, but pre-measure the egg liquid content. After whisking one egg, measure out exactly half its volume (about 2 tablespoons) to ensure the fat-to-protein ratio stays balanced for that desired soft crumb.
Baked Red Velvet Donuts

