Easy Homemade Dinner Rolls: Soft and Golden
- Time:15 minutes active + 75 minutes rising/baking = 90 minutes total
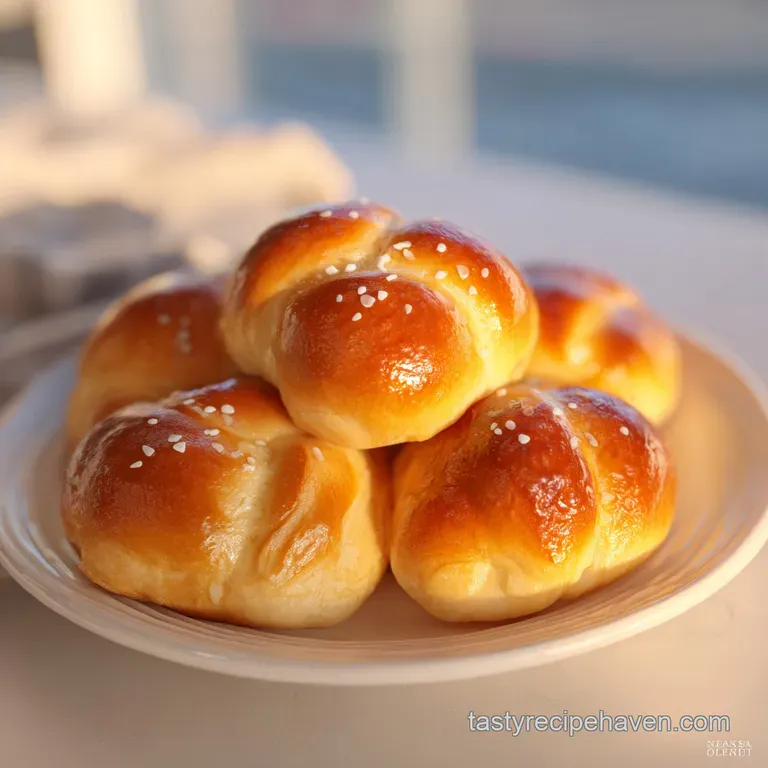
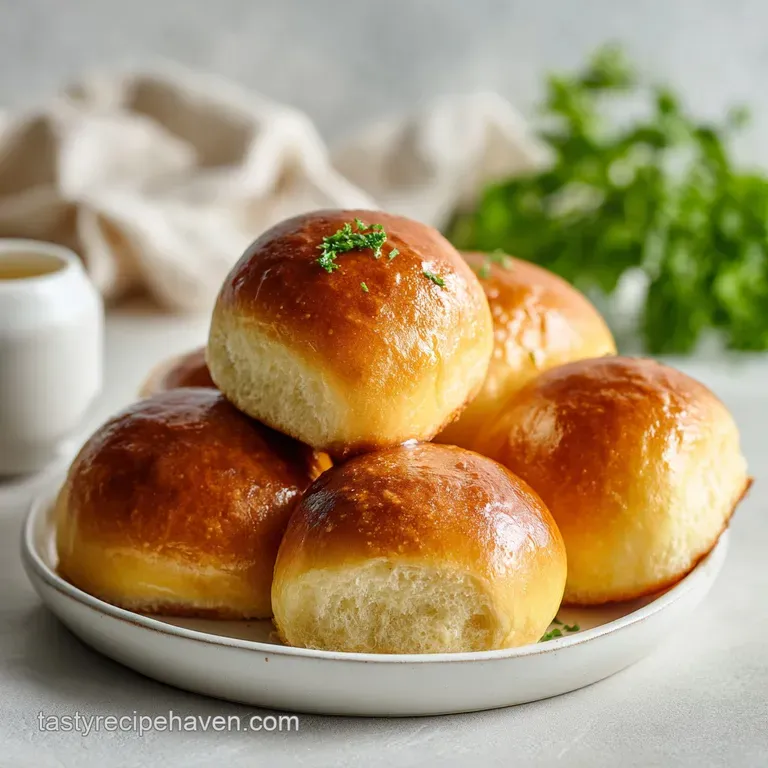
- Flavor/Texture Hook: Velvety, buttery crumb with a golden, slightly salty crust
- Perfect for: Holiday gatherings, beginner bakers, or Sunday night comfort
- Secrets to Success with Easy Homemade Dinner Rolls
- Quick Summary of This Soft Bread Roll Method
- Selecting the Best Components for Your Yeast Rolls
- Essential Tools for a Smooth Dough Experience
- Precisely Timing Your Way to Fluffy Rolls
- Fixing Common Yeast Dough Problems Instantly
- Creative Variations for Every Occasion and Flavor
- Selecting Your Finish: Method Comparisons
- Debunking Baked Good Myths
- Maintaining Softness in Your Homemade Bread Rolls
- Perfect Pairings for These Golden Butter Rolls
- Recipe FAQs
- 📝 Recipe Card
Secrets to Success with Easy Homemade Dinner Rolls
Forget everything you have been told about bread making being a stressful, all day affair that requires a humidity controlled proofing drawer and a prayer to the yeast gods. You don't need a professional bakery setup or a massive block of time to get that cloud like texture we all crave.
Honestly, the biggest mistake most home cooks make is overthinking the dough or, worse, being afraid of the yeast itself.
The aroma of these rolls hitting the oven is a sensory trigger like no other. It starts with the sweet, nutty scent of browning butter and quickly evolves into that unmistakable "fresh bread" smell that fills every corner of the house.
When you pull them out, the tops should have a slight sheen that yields to a velvety, steamy center when you pull them apart. We are going for a crumb that is tight enough to hold butter but airy enough to feel weightless.
I remember my first few batches of rolls years ago; they were more like hockey pucks because I was terrified of "wet" dough. I kept adding flour until the dough was easy to handle, but that is the fastest way to get a dense, dry roll.
Once I realized that a slightly tacky dough is the secret to a soft interior, everything changed. We are going to walk through the precision points together so you can nail this on your very first try.
Quick Summary of This Soft Bread Roll Method
To get the best results, we need to focus on temperature and timing. Yeast is a living organism, and like most of us, it performs best when it is warm and well fed. If your water is too hot, you will kill the yeast; if it is too cold, it will stay dormant.
We are aiming for exactly 43°C (110°F) for the water to ensure a vigorous bloom.
- Osmotic Pressure
- Sugar provides immediate energy for the yeast, accelerating carbon dioxide production for a faster rise.
- Protein Shielding
- The fat from the whole milk and butter coats the flour's gluten strands, preventing them from becoming too tough.
- Gelatinization Control
- Using all purpose flour instead of bread flour keeps the protein content around 10-11%, which ensures a tender "shatter" rather than a chewy "pull."
- Moisture Retention
- The egg acts as an emulsifier, binding the fats and liquids to keep the rolls from drying out the next day.
| Method | Total Time | Texture Result | Best Use Case |
|---|---|---|---|
| This Fast Method | 90 minutes | Fluffy, soft, velvety | Weeknight dinner or quick holidays |
| Slow Ferment | 12-18 hours | Chewy, sourdough like | Artisan sandwiches or soup dipping |
| No Knead Style | 4 hours | Open crumb, crusty | Rustic meals or beginners without mixers |
Choosing the right approach depends on your schedule. If you are looking for that classic, buttery dinner roll that reminds you of a high end steakhouse, this 90 minute method is the gold standard. It hits the sweet spot between convenience and a professional grade crumb structure.
Selecting the Best Components for Your Yeast Rolls
Every ingredient in this recipe serves a specific structural purpose. We aren't just tossing things in a bowl; we are building a biological matrix. Using whole milk is non negotiable here because the fat content is what creates that silky mouthfeel.
If you use skim milk, the rolls will be noticeably leaner and will stale much faster.
| Ingredient | Science Role | Pro Secret |
|---|---|---|
| Active Dry Yeast | Leavening agent | Ensure it foams; if it stays flat, your yeast is dead. |
| All Purpose Flour | Structural base | Weigh your flour (560g) to avoid adding too much and making rolls heavy. |
| Unsalted Butter | Tenderness/Fat | Use high-quality European style butter for a richer flavor profile. |
| Whole Milk | Hydration/Softness | Warm it slightly to 40°C so it doesn't chill the yeast mixture. |
When it comes to the flour, 4.5 cups is our target, but we start with 4 cups for a reason. Humidity and even the brand of flour can change how much liquid is absorbed. We want the dough to pull away from the sides of the bowl while remaining slightly tacky to the touch.
If it feels like play dough, you have gone too far with the flour.
For a different take on yeasty snacks, you might enjoy learning the dough techniques used in Copycat Pizza Hut Breadsticks which use a similar hydration level for that signature golden crust.
| Original Ingredient | Substitute | Why It Works |
|---|---|---|
| Whole Milk (1 cup) | Oat Milk (full fat) | Similar creamy consistency. Note: Slightly sweeter finish. |
| Granulated Sugar | Honey | Provides glucose for yeast. Note: Adds a floral note and browns faster. |
| Active Dry Yeast | Instant Yeast | Can be mixed directly with dry ingredients. Note: Skip the 5 minute bloom step. |
Essential Tools for a Smooth Dough Experience
You don't need a laboratory of gadgets, but a few key items make this easy homemade dinner rolls recipe much more consistent. A stand mixer like a KitchenAid is my preferred tool because it handles the heavy lifting of kneading, ensuring the gluten is developed without you breaking a sweat.
If you don't have one, your hands will work just fine it just takes a bit more elbow grease.
Chef Tip: Freeze your butter for 10 minutes before melting it. This sounds counterintuitive, but it ensures the milk solids don't burn if you are melting it on the stovetop, keeping the flavor clean and sweet.
A 9x13 inch (23x33 cm) baking dish is the classic choice for 24 rolls. It allows them to "huddle" together as they rise, which forces the growth upward rather than outward. This huddling is what creates those soft, pull apart sides that everyone loves.
If you use a flat baking sheet, the rolls will be crustier on all sides and won't be quite as tall.
Finally,, a digital thermometer is the one "nerdy" tool I insist on. Guessing the temperature of your water is like playing Russian roulette with your dough. 43°C (110°F) is the magic number.
Anything over 50°C (122°F) and you are likely sending your yeast to an early grave.
Precisely Timing Your Way to Fluffy Rolls
- Activate the yeast. In the bowl of a stand mixer, combine 1/2 cup warm water (43°C/110°F), 2 tbsp granulated sugar, and 2 1/4 tsp active dry yeast. Let it sit for 5–8 minutes. Note: You are looking for a thick, bubbly foam to appear on the surface.
- Combine wet ingredients. Add the 1 cup warmed milk, 1/2 cup melted butter, 1 large egg, and 1 1/2 tsp fine sea salt to the yeast mixture. Start the mixer on low speed with the paddle attachment.
- Incorporate the flour. Gradually add the flour, starting with 4 cups. Switch to the dough hook once the mixture becomes a shaggy mass.
- Adjust the texture. If the dough is still sticking to the bowl, add the remaining 1/2 cup of flour one tablespoon at a time. Stop until the dough pulls away from the sides but still feels slightly sticky.
- Knead for structure. Knead with the dough hook for 5 minutes (or 8 minutes by hand). You are finished until the dough is smooth and elastic.
- Primary rise. Place the dough in a greased bowl, cover with a damp cloth, and let rise in a warm, draft free spot for 60 minutes. It is ready until it has doubled in size.
- Shape the rolls. Punch down the dough to release excess gas. Divide into 24 equal pieces, roughly 45-50g each. Roll them into smooth balls and place them in a greased 9x13 inch dish.
- Final prep. Preheat your oven to 190°C (375°F). Brush the rolls gently with an egg wash made from 1 egg and 1 tbsp water.
- Bake to perfection. Bake for 12–15 minutes. Watch closely until the tops are golden brown and glowing.
- The finishing touch. Remove from the oven and immediately brush with 2 tablespoons of melted butter and a sprinkle of flaky sea salt. Let them rest for 5 minutes before serving.
Fixing Common Yeast Dough Problems Instantly
Working with yeast can feel unpredictable if you aren't used to it. The most common heartbreak is seeing a bowl of dough that hasn't moved an inch after an hour. Usually, this comes down to one of two things: dead yeast or a room that is too cold.
If your kitchen is chilly, try putting the bowl inside an "off" oven with the oven light turned on. That light bulb provides just enough warmth to keep the yeast happy.
Why My Rolls Didn't Rise
If your dough is sitting there like a lump of lead, check the expiration date on your yeast. If it's fresh, the liquid might have been too hot and killed the culture. Another culprit is salt; if you accidentally poured the salt directly onto the dry yeast before the water was added, it can dehydrate and kill the yeast cells.
Fixing Dense or Heavy Texture
Dense rolls usually happen because of "flour creep." This is when you keep adding flour because the dough feels sticky. Resist the urge! Use a light touch and trust the kneading process to tighten the gluten.
If the rolls are already baked and heavy, you likely under proofed them, meaning they didn't get enough time to fill with air bubbles before hitting the heat.
| Problem | Root Cause | Solution |
|---|---|---|
| Rolls are dry/crumbly | Too much flour added | Weigh flour next time; keep dough tacky. |
| Hard, thick crust | Oven temperature too low | Ensure oven is preheated to exactly 190°C (375°F). |
| Pale, white tops | Missing egg wash | Always brush with egg/water for that golden sheen. |
Common Mistakes Checklist
- ✓ Check yeast activity in the first 8 minutes (it must be foamy).
- ✓ Use a kitchen scale for the 45-50g portions to ensure even baking.
- ✓ Avoid "over flouring" the work surface when shaping the balls.
- ✓ Let the rolls rise in a truly warm spot (around 24-27°C).
- ✓ Don't skip the butter brush after baking it softens the crust instantly.
Creative Variations for Every Occasion and Flavor
Once you have mastered the base "easy homemade dinner rolls" technique, you can start playing with the flavor profile. The beauty of this enriched dough is that it acts as a canvas. You can lean into the sweetness or go completely savory depending on what you are serving for the main course.
- Savory Herb Twist: Fold in 1 tablespoon of chopped fresh rosemary and 2 cloves of minced garlic during the final minute of kneading.
- Honey Butter Glaze: Substitute the sugar in the dough for honey and brush the finished rolls with a mixture of melted butter and honey instead of plain butter.
- Cheesy Center: Stuff a small cube of sharp white cheddar or mozzarella into the center of each ball during the shaping step.
If you are scaling the recipe down for a smaller dinner, just use half of every ingredient. For the egg, beat it in a small bowl first, then measure out exactly half by weight or volume.
When scaling up to 48 rolls, be careful not to crowd your mixer; it's often better to make two separate batches to ensure the gluten develops properly in both.
These rolls pair beautifully with savory sides. I often serve them alongside a Homemade Creamed Corn recipe during the holidays, as the sweetness of the corn complements the buttery bread perfectly.
Selecting Your Finish: Method Comparisons
| Priority | Strategy | Visual Cue | Result |
|---|---|---|---|
| Ultimate Shine | Whole egg + 1 tbsp heavy cream | Deep mahogany, high gloss | Showstopper holiday look |
| Soft & Rustic | Melted butter before and after | Matte, golden, very soft | Home style comfort |
| Chewy Crust | Just a splash of water/steam | Pale gold, slight crunch | Best for dipping in stews |
Debunking Baked Good Myths
One of the most persistent myths in home baking is that you need to knead dough until your arms fall off. With a high fat dough like this, over kneading can actually make the rolls tough. Five minutes in a mixer is plenty.
The fat in the butter and milk limits gluten development naturally, so you aren't looking for the same "windowpane" strength you would want in a baguette.
Another misconception is that the dough needs to rise in a scorching hot place. If the environment is too hot (above 35°C), the yeast will produce off flavors that taste "beery" or sour. A slow, steady rise at room temperature actually develops a better, more complex flavor.
Maintaining Softness in Your Homemade Bread Rolls
The high fat content from the butter and milk in this recipe acts as a natural preservative, but bread is always best the day it is made. If you have leftovers, store them in an airtight container or a heavy duty Ziploc bag at room temperature for up to 3 days.
Do not refrigerate them; the refrigerator actually accelerates the staling process through a process called starch retrogradation.
For long term storage, these rolls freeze beautifully. Wrap them tightly in plastic wrap and then foil, and they will stay fresh in the freezer for up to 2 months. To reheat, let them thaw at room temperature, then pop them in a 150°C (300°F) oven for 5 minutes to restore that "just baked" softness.
Zero Waste Tip: If you find yourself with rolls that have gone a bit stale, don't toss them! They make the most incredible croutons or bread pudding. You can also pulse them in a food processor for high-quality breadcrumbs that beat the store-bought canisters any day.
Perfect Pairings for These Golden Butter Rolls
These rolls are the ultimate utility player on your dinner table. Their soft, neutral profile makes them the perfect vessel for soaking up gravy, wiping a plate of pasta sauce clean, or even acting as the base for mini sliders the next day.
I love using them for "thanksgiving sliders" with leftover turkey and cranberry sauce.
When serving, try putting the butter in a small dish and sprinkling it with a little extra sea salt or even a drizzle of honey. The contrast of the warm, soft bread against cool, salted butter is a simple pleasure that never gets old.
Whether it's a casual Tuesday or a massive holiday feast, these easy homemade dinner rolls are the one thing everyone will ask for seconds of. Trust the science, watch your temperatures, and don't be afraid of a little sticky dough you've got this!
Recipe FAQs
What are the three ingredients for dinner rolls?
There is no three ingredient version of this recipe. These dinner rolls require yeast, flour, and liquid components like milk, butter, and eggs to achieve the necessary structure and leavening.
How to make easy bread rolls from scratch?
Activate your yeast by mixing warm water, sugar, and yeast until foamy, then incorporate the milk, butter, egg, salt, and flour. Knead the dough until elastic, let it rise for 60 minutes, shape into 24 balls, and bake at 375°F for 12 15 minutes.
How to make 2 ingredient bread rolls?
Do not attempt a two-ingredient version for this specific recipe. This formula relies on the precise interaction between yeast, fats, and proteins to create a soft, airy crumb; removing ingredients will prevent the dough from rising or baking correctly.
What is the secret to making fluffy dinner rolls?
Ensure your yeast is fully activated by waiting 8 minutes until it is foamy before adding other ingredients. If you enjoyed mastering the proofing process here, see how the same principle of patience applies to our make ahead breakfast burritos for achieving consistent results.
Can I tell if my yeast is dead before I start?
Yes, watch for a thick foam to develop within the first 8 minutes. If the mixture remains flat or clear, your yeast is inactive and will not provide the lift needed for fluffy rolls.
Why did my rolls turn out dense instead of airy?
Check your flour measurement, as adding too much flour creates a heavy, dry crumb. Use a scale to ensure your dough remains supple rather than stiff, and confirm your rising environment is between 24 27°C.
How do I get the golden crust on top?
Brush the shaped rolls with an egg wash made of one egg and one tablespoon of water before placing them in the oven. This creates a beautiful, shiny finish as they bake for the final 12 15 minutes.
Easy Homemade Dinner Rolls

