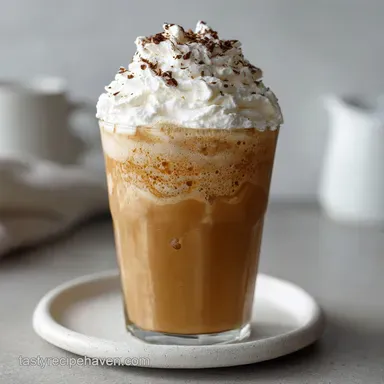
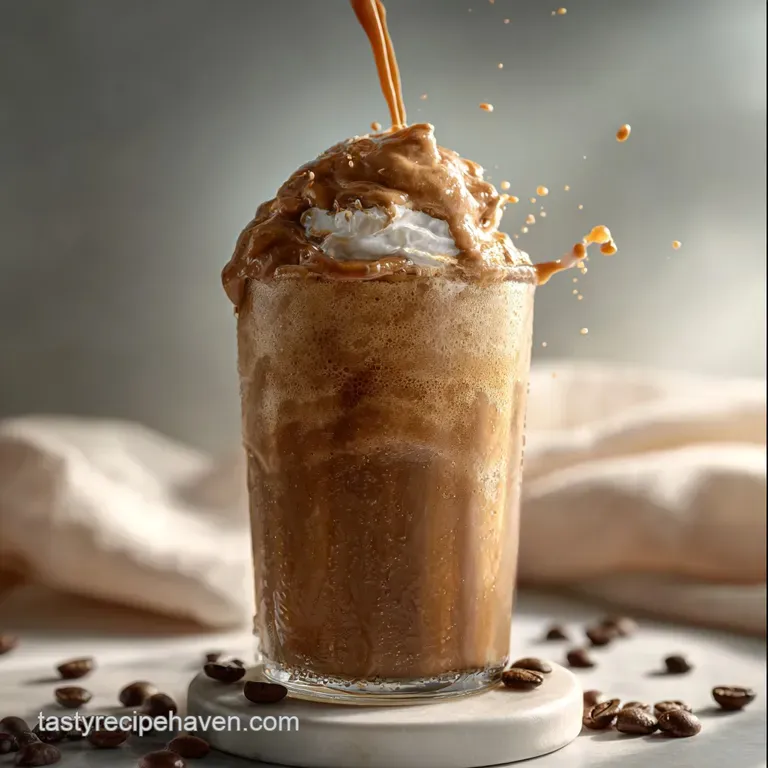
Frozen Coffee Recipe
- Time: Active 5 minutes, Passive 0 minutes, Total 5 minutes
- Flavor/Texture Hook: Silky, bold, and frosty
- Perfect for: Mid afternoon slumps or a budget-friendly morning pick me-up
- Crafting the Ultimate Frozen Coffee Recipe
- Why This Frosty Brew Works
- Essential Ingredient Deep Dive
- Shopping for Quality Ingredients
- Necessary Tools for Blending
- Simple Steps to Perfection
- Avoiding Common Texture Problems
- Customizing Your Coffee Slush
- Smart Storage and Leftovers
- Best Ways to Serve
- Myths About Frozen Coffee
- Frozen Coffee Recipe FAQs
- 📝 Recipe Card
Crafting the Ultimate Frozen Coffee Recipe
The high pitched whir of the blender is basically my siren song in the middle of a humid July afternoon. You know that specific sound? It starts as a jagged crunch of ice hitting the blades and then transitions into a smooth, rhythmic hum once everything emulsifies.
That’s the moment I know I’m seconds away from that first brain freezing, velvety sip that usually costs me seven dollars at the drive thru.
I used to be the person who just dumped hot coffee over ice cubes and wondered why my drink looked like muddy dishwater within two minutes. It was frustrating and, frankly, a waste of good beans.
Through plenty of watered down disasters and a few "blender explosions" (tip: never blend truly boiling liquid), I finally figured out the ratio that keeps things thick and punchy.
This version is all about intensity. We aren't just using chilled coffee; we're doubling down with instant granules to make sure the flavor doesn't get lost in the frost. It’s a budget friendly hack that mimics the "base" used in those fancy coffee shop machines without the weird preservatives or the massive price tag.
Trust me, once you nail this balance, you’ll never look at a paper cup the same way again.
Why This Frosty Brew Works
- The Cryoscopic Effect: Adding maple syrup and sea salt lowers the freezing point of the mixture, which prevents the drink from turning into a solid ice brick and keeps it slushy.
- Fat Emulsification: The combination of 0.75 cup whole milk and 2 tbsp heavy cream creates a lipid barrier around the ice crystals, resulting in a velvety mouthfeel.
- Double Down Flavor: Using 2 tsp instant coffee granules on top of the 1.5 cups chilled coffee compensates for the dilution that naturally happens as the ice melts.
- Thermal Stability: Chilling the coffee beforehand ensures the ice doesn't melt instantly upon contact, preserving the "shatter" of the ice crystals during the blend.
| Premium Option | Budget Alternative | Flavor Impact | Savings |
|---|---|---|---|
| Grade A Maple Syrup | Simple Syrup (DIY) | Sweeter, less earthy | Save $2-4 |
| Heavy Cream | Evaporated Milk | Slightly less rich | Save $1-2 |
| Espresso Shots | Strong Instant Coffee | More bitter, less depth | Save $3-5 |
It is worth noting that while simple syrup is cheaper, it adds more water to the recipe, which can slightly increase the size of the ice crystals. If you are looking for that premium "thick" texture, sticking with the syrup or even a touch of honey is your best bet. If you find yourself craving something sweet to pair with this, I highly recommend serving it alongside an Applesauce Coffee Cake Recipe for a cozy afternoon snack.
Essential Ingredient Deep Dive
Understanding the "why" behind your ingredients helps you make smarter swaps when the pantry is looking a bit bare. For this frozen coffee recipe, we are focusing on the relationship between water, fat, and solutes.
| Component | Science Role | Pro Secret |
|---|---|---|
| Chilled Coffee | Primary Solvent | Freeze it into cubes first to prevent a watery finish. |
| Instant Coffee | Flavor Fortifier | Sift it to ensure no bitter "clumps" survive the blend. |
| Heavy Cream | Emulsifier | A tiny bit of fat binds the water and air for a frothy head. |
| Sea Salt | Flavor Enhancer | Salt suppresses bitterness and makes the chocolatey notes pop. |
Shopping for Quality Ingredients
- 1.5 cups strong brewed coffee, chilled: Use a dark roast if possible. Why this? Darker roasts hold their "coffee" identity better when diluted by ice and milk.
- 2 tsp instant coffee granules: Any brand works here, even decaf. Why this? It provides a concentrated "hit" of flavor without adding more liquid volume.
- 0.75 cup whole milk: For the best texture, don't go lower than 2%. Why this? Milk solids provide the "body" that makes the drink feel like a meal.
- 2 tbsp heavy cream: This is the secret to that "premium" mouthfeel. Why this? High fat content prevents the drink from separating into water and foam.
- 1 tbsp pure maple syrup: A natural liquid sweetener. Why this? It dissolves instantly unlike granulated sugar which can stay gritty.
- 1 tsp pure vanilla extract: For that nostalgic, bakery style aroma.
- 1 pinch sea salt: Just a tiny bit to balance the sweetness.
Necessary Tools for Blending
You don't need a thousand dollar setup, but a high speed blender is definitely your best friend here. If you're using a standard blender, you might need to pulse it a few extra times to ensure the ice is completely pulverized into a "shatter" texture rather than chunks.
Chef's Tip: If your blender struggles with ice, add the liquid ingredients first, then the ice on top. This creates a vortex that pulls the ice down into the blades more efficiently.
Speaking of heat and cold, some people wonder about preparing the coffee base using different methods. While we usually brew and chill, you can actually create a concentrate using a heat controlled method.
| Method | Time | Flavor Profile | Best For |
|---|---|---|---|
| Stovetop Simmer | 10 minutes | Intensely caramelized, slightly smoky | Quick, bold concentrate |
| Oven Roasting (Beans) | 15 minutes | Toasted, nutty, low acidity | Enhancing cheap coffee beans |
Simple Steps to Perfection

- Prepare the coffee. Brew your 1.5 cups of strong coffee and let it cool completely. Note: Room temp is okay, but cold from the fridge is better for a thicker slush.
- Combine the liquids. Pour the chilled coffee, 0.75 cup whole milk, and 2 tbsp heavy cream into the blender jar.
- Add the boosters. Spoon in the 2 tsp instant coffee granules and the 1 tsp vanilla extract.
- Sweeten the mix. Drizzle in the 1 tbsp maple syrup.
- Season it. Add that crucial 1 pinch of sea salt to the liquid.
- Add ice. Add approximately 1.5 to 2 cups of ice cubes (depending on how thick you want it).
- Blend on low. Start the blender at its lowest speed until the ice begins to break apart.
- Ramp up the speed. Increase to high for 30-45 seconds until the mixture looks smooth and vortex like.
- Check the consistency. Stop and stir; if it’s too thin, add three more ice cubes and pulse.
- Serve immediately. Pour into a chilled glass until the frothy foam reaches the brim.
Avoiding Common Texture Problems
The biggest hurdle with any frozen coffee recipe is the dreaded separation where the ice rises to the top and the sweetened coffee sinks to the bottom. This usually happens because there isn't enough "glue" (fat or sugar) to keep the emulsion stable.
Why Your Drink is Watery
If your drink feels more like a cold juice than a thick shake, you likely used coffee that was still warm. Heat is the enemy of the slush. Even "room temperature" coffee will melt a significant portion of your ice before the blades even start turning.
| Problem | Root Cause | Solution |
|---|---|---|
| Gritty Texture | Undissolved instant coffee | Dissolve granules in a tsp of warm water before adding. |
| Too Much Foam | Over blending the milk | Blend for max 60 seconds; stop once smooth. |
| Bland Flavor | Ice dilution | Use coffee flavored ice cubes instead of plain water. |
Common Mistakes Checklist
- ✓ Always use "strong" coffee; a standard brew will taste weak once ice is added.
- ✓ Don't skip the heavy cream; it acts as the stabilizer for the entire structure.
- ✓ Measure the maple syrup accurately; too little and the ice crystals will be too large.
- ✓ Use a pinch of salt; it’s the difference between "flat" and "vibrant" flavor.
- ✓ Chill your glass in the freezer for 5 minutes before pouring.
Customizing Your Coffee Slush
If you want to recreate a specific cafe vibe, small tweaks make a huge difference. For a "Dunkin" style copycat, you might increase the maple syrup slightly and use a very dark, almost burnt roast.
If you are looking for a "Starbucks" feel, adding a half teaspoon of xanthan gum (if you have it) will give you that eerily smooth, non separating texture they are famous for.
For those looking for a festive twist, you can actually blend in a few pieces of chocolate. If you enjoy those flavors, you'll love making this alongside my No Bake Christmas recipe during the holidays. It’s a great way to keep the oven off while still serving something that feels like a total indulgence.
| Original Ingredient | Substitute | Why It Works |
|---|---|---|
| Whole Milk (0.75 cup) | Oat Milk (0.75 cup) | Creamy texture. Note: Slightly nuttier finish. |
| Maple Syrup (1 tbsp) | Date Syrup (1 tbsp) | Rich, caramel like sweetness. Note: Darkens the drink. |
| Heavy Cream (2 tbsp) | Coconut Cream (2 tbsp) | Same fat content. Note: Adds a distinct tropical flavor. |
Smart Storage and Leftovers
Honestly, this is a drink that wants to be enjoyed the second it leaves the blender. However, if you find yourself with half a glass left, don't just let it melt into a puddle. Pour the leftovers into an ice cube tray and freeze them.
These "leftover cubes" are gold for your next batch, as they won't dilute the flavor when you blend them up again.
If you want to prep ahead, you can mix the chilled coffee, milk, cream, and syrup in a jar and keep it in the fridge for up to 3 days. When the craving hits, just pour that "base" into the blender with ice and you're 30 seconds away from bliss.
For zero waste, if you have dregs of coffee left in your pot every morning, just keep a "coffee jar" in the fridge to accumulate enough for this recipe.
Best Ways to Serve
Presentation is half the fun. I like to drizzle a little extra maple syrup down the inside of the glass before pouring to get those beautiful amber streaks. If you're feeling fancy, a dollop of whipped cream and a dusting of cinnamon or more instant coffee granules on top makes it feel like you’ve actually left the house and paid a barista.
One trick I learned the hard way: use a wide straw. This drink is thick, and trying to sip it through a tiny cocktail straw is just a recipe for a headache. Right then, you've got the science, the steps, and the fixes. Go fire up that blender and save yourself those seven dollars. You've earned it!
Myths About Frozen Coffee
"Using hot coffee is fine if you use more ice." This is a total trap. Using hot coffee just creates more melted water, which dilutes the flavor profile and ruins the creamy emulsion. Always start with cold or at least room temperature liquid.
"Instant coffee is low quality." In a blended drink, instant coffee is actually a tool for precision. It allows you to dial up the caffeine and the "roast" flavor without changing the liquid to solid ratio of the drink. It’s about function, not just convenience.
Frozen Coffee Recipe FAQs
How do I make frozen coffee at home?
Brew and chill your coffee first. Combine 1.5 cups strong brewed, chilled coffee with 0.75 cup whole milk, 2 tbsp heavy cream, 2 tsp instant coffee granules, 1 tbsp maple syrup, and a pinch of sea salt in a blender. Add 1.5-2 cups of ice and blend until smooth.
What is a frozen coffee?
It's a blended iced coffee drink. Frozen coffee is a creamy, slushy beverage made from coffee, ice, sweetener, and often milk or cream, blended together to create a frosty, cafe style treat you can easily make at home.
What's the difference between a frappe and a frozen coffee?
Frappes often include flavorings and are thicker. While both are blended iced coffee drinks, a frappe typically has more distinct flavorings (like chocolate or caramel), a thicker, milkshake like consistency, and sometimes even includes a cake mix or cookie base, unlike a simpler frozen coffee.
What is Dunkin Donuts frozen coffee made of?
It's a blend of coffee, ice, and creamy ingredients. Dunkin's frozen coffee base typically includes brewed coffee, water, sugar, cream, and flavorings, blended with ice to achieve its signature slushy texture.
Can I use hot coffee for frozen coffee?
No, always start with cold coffee. Using hot coffee will melt too much ice before blending, resulting in a watery, less flavorful drink that lacks the desired thick, slushy consistency.
How do I get a thicker frozen coffee?
Increase the fat content and reduce liquid. Use a higher ratio of ice to liquid, and ensure you have enough fat from ingredients like heavy cream or whole milk to create a stable emulsion, similar to how fat controls texture in our Peanut Butter Cookies: The Classic Chewy Crisp Recipe.
What's the secret to preventing my frozen coffee from being icy?
Balance solids and liquids with fat. The key is achieving a proper emulsion by including fat (like heavy cream or whole milk) and using a touch of sweetener like maple syrup, which lowers the freezing point and creates a smoother texture, much like the sugar balance in our Sugar Cookie Recipe Without Eggs: Melts In Your Mouth.
Frozen Coffee Recipe