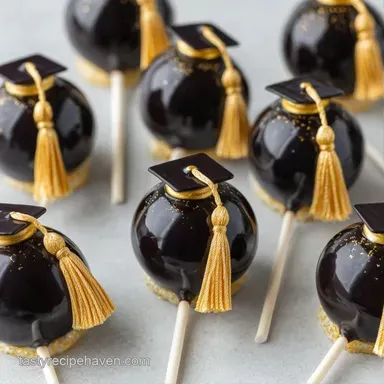
Graduation Cap Cake Pops: Shatter Crisp Shell
- Time: 45 min active + 60 min chilling
- Flavor/Texture Hook: Velvety cake interior with a shatter crisp chocolate shell
- Perfect for: Graduation parties, school celebrations, or dessert tables
Graduation Cap Cake Pops
The smell of vanilla and melted chocolate usually fills my kitchen whenever a graduation rolls around. I remember the first time I tried making these for a cousin. I used way too much frosting, and by the time the party started, half the pops had slid right off the sticks.
It was a disaster, and I spent the first twenty minutes of the party trying to "glue" them back together with leftover chocolate. It was a messy lesson in structural integrity.
Since then, I've focused on the binding agent. Most people just use buttercream, but that's too soft. I switched to a cream cheese and butter base, which gives these Graduation Cap Cake Pops a denser, more stable core.
This shift means you can actually stack them or move them around without worrying about a "cake slide" event.
You can expect a treat that looks professional but tastes like a classic homemade cake. The goal here is a velvety interior that contrasts with the hard snap of the candy melt shell. We're going to walk through the precision of the crumb, the chill time, and the fondant work to make sure your party platter looks sharp.
The Trick Behind the Texture
Getting the right mouthfeel is all about the moisture balance. If the cake is too wet, the pops will be mushy and won't hold the weight of the fondant cap. If they're too dry, they'll crumble the moment you take a bite.
The Binding Ratio: Combining cream cheese and butter creates a fat heavy binder that locks the cake crumbs together without adding excessive sugar. This prevents the "cloying" sweetness found in pops that use only frosting.
Thermal Shock Prevention: Chilling the balls for a full hour is not optional. When a cold cake ball hits hot chocolate, it creates a quick set that prevents the chocolate from soaking into the cake, which keeps the shell thin and crisp.
The Structural Anchor: Dipping the stick in chocolate before inserting it creates a mechanical bond. This "glue" ensures the stick is fused to the core, meaning the pop stays put even if the cake is particularly soft.
According to Serious Eats, the texture of a cake pop relies on the ratio of cake to binder, where too much fat can cause the pops to soften at room temperature. That's why we use the specific weights listed in the recipe.
Fast vs Classic Methods
| Feature | Box Mix (Fast) | Scratch Cake (Classic) | Impact on Result |
|---|---|---|---|
| Texture | Uniform, airy | Dense, rich | Mix is easier to crumble |
| Prep Time | 30 mins | 90 mins | Mix saves an hour |
| Flavor | Sweet, consistent | Complex, buttery | Scratch is more "homemade" |
Common Texture Myths
Searing a cake pop in the fridge "freezes" the flavor. This is false. Chilling is purely about structural stability and temperature contrast for the coating.
You need a special mold to get a round shape. Not true. Your hands are the best tool for this. Just roll them between your palms for 10 seconds to get a smooth sphere.
Recipe Specs
For this project, precision is everything. We aren't just winging it because the weight of the black fondant on top is surprisingly heavy. If the base isn't dense enough, the whole thing will tilt.
- 1. Chill Time
- Exactly 60 minutes in the fridge.
- 2. Heat Control
- 30 second bursts in the microwave for the chocolate.
- 3. Fondant Size
- 3/4 inch squares for the cap.
Right then, let's look at the gear you'll need. You don't need a professional bakery setup, just a few basics.
The Building Blocks
The hero here is the cream cheese. While many recipes call for frosting, cream cheese adds a slight tang that cuts through the sugar and provides a much firmer structure. This is what keeps your Graduation Cap Cake Pops from leaning.
Component Analysis
| Ingredient | Science Role | Pro Secret |
|---|---|---|
| Cream Cheese | Structural Binder | Use full fat for better stability |
| Coconut Oil | Fluidity Agent | Prevents chocolate from seizing |
| Candy Melts | Hard Shell | Use a high-quality brand for a smooth finish |
| Fondant | Decorative Weight | Knead it for 1 minute to make it pliable |
Ingredients & Substitutes
For the Cake Base
- 430g white or chocolate cake mixWhy this? Consistent crumb structure
- 240ml water (Sub: Milk for a richer taste)
- 115g vegetable oil (Sub: Melted butter for more flavor)
- 3 large eggs (Sub: Applesauce, but the pop will be softer)
For the Binding
- 225g softened cream cheese Why this? Stability and tang (Sub: Mascarpone for a sweeter, creamier pop)
- 115g unsalted butter, softened (Sub: Vegan butter)
- 250g powdered sugar (Sub: Maple powder for a different twist)
- 5ml vanilla extract (Sub: Almond extract for a wedding cake flavor)
For the Coating & Caps
- 340g black candy melts or semi sweet chocolate Why this? Bold color contrast (Sub: White chocolate with black oil based dye)
- 5ml coconut oil Why this? Smooths the texture (Sub: Shortening)
- 115g black fondant (Sub: Black modeling chocolate)
- 55g yellow or gold fondant (Sub: Yellow candy strips)
- 24 lollipop sticks (4 inches)
Equipment Needed
You don't need a fancy mixer, but a few things make this way easier. I suggest a standard stand mixer such as a KitchenAid for the binder, but a hand mixer works just as well.
- Large mixing bowl (for crumbling)
- Medium mixing bowl (for the binder)
- Baking pan (according to your cake mix instructions)
- Parchment paper (essential to stop sticking)
- Microwave safe bowl (for the candy melts)
- Small rolling pin or a smooth bottle (for the fondant)
- Knife or small square cutter
How to Make It
Let's crack on. The process is straightforward, but the magic is in the details.
1. Create the Crumb
Bake the cake according to the package instructions. Let it cool completely. This is a big one - if the cake is even slightly warm, the butter in the binder will melt, and you'll have a puddle. Once cold, crumble the cake into a bowl using your hands or a fork.
Keep going until you have fine, uniform crumbs with no large chunks.
2. Mix and Mold
Beat the butter, cream cheese, powdered sugar, and vanilla until the mixture is smooth and velvety. Gradually fold in the cake crumbs. Use a spatula to mix until a stiff, dough like consistency forms. If it feels too sticky to roll, add another tablespoon of crumbs.
Roll the mixture into 1 inch spheres. Place them on parchment paper. Now, the hard part: chill them in the refrigerator for 60 minutes. Trust me, skipping this leads to the "sinking pop" syndrome.
3. The Dipping Process
Melt the black candy melts with the coconut oil in 30 second bursts in the microwave. Stir between each burst until the chocolate is glossy and fluid.
Dip the tip of a lollipop stick into the melted chocolate. Insert it halfway into a chilled cake ball. Submerge the entire ball into the chocolate, then gently tap your wrist to remove the excess. This prevents a thick, clumpy bottom.
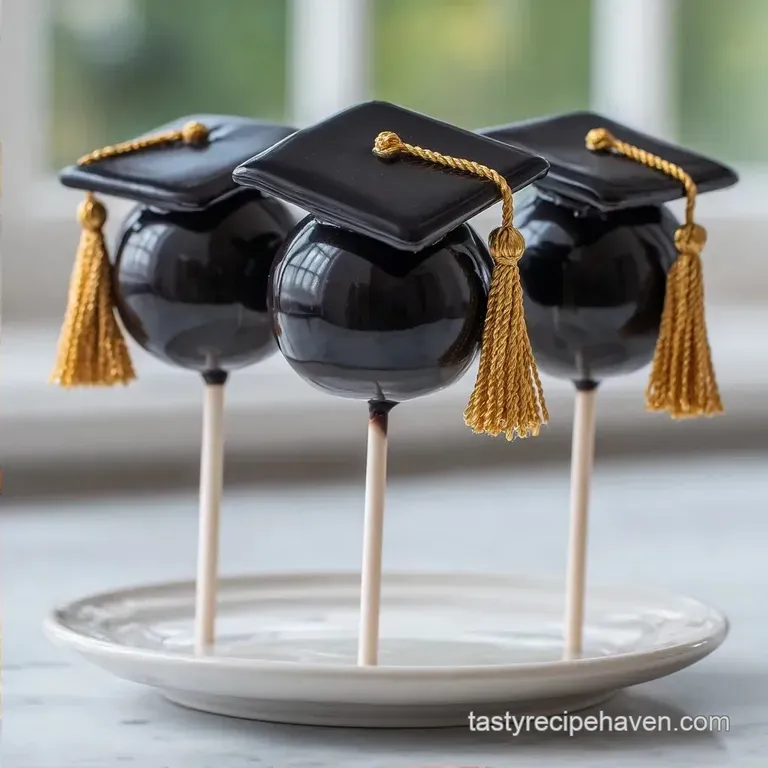
4. Crafting the Graduation Hat Cake Pops
Roll out the black fondant on a lightly floured surface. Cut into small 3/4 inch squares. Flatten them slightly with your finger. For the tassel, roll a tiny sliver of yellow fondant into a thin string.
Attach the square fondant cap to the top of the set cake pop using a tiny dot of melted chocolate. Press the tassel into the center. Let them sit for 10 minutes to lock everything in place.
Chef's Note: If your chocolate is too thick, add a tiny bit more coconut oil. It should coat the back of a spoon without leaving a heavy ridge.
What Can Go Wrong (and How to Fix It)
Even the best of us have a "cake pop fail." Usually, it comes down to temperature or ratios.
The Slipping Pop
This happens when the cake is too soft or the stick wasn't anchored. If you see a pop starting to slide, you can sometimes save it by dipping it in more chocolate to create a thicker external shell.
The Cracked Shell
Cracks usually happen if the chocolate was overheated or if the cake balls weren't cold enough. Overheated chocolate loses its elasticity and snaps.
Fondant Caps Sliding Off
This is usually a result of too much "glue" (melted chocolate). The chocolate acts as a lubricant before it sets. Use a tiny dot, not a glob.
| Problem | Root Cause | Solution |
|---|---|---|
| Soft Center | Too much binder | Add more cake crumbs |
| Grainy Coating | Chocolate overheated | Re melt slowly with coconut oil |
| Sticky Surface | High humidity | Store in airtight container in fridge |
Common Mistakes Checklist:
- ✓ Did you cool the cake completely before crumbling?
- ✓ Did you chill the balls for a full 60 minutes?
- ✓ Did you anchor the stick with chocolate?
- ✓ Did you stir the candy melts every 30 seconds?
- ✓ Is the fondant square flat enough to sit securely?
Flavor Variations to Try
While black and gold are classic, you can easily switch these up to match school colors. If you're making a larger spread, these pops go great alongside a Homemade College Grad Cake.
2 Flavor Twists
- Red Velvet Grad: Use a red velvet cake mix and replace the cream cheese with a mixture of cream cheese and a hint of cocoa powder. Use red candy melts for the base and black for the cap.
- Lemon Sunshine: Use a lemon cake mix and add 1 teaspoon of lemon zest to the binder. This makes for a bright, refreshing pop.
2 Diet Swaps
- gluten-free: Use a GF cake mix. The binding process remains exactly the same, though you might need a bit more binder as GF crumbs can be drier.
- dairy-free: Use vegan butter and a dairy-free cream cheese alternative. Use dark chocolate (which is often dairy-free) and a tiny bit of coconut oil for the coating.
Scaling Your Batch: If you need to make 48 pops instead of 24, double the ingredients. However, don't just double the microwave time for the chocolate - continue using 30 second bursts to avoid burning.
If you're baking a larger cake for the crumbs, lower the oven temperature by 10°C and bake for a few minutes longer to ensure the center is set.
How to Store and Keep Fresh
Cake pops are surprisingly hardy, but they don't like extreme temperature swings.
Storage Guidelines: Keep them in an airtight container in the fridge for up to 5 days. If you're planning to serve them, take them out about 30 minutes before eating so the interior softens back to that velvety texture.
Freezing Tips: You can freeze these for up to 2 months. Wrap them individually in parchment paper before placing them in a freezer bag. Thaw them in the fridge overnight.
Zero Waste Tips: If you have leftover cake crumbs that didn't make it into the pops, don't toss them. Mix them with a bit of extra frosting and roll them into small "truffles" without the sticks. They make great little bite sized treats for the cook.
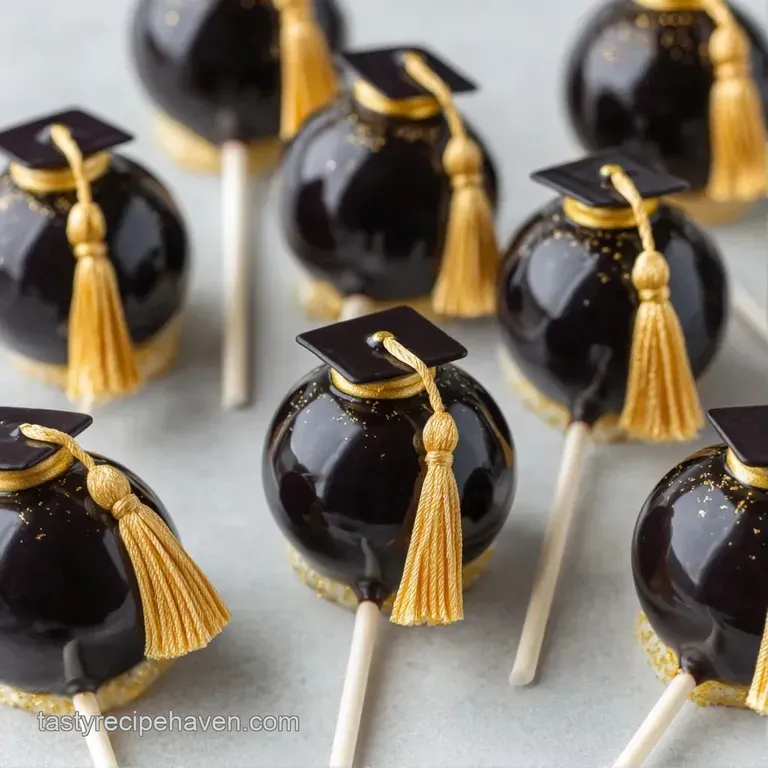
Presentation Tips
The way you display these is half the fun. Since they have sticks, you have a few options.
You can use a block of styrofoam wrapped in fabric or foil. Stick the pops in at slightly different angles to create a dynamic look. For a more elegant vibe, use a tiered cupcake stand with a cardboard base.
If you're serving these as part of a larger dessert table, pair them with a Graduation Cake for 10 recipe to create a cohesive theme. Use a few gold sprinkles around the base of the stand to tie the colors together.
Final Decision Shortcut:
- If you want a denser pop, use slightly less cream cheese.
- If you want a softer, more cake like pop, add an extra tablespoon of butter.
- If you're short on time, use a store-bought pound cake instead of baking from scratch.
Right then, you're all set. Just remember to stay patient with the chilling and the chocolate, and your Graduation Cap Cake Pops will be the star of the party. Happy baking!
Recipe FAQs
Is a stand necessary for setting cake pops?
No, a block of styrofoam works perfectly. Simply poke holes in the foam to hold the lollipop sticks upright until the chocolate shell hardens.
What decorations can be used?
Use black and yellow fondant. Roll out black squares for the mortarboard caps and thin yellow strings for the tassels to create the graduation look.
How do I keep the coating smooth and shiny?
Mix in coconut oil. Heat the candy melts in 30-second bursts and stir thoroughly to ensure the oil is fully incorporated for a professional gloss.
Can I personalize cake pops with messages?
Yes, use a food grade marker. Write small messages directly onto the fondant caps once the coating has fully set to avoid smudging.
What tools are needed for making cake pops?
Gather lollipop sticks, parchment paper, and a mixing bowl. You will also need a microwave safe container for melting the candy melts.
How to make a great cake with cheap cake mixes?
Bake according to the package and cool completely. Crumble the cake finely and bind it with cream cheese for a dense, professional texture. If you enjoyed mastering this consistency, see how we scale cake bases for our party sheet cake.
Is it true that buttercream is the best binder for cake pops?
No, this is a common misconception. Buttercream is often too soft, whereas a cream cheese and butter base provides the structural integrity needed to support the fondant caps.
Graduation Cap Cake Pops