Simple College Graduation Cake: Moist and Velvety
- Time: 30 min active + 25 min bake + 60 min cooling/decorating
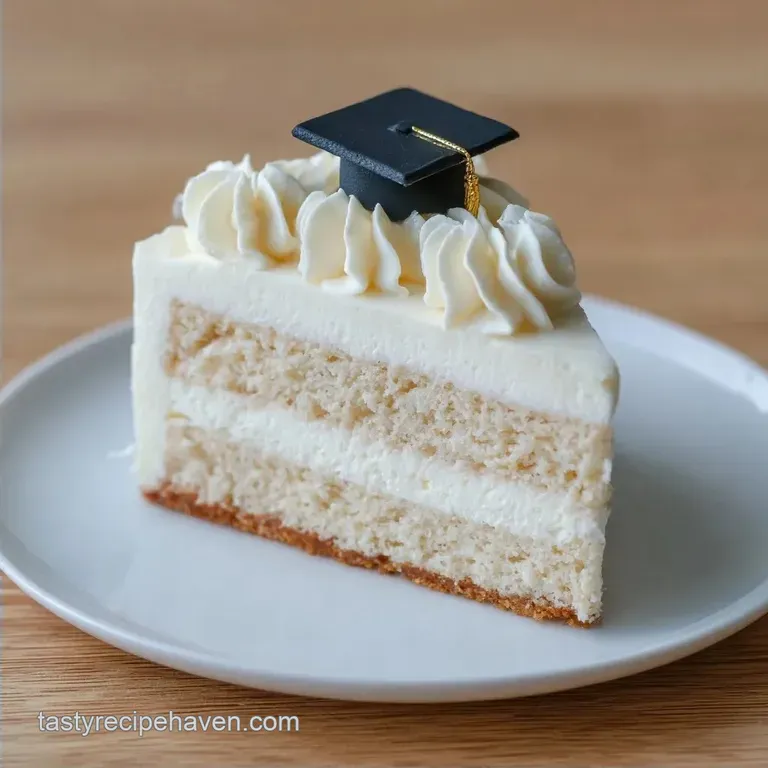
- Flavor/Texture Hook: Velvety vanilla buttercream on a light, moist sponge
- Perfect for: Graduation parties, dorm celebrations, or a surprise for a new grad
Ever wondered why some celebration cakes feel like eating a sponge while others feel like a brick? It usually comes down to how the fat and air are managed in the first five minutes of mixing. When you're making a cake for a big milestone, the last thing you want is a dessert that tastes like a cafeteria afterthought.
I remember making a cake for my cousin's grad party years ago. I rushed the butter, used cold eggs, and ended up with a batter that looked like curdled milk. It baked, but the texture was dense and weirdly oily. That's when I realized that baking isn't just about following a list, it's about managing temperatures.
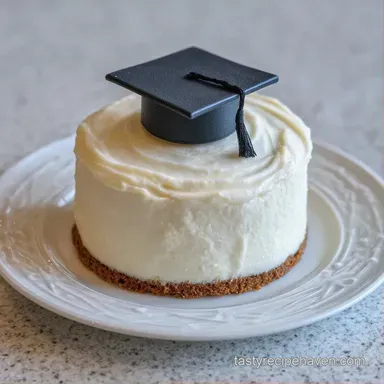
This Simple College Graduation Cake is the result of getting those basics right. It's a classic vanilla base that's sturdy enough to hold a graduation cap topper but soft enough to melt in your mouth. We're going for a clean, professional look that doesn't require a culinary degree to achieve.
Simple College Graduation Cake
Right then, let's talk about why this particular version works so well. Most "easy" cakes skip the science of aeration, but we aren't doing that here. We want a cake that stands tall and tastes like a bakery treat, not a box mix.
- Air Incorporation
- Whipping butter and sugar creates tiny air pockets that expand in the heat, giving the cake its lift.
- Emulsion Stability
- Adding eggs one by one prevents the fat and water from separating, ensuring a smooth, velvety crumb.
- Gluten Control
- Alternating the milk and flour prevents over mixing, which keeps the cake from becoming tough or bread like.
- Moisture Balance
- The ratio of whole milk to flour ensures the cake stays moist for days without becoming soggy.
If you're wondering about the best way to bake this, here is a quick look at how the oven compares to alternative methods.
| Feature | Oven Bake | Stovetop (Pot in-Pot) |
|---|---|---|
| Time | 25 minutes | 60-90 minutes |
| Texture | Even, light crumb | Denser, steamed |
| Best For | Standard cakes | No oven situations |
But what about the equipment? You don't need a professional studio, but a couple of basics make the process foolproof.
Essential Timing and Yield
Before we get into the grit, let's set the expectations. This recipe is designed for a standard two layer cake that serves about 10 people.
- 1. Butter Temp
- Softened butter should be around 21°C (70°F), where it indents but doesn't ooze.
- 2. Oven Temp
- A steady 175°C (350°F) is non negotiable for the 25 minute bake.
- 3. Internal Temp
- The cake is done when a toothpick comes out clean or the center hits 98°C (208°F).
The Component List
I've broken this down into the cake base and the frosting. For the best results, use a mixer such as a KitchenAid, though a hand mixer works just fine if you have a bit more patience.
For the Cake:
- 2 ¼ cups (280g) all purpose flourWhy this? Provides the necessary structure for layering
- 1 ½ cups (300g) granulated sugarWhy this? Sweetens and helps with aeration during creaming
- 3 ½ tsp (14g) baking powderWhy this? The primary lift for a light texture
- 1 tsp (5g) saltWhy this? Balances the sugar and enhances vanilla
- ¾ cup (170g) unsalted butter, softenedWhy this? Adds richness and traps air
- 1 cup (240ml) whole milkWhy this? Provides moisture and a tender crumb
- 1 tbsp (15ml) vanilla extractWhy this? The core flavor profile
- 2 large eggs, room temperatureWhy this? Binds ingredients and adds stability
For the Frosting:
- 1 cup (225g) unsalted butter, softenedWhy this? Base for a stable buttercream
- 4 cups (480g) powdered sugar, siftedWhy this? Creates the sweetness and stiff peaks
- 2 tbsp (30ml) heavy creamWhy this? Adjusts consistency for piping
- 1 tsp (5ml) vanilla extractWhy this? Cuts through the sweetness
- Food coloring (school colors)
Quick Ingredient Swaps:
| Original Ingredient | Substitute | Why It Works |
|---|---|---|
| All purpose Flour | Cake Flour | Finer grind. Note: Results in a softer, more fragile cake |
| Whole Milk | Buttermilk | Adds tang. Note: Add ½ tsp baking soda to balance acidity |
| Heavy Cream | Full fat Coconut Milk | Similar fat. Note: Adds a slight coconut flavor to frosting |
| Unsalted Butter | Margarine | Similar texture. Note: May alter the flavor slightly |
Tools for the Job
You don't need a fancy kitchen, but using the right tools prevents the "cake stuck to the pan" disaster.
- Two 8 inch round cake pans
- Parchment paper (essential for easy release)
- Electric mixer (stand or hand)
- Large mixing bowl
- Sifter or fine mesh strainer
- Serrated knife (for leveling the cakes)
- Offset spatula (for smooth frosting)
- Piping bag and nozzle
Step by step Assembly
Now we get to the fun part. Let's bring this Simple College Graduation Cake to life.
1. Prepping the Base
Preheat your oven to 175°C (350°F). Grease your two 8 inch pans and line the bottoms with parchment paper. Trust me, don't skip the parchment, or you'll be digging cake out with a spoon.
2. The Creaming Phase
Place your softened butter and granulated sugar in the mixer. Beat them on medium high until the mixture looks pale and fluffy. This takes about 3-5 minutes. If it's still yellow and grainy, keep going.
3. Adding the Binders
Beat in the eggs one at a time. Mix fully after the first egg before adding the second. Stir in the vanilla extract. If the batter looks slightly broken, don't panic, it will come together once the flour is added.
4. The Alternating Mix
Turn your mixer to low. Add about a third of the flour mixture (flour, baking powder, salt), then half of the milk. Repeat, ending with the flour. Mix until just combined. Over mixing here is the fastest way to get a tough cake.
5. The Bake
Divide the batter evenly between the pans. Bake for 25 minutes until a toothpick inserted in the center comes out clean and the edges start to pull away from the pan.
6. Whipping the Frosting
Beat the softened butter until smooth. Gradually add the sifted powdered sugar, heavy cream, and vanilla.
7. Achieving Stiff Peaks
Beat the frosting on high for 3 minutes until it is light, airy, and holds a stiff peak. This is where the "velvety" texture comes from.
8. Leveling and Layering
Once the cakes are completely cool, use your serrated knife to slice off any domes on top. Place the first layer down, spread a thick layer of frosting, and top with the second cake.
9. The Crumb Coat
Apply a very thin layer of frosting over the whole cake. This "traps" the crumbs. Chill in the refrigerator for 15 minutes.
10. Final Design
Apply a smooth final coat of white frosting. Pipe a border in school colors around the top edge. Place a small square of dark chocolate or fondant in the center to mimic a graduation cap.
Chef's Tip: To get those professional looking sharp edges, use a bench scraper or a flat spatula dipped in hot water and wiped dry.
Fixing Common Cake Issues

Even with a plan, things happen. Here is how to handle the most frequent hiccups when making a Simple College Graduation Cake.
Why Your Cake Sinks in the Middle
This is usually caused by opening the oven door too early or using expired baking powder. When you let cold air in, the structure collapses before it's set.
Frosting is Too Runny
Humidity is often the culprit here. If your frosting won't hold a peak, it needs more structure.
Cake Sticks to the Pan
This happens when the pan isn't greased properly or the cake is removed while too hot. Let it cool for 10 minutes before flipping.
| Problem | Root Cause | Solution |
|---|---|---|
| Sinking center | Oven door opened too soon | Keep door closed until 20 mins in |
| Runny frosting | Too much cream/humidity | Add 2 tbsp powdered sugar |
| Stuck cake | Lack of parchment/grease | Use parchment and cool before flipping |
Common Mistakes Checklist:
- ✓ Butter is truly softened, not melted.
- ✓ Flour is measured by weight or spooned into the cup.
- ✓ Eggs are room temperature to ensure emulsion.
- ✓ Cakes are completely cool before frosting.
- ✓ Powdered sugar is sifted to avoid lumps.
Customizing Your Celebration
One of the best things about this Simple College Graduation Cake is how easily it adapts. Whether you're celebrating a PhD or a high school diploma, you can tweak the flavors.
Simple Graduation Cake for Guys
For a more "masculine" vibe, swap the vanilla frosting for a chocolate ganache or a salted caramel drizzle. Deep blues or forest greens usually work well for the piping colors.
Simple Graduation Cake for Girls
Try adding a hint of almond extract to the batter. Pair the white frosting with soft pastels or gold leaf accents for a more elegant look.
Flavor Variations
If you want to move away from plain vanilla, you can add a fruit element. For example, topping the layers with a Sauce in 25 Minutes recipe adds a bright, tart contrast to the sweet buttercream.
Decision Shortcut:
- If you want a taller cake, use 6 inch pans and increase bake time by 5-10 mins.
- If you want a richer taste, replace the milk with heavy cream.
- If you're short on time, use a store-bought white cake mix but use the buttercream recipe above.
Adjusting the Batch Size
Sometimes you need a tiny cake for a small family dinner, and other times you're feeding the whole department.
Scaling Down (Half Batch): Use one 8 inch pan for a single layer cake. Reduce the bake time by about 20% (check at 18-20 mins). For the eggs, beat one egg in a bowl and use half of it by weight.
Scaling Up (Double Batch): If you're making a four layer cake, don't just double the baking powder and salt; increase them to 1.5x to avoid a metallic taste. Work in batches with your mixer to avoid overfilling the bowl.
For those who enjoy a more rustic, spiced treat, you might consider the techniques used in an applesauce coffee cake, where moisture is added through fruit purees. However, for this graduation cake, we stick to the classic emulsion for stability.
Baking Note: If you double the recipe and bake in larger pans, lower the oven temperature by 15°C (25°F) and extend the time. This ensures the edges don't burn before the middle is cooked.
Baking Myths Debunked
There's a lot of bad advice floating around the internet. Let's clear a few things up.
Myth: You must "cream" butter and sugar for 10 minutes. Truth: Five minutes is usually plenty. Over creaming can actually incorporate too much air, causing the cake to rise too quickly and then collapse in the oven.
Myth: Greasing the sides of the pan helps the cake rise. Truth: Actually, if you grease the sides too heavily, the batter has nothing to "climb," which can lead to a shorter cake. Only grease the bottom and a light swipe on the sides.
Myth: Room temperature eggs are just a suggestion. Truth: Cold eggs will seize the softened butter, breaking the emulsion. This leads to a denser cake with an uneven crumb.
Storage and Freshness
To keep your Simple College Graduation Cake tasting fresh, you need to manage the moisture.
Fridge Storage: Keep the cake in an airtight container or a cake dome. It stays fresh for 3-5 days. Because the butter in the frosting firms up, let the cake sit at room temperature for 30 minutes before serving for that velvety texture.
Freezing Guide: You can freeze the cake layers without frosting. Wrap them tightly in plastic wrap and then foil. They last up to 3 months. Thaw in the fridge overnight before frosting.
Zero Waste Tips: Don't throw away the cake scraps from leveling! Crumble them into a bowl, mix with a tablespoon of frosting, and roll them into balls. Dip them in melted chocolate for instant graduation cake pops. If you have leftover buttercream, freeze it in small dollops for future cupcakes.
Serving and Presentation
The final touch is all about the delivery. Since this is a celebration, the presentation should feel intentional.
Serve the cake on a clean white platter to make the school colors pop. Because this cake is rich, it pairs well with a tart accompaniment or a bitter drink. A side of fresh raspberries or a cup of strong black coffee balances the sweetness of the buttercream.
If you're serving a crowd, cut the cake in wedges for a traditional look, or cut it into a grid of squares to get more servings out of a single cake. Trust me, the squares are easier to handle at a party where people are standing and chatting.
Right then, you've got a plan. From the precise creaming of the butter to the strategic crumb coat, this Simple College Graduation Cake is designed to be a win. Just remember to keep your ingredients at the right temperature, don't over mix that batter, and you'll have a dessert that looks like it came from a boutique bakery.
Happy celebrating!
Recipe FAQs
How to tell when the cake layers are done?
Insert a toothpick into the center. It should come out clean after baking for 25 minutes at 350°F.
Why is a crumb coat necessary?
It seals in loose crumbs. Applying this thin layer and chilling it for 15 minutes ensures the final coat of white frosting remains smooth and clean.
How long does the cake last in the fridge?
3 to 5 days in an airtight container. Let the cake sit at room temperature for 30 minutes before serving to soften the butter in the frosting.
Is it true that butter and eggs can be cold when mixing?
No, this is a common misconception. Softened butter and room temperature eggs emulsify more effectively, creating a pale and fluffy batter.
How to make the frosting hold a stiff peak?
Beat on high for 3 minutes. Gradually incorporating the powdered sugar and heavy cream into whipped butter provides the structure needed for piping.
Can I bake the cake layers in advance?
Yes, you can freeze them. Wrap un-frosted layers tightly in plastic wrap and foil for up to 3 months, then thaw in the fridge overnight.
What other snacks pair well with this cake for a party?
Salty appetizers provide a great balance. This sweet cake pairs perfectly with sourdough pretzel bites to satisfy a variety of guest preferences.
Simple College Graduation Cake