No-Bake Chocolate Peanut Butter Protein Ball Healthy 4-Ingredient Snack
- Time: Active 10 minutes, Passive 0 minutes, Total 10 minutes
- Flavor/Texture Hook: Fudgy, cocoa rich, and velvety
- Perfect for: Post workout recovery or midday energy
- The Logic of Nutrient Dense Bites
- Precision Metrics for Daily Wellness
- The Essential Four Ingredient Base
- Minimalist Equipment for Clean Prepping
- Sequence for Achieving Silky Textures
- Correcting Common Texture Problems Fast
- Sustainable Flavor Twists to Explore
- Efficient Storage and Waste Prevention
- Thoughtful Pairings for Balanced Energy
- Myths About No Bake Protein Snacks
- Recipe FAQs
- 📝 Recipe Card
The Logic of Nutrient Dense Bites
The magic of this recipe isn't just in the flavor, it's in the chemistry of how these four items interact. We are essentially creating a cold formed emulsion where the liquid sweetener and the natural oils in the peanut butter trap the dry particles of cocoa and protein.
This creates a cohesive "dough" that stays flexible even when chilled.
If you have ever made my Peanut Butter Cookies recipe, you know how temperamental nut butters can be when heat is involved. By keeping this no bake, we preserve the integrity of the healthy fats. This method ensures the snack remains moist and dense rather than becoming brittle or dry over time.
The Science of Why it WorksProtein Hydration: The protein powder acts as a structural absorbent, pulling moisture from the maple syrup to create a firm, sliceable texture.
Lipid Emulsification: The natural lecithins in peanut butter bind the fats and sugars together, preventing the snack from crumbling.
Harnessing Natural Emulsifiers
Natural peanut butter, specifically the kind where the oil separates at the top, is a fantastic emulsifier. When you stir that oil back in, you're creating a suspension that holds the dry cocoa powder perfectly. This is why the texture feels so silky on the tongue.
Optimizing Protein Hydration Ratios
Different protein powders (whey, casein, or plant based) absorb liquid at different rates. Plant based proteins often require a touch more moisture because they are more fibrous. Understanding this ratio is the difference between a gritty ball and a smooth, fudge like bite.
| Method | Texture | Set Time | Ideal For |
|---|---|---|---|
| Quick Roll | Soft/Fudgy | 0 mins | Immediate hunger |
| Chilled | Firm/Dense | 30 mins | Meal prep |
| Frozen | Truffle like | 1 hour | Summer snack |
Choosing your preferred method depends entirely on how much of a "snap" you want when you bite into the snack. I personally love the frozen version because it melts slowly, letting the cocoa flavor linger longer.
Precision Metrics for Daily Wellness
To get the results we want, we need to be precise with our measurements. Because this is a no bake recipe, there is no evaporation in the oven to fix a "wet" batter. What you mix is what you get. Using a kitchen scale is the best way to ensure your 250g of peanut butter is exact.
I remember once trying to eyeball the maple syrup and ending up with something more like a chocolate soup than a protein ball. It was a mess, but a tasty one. Now, I always weigh everything. This precision ensures that every single bite has that consistent 9.5g of protein.
| Ingredient | Science Role | Pro Secret |
|---|---|---|
| Peanut Butter (250g) | Primary Emulsifier | Use "oil on-top" natural types |
| Maple Syrup (85g) | Hygroscopic Binder | Grade A Dark adds minerals |
| Cocoa Powder (30g) | Structural Solid | Sift to prevent bitter clumps |
| Protein Powder (60g) | Moisture Absorbent | Casein absorbs 2x more liquid |
Using these exact weights will give you a dough that is tacky but does not stick to your fingers. If you find the mixture is too oily, it usually means the peanut butter wasn't stirred well enough before measuring, leaving too much free oil in the mix.
The Essential Four Ingredient Base
We are using high-quality, whole food ingredients here to maximize the nutrient density. Every component serves a specific purpose for both your palate and your body's energy needs.
- Natural Creamy Peanut Butter (250g): Why this? Provides the fat base and essential creaminess without added hydrogenated oils.
- Pure Maple Syrup (85g): Why this? A liquid sweetener that helps the protein powder hydrate and bind.
- Unsweetened Cocoa Powder (30g): Why this? Adds the deep, earthy chocolate flavor and provides structure to the dough.
- Protein Powder (60g): Why this? Increases the satiety factor and absorbs excess moisture from the syrup.
| Original Ingredient | Substitute | Why It Works |
|---|---|---|
| Peanut Butter | Almond Butter | Similar fat profile but milder flavor. Note: Less "nutty" aroma. |
| Maple Syrup | Honey | Identical sugar density. Note: Results in a much thicker, stickier texture. |
| Cocoa Powder | Carob Powder | Naturally caffeine free. Note: Much sweeter and less intense than cocoa. |
| Protein Powder | Oat Flour | High fiber structure. Note: Will significantly lower the protein content. |
If you decide to swap the peanut butter for almond butter, just be aware that almond butter is often runnier. You might need to add an extra 10g of protein powder to reach that rollable consistency.
Minimalist Equipment for Clean Prepping
One of the best parts about this recipe is the lack of cleanup. You don't need a stand mixer such as KitchenAid or even a food processor. Everything can be done in one bowl with just a few simple tools.
I'm a big fan of efficiency in the kitchen. If I can make a week's worth of snacks using only a bowl and a spatula, I'm a happy cook. It makes the transition to a healthier lifestyle so much easier when the "cost of entry" in terms of labor is low.
- Medium Mixing Bowl: Glass or stainless steel works best to prevent the oils from sticking too much.
- Silicone Spatula: This is essential for folding the protein powder into the peanut butter without creating a cloud of dust.
- Kitchen Scale: To get those precise grams we talked about earlier.
- Small Cookie Scoop: This ensures every ball is the same size, which helps with tracking your macros.
Chef Tip: Freeze your cocoa powder for 10 minutes before sifting. It prevents the powder from "clumping" due to humidity, giving you a much smoother distribution of chocolate flavor.
Sequence for Achieving Silky Textures

The order in which you combine these ingredients matters more than you might think. We want to create a smooth paste with the wet ingredients before introducing the "thirsty" dry ingredients. This prevents dry pockets of protein powder from forming in the middle of your snack.
As you mix, pay attention to the aroma. When the maple syrup hits the peanut butter, it releases a sweet, toasted scent. Once the cocoa is added, that scent shifts to a rich, dark fragrance that is almost like a brownie batter.
1. Combine the Wet Elements
Place the 250g of peanut butter and 85g of maple syrup into your bowl. Use your spatula to stir them until they are completely unified. You should see a glossy, thick ribbons of mixture.
2. Sift the Cocoa Powder
Add the 30g of cocoa powder. Note: Sifting prevents bitter cocoa lumps. Stir slowly until the mixture turns a deep, dark brown. It will start to smell intensely like chocolate at this stage.
3. Incorporate the Protein Powder
Gradually fold in the 60g of protein powder. Don't dump it all at once, or it will be harder to mix. Stir until the white powder completely disappears into the dark chocolate base.
4. Check the Consistency
The dough should be firm enough to hold its shape but soft enough to indent with a finger. Continue mixing until the dough pulls away from the sides of the bowl cleanly.
5. Portion the Smooth Dough
Use a spoon or small scoop to portion out 12 equal pieces. I find that weighing each piece to about 35-40g keeps them consistent.
6. Roll into Spheres
Roll each portion between your palms. If the dough is sticking, lightly dampen your hands with water. Roll until the surface is smooth and matte.
7. Optional Coating Application
If you want extra texture, you can roll the balls in crushed nuts or extra cocoa powder now while they are still slightly tacky.
8. The Quick Chilling Phase
While you can eat them immediately, placing them in the fridge for 15 minutes allows the proteins to fully hydrate. Chill until they feel firm to the touch.
Correcting Common Texture Problems Fast
Even with the best intentions, natural ingredients can be unpredictable. The oil content in peanut butter varies by brand, and the humidity in your kitchen can affect how the protein powder behaves. Don't panic if it doesn't look like the pictures right away.
I once made these on a particularly humid day and they stayed sticky no matter how much I rolled them. I learned the hard way that a little bit of patience (and some extra dry ingredients) goes a long way.
Dry and Crumbly Consistency
If your dough looks like sand and won't hold a ball shape, it's likely too dry. This often happens if you use a very thick, bottom of-the jar peanut butter or a highly absorbent vegan protein powder.
Sticky and Unmanageable Dough
This is usually caused by using a very runny, oily peanut butter. It can also happen if the maple syrup was slightly too warm when added.
| Problem | Root Cause | Solution |
|---|---|---|
| Crumbly | Low hydration | Add 1 tsp maple syrup and mix. |
| Greasy | Oil separation | Add 1 tbsp protein powder to absorb oil. |
| Bland | Salt imbalance | Add a tiny pinch of flaky sea salt. |
Before you start rolling, always do a "test squeeze." If the dough stays together when you squeeze it in your palm, you're good to go. If it shatters, add a tiny bit more syrup.
- ✓ Common Mistakes Checklist
- ✓ Stir your natural peanut butter thoroughly to incorporate all the oil before measuring.
- ✓ Don't use a "low-fat" peanut butter - the fats are essential for the structure here.
- ✓ Add the protein powder in two batches to ensure even distribution.
- ✓ Let the dough sit for 2 minutes before rolling to allow the powder to hydrate.
- ✓ Use a kitchen scale instead of measuring cups for the most accurate results.
Sustainable Flavor Twists to Explore
Once you have the base recipe down, you can start getting creative. This 4 ingredient foundation is like a blank canvas for your favorite flavors. Because it's a no bake recipe, you don't have to worry about how additions will affect the rise or bake time.
If you are feeling festive, you might try adding a drop of peppermint extract to make something similar to my No Bake Christmas recipe. The combination of chocolate and mint is always a crowd pleaser and keeps the snack feeling fresh.
Added Texture and Crunch
Fold in 2 tablespoons of cacao nibs or finely chopped roasted peanuts. This adds a satisfying "shatter" to the velvety base. It also increases the healthy fiber content, making the snack even more nutrient dense.
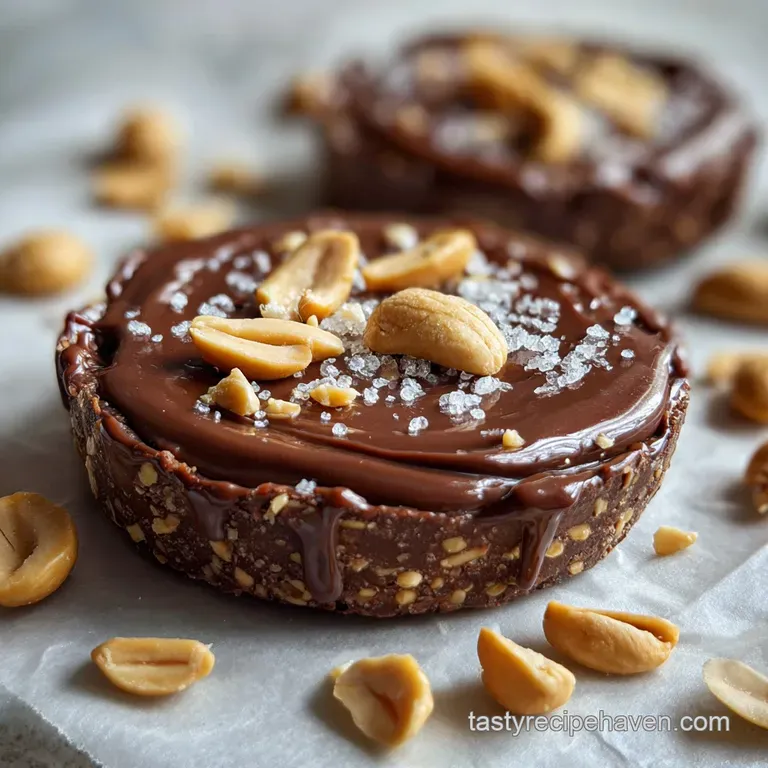
Salted Chocolate Decadence
A tiny pinch of Maldon sea salt on top of each ball transforms this from a simple snack into a gourmet treat. The salt cuts through the richness of the peanut butter and amplifies the cocoa notes.
Post Workout Recovery Fuel
If you are using these specifically for recovery, consider adding a teaspoon of maca powder or ground flaxseeds. These don't change the flavor much but add an extra boost of minerals and omega-3s.
Efficient Storage and Waste Prevention
These protein balls are perfect for meal prep because they actually improve in texture after a day or two in the fridge. The flavors meld together, and the protein powder loses any hint of grittiness.
Storage Guidelines Store the finished balls in an airtight container in the fridge for up to 7 days. If you want them to last longer, they freeze beautifully for up to 3 months.
When freezing, I recommend placing them on a tray first so they don't stick together, then transferring them to a bag once frozen solid.
Zero Waste Tips Don't wash that peanut butter jar just yet! If you are at the end of a jar, you can mix the dough directly inside it. This picks up every last bit of peanut butter from the sides.
Also, if you have leftover "dust" from the bottom of your protein powder tub, this is the perfect place to use it up. Any crumbly bits that don't make it into a ball can be saved and used as a high protein topping for your morning oatmeal.
Thoughtful Pairings for Balanced Energy
While these are great on their own, pairing them with the right beverage or side can make your snack time feel like a complete mini meal. Since we've focused on fats and proteins, adding a bit of fresh fruit can provide the fiber and hydration to round it out.
If you are looking for a savory contrast, these bites are surprisingly good alongside a protein heavy main dish like my Meatball Recipe Without Breadcrumbs. Having a sweet and salty balance throughout the day keeps your palate satisfied and prevents late night cravings.
Midday Energy Enhancement
Pair one or two balls with a cup of black coffee or green tea. The caffeine interacts beautifully with the theobromine in the cocoa powder, providing a focused, steady energy lift without the jitters.
Post Workout Recovery Routine
Enjoy these with a side of sliced apple or berries. The natural sugars in the fruit help transport the protein to your muscles faster, making for an efficient recovery snack. It’s a sustainable way to refuel that actually tastes like a reward.
Myths About No Bake Protein Snacks
There are a few misconceptions floating around about "raw" or no bake snacks that can keep people from trying them. Let's clear some of those up so you can feel confident in your kitchen.
Myth: Protein powder always tastes chalky in no bake recipes. The truth is that the chalkiness usually comes from an imbalance of fats. By using a full cup of creamy peanut butter, we are coating the protein particles in fat, which prevents that dry, dusty mouthfeel.
Choosing a high-quality protein powder also helps.
Myth: You need dates or honey to make them stick. While dates are a common binder, they add a lot of extra sugar. Maple syrup is a more efficient binder in smaller quantities because it's a liquid, allowing it to penetrate the dry ingredients more effectively than a chunky date paste.
Myth: These will melt if they aren't refrigerated. Because of the high solid content (cocoa and protein powder), these are surprisingly stable at room temperature. They might get a little softer if it's a hot day, but they won't lose their shape or turn into a puddle in your gym bag.
Recipe FAQs
Can I substitute almond butter for peanut butter?
Yes, but be mindful of consistency. Almond butter is often runnier than peanut butter, so you may need to add an extra 10g of protein powder to achieve the correct rollable texture.
How long do these protein balls last?
Up to 7 days in the refrigerator. For longer storage, they freeze well for up to 3 months; just freeze them on a tray first to prevent sticking, then transfer to a bag.
What is the best way to store these protein balls?
In an airtight container in the fridge. This keeps them firm and prevents them from drying out. They actually improve in texture after a day or two.
Why are my protein balls too dry and crumbly?
Likely too little moisture or a very thick peanut butter. Try adding 1 teaspoon of maple syrup and mixing thoroughly. This helps rehydrate the mixture and bind it together.
Can I add other ingredients for texture?
Absolutely, get creative! Fold in 2 tablespoons of cacao nibs or finely chopped roasted peanuts for added crunch, similar to the delightful texture you'd find in our Sugar Cookie Recipe Without Eggs: Melts In Your Mouth.
Do these protein balls need to be refrigerated?
No, they are surprisingly stable at room temperature. Due to their high solid content from cocoa and protein powder, they won't melt into a puddle even on a warm day, though they may soften slightly.
How do I ensure a smooth, non-chalky texture?
Use high-quality ingredients and proper ratios. Using natural peanut butter that has been stirred well is crucial, as its fats coat the protein powder. This technique of using fat to control texture is also key to achieving the perfect crumb in our Butter Pecan Cake Recipe: Ultra Moist Scratch Made.
Healthy 4 Ingredient Snack