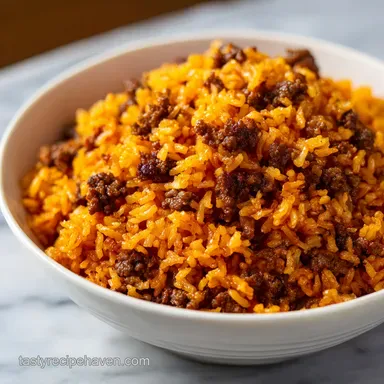
Mexican Beef Rice Skillet: One-Pot and Fluffy
- Time:10 minutes prep + 25 minutes cook = Total 35 minutes
- Flavor/Texture Hook: Savory mahogany beef with velvety melted cheese and zesty lime
- Perfect for: Weeknight dinners, budget-friendly feeding of a crowd, and minimum cleanup nights
Quick Look at Timings
Getting the timing right is the difference between fluffy grains and a mushy mess. Since we're cooking the rice directly in the broth and tomato juices, the window of perfection is specific. You aren't just boiling water, you're creating a concentrated flavor environment.
The 35 minutes total time is honest. You'll spend about 10 minutes chopping and prepping, and 25 minutes at the stove. Most of that cooking time is passive, meaning once the lid is on, you can actually step away and relax.
But don't walk too far, because the smell of the simmering spices is the best part.
The most critical phase is the 18-20 minute simmer. This is where the magic happens, and the rice drinks up the beef broth. If you peek too often, you let the steam escape, and that's how you end up with undercooked grains. Just leave it alone and let the heat do the work.
Component Analysis
Understanding why these specific ingredients are in the pan helps you tweak the recipe without breaking it. It's not just about the taste, it's about how the components interact under heat.
Rice Toasting: Frying the raw rice in beef fat creates a protective barrier on the grain. This prevents the rice from becoming a porridge and keeps the texture distinct.
Steam Pressure: Using a tight fitting lid traps the moisture and heat. This ensures the rice cooks evenly from the top down, not just from the bottom where it touches the pan.
Acidity Balance: The fire roasted tomatoes and lime juice cut through the richness of the beef and cheese. This prevents the dish from feeling too "heavy" on the palate.
Serving Size Calculator
| Servings | Beef/Rice Amount | Pan Size | Cook Time |
|---|---|---|---|
| 4 people | 0.6 lb beef, 0.6 cup rice | 10 inch skillet | 22-25 mins |
| 6 people | 1 lb beef, 1 cup rice | 12 inch skillet | 25 mins |
| 8 people | 1.3 lb beef, 1.3 cup rice | 14 inch skillet | 28-30 mins |
Ingredient Deep Dive
| Ingredient | Science Role | Pro Secret |
|---|---|---|
| Long grain White Rice | Structural Base | Toasting prevents sticking |
| Fire roasted Tomatoes | Flavor Layer | Adds a smoky depth plain cans lack |
| Beef Broth | Hydration/Salt | Use low sodium to control the final taste |
| Sharp Cheddar | Fat/Binder | Grate it yourself for a smoother melt |
Pantry Staples and Fresh Finds
When you're heading to the store, don't just grab the first thing you see. The quality of your beef and the type of rice make a massive difference in the final texture. I always go for lean ground beef, usually 90/10, because we don't want a pool of grease at the bottom of the skillet.
For the rice, stick to long grain white. Basmati works if you want a nuttier scent, but standard long grain is the classic choice for this kind of skillet meal. Avoid instant rice here, as it will turn into mush the moment it hits the broth.
| Original Ingredient | Substitute | Why It Works |
|---|---|---|
| Lean Ground Beef (1 lb) | Ground Turkey (1 lb) | Similar texture. Note: Lacks the richness of beef; add a pinch more paprika |
| Long grain White Rice (1 cup) | Brown Rice (1 cup) | Heartier grain. Note: Requires 1/2 cup more broth and 20 mins extra cook time |
| Sharp Cheddar (1.5 cups) | Pepper Jack (1.5 cups) | Similar melt. Note: Adds a spicy kick to the finish |
| Beef Broth (1.5 cups) | Chicken Broth (1.5 cups) | Same liquid ratio. Note: Lighter, less intense beefy flavor |
Honestly, don't even bother with low-fat cheese. You need the fat in the sharp cheddar to get that silky, stretchy pull when you lift a spoonful. If you're looking for a way to add more depth to the meat, you could experiment with a Chipotle Barbacoa recipe approach by adding a bit of chipotle in adobo to the beef while it browns.
Gear for Minimum Cleanup
The goal here is one pan. I use a 12 inch deep skillet, preferably a cast iron or a heavy bottomed stainless steel one. The depth is key because you're adding beans, corn, and tomatoes on top of the rice, and you don't want ingredients spilling over the sides.
A tight fitting lid is non negotiable. If your lid is loose, you can place a piece of foil over the pan before putting the lid on. This seals in the steam, which is the only way the rice will cook through without burning at the bottom.
You'll also need a sturdy fork for fluffing the rice. Using a spoon can sometimes smash the grains, but a fork allows you to lift and separate them gently. It's a small detail, but it's how you get that restaurant style texture.
Path to Fluffy Rice
Let's crack on with the cooking. The secret to this beef and rice skillet is the order of operations. If you add the rice too late, it won't toast; if you add the liquid too early, it'll steam instead of sear.
Searing and Aromatics
Heat 1 tbsp olive oil in your 12 inch deep skillet over medium high heat. Add 1 lb lean ground beef and cook until it is mahogany colored and browned. This is where you build the base flavor, so don't rush it. Once the beef is browned, stir in 1 medium diced yellow onion and 3 cloves of minced garlic.
Sauté them until the onion is translucent and the garlic smells fragrant.
Toasting and Simmering
Now, here is the pro move: push the beef to the edges of the pan, creating a hole in the center. Pour 1 cup uncooked long grain white rice into that center spot. Stir the rice for 2 minutes until the edges look translucent and it smells slightly nutty.
Stir in 2 tbsp taco seasoning, 1 tsp ground cumin, and ½ tsp smoked paprika, making sure every grain of rice and piece of beef is coated in the spices.
Pour in 1.5 cups low sodium beef broth and 1 can (14.5 oz) fire roasted diced tomatoes (don't drain them!). Stir in 1 can (15 oz) drained black beans, 1 cup frozen corn, and 1 can (4 oz) diced green chilis. Bring the whole mixture to a boil, then immediately turn the heat to low.
Cover with your tight lid and simmer for 18-20 minutes.
The Final Melt
Remove the lid and gently fluff the rice with a fork. You should see the liquid has been fully absorbed and the rice looks plump. Sprinkle 1.5 cups shredded sharp cheddar evenly across the top. Cover for 2 more minutes until the cheese is completely melted and velvety.
Garnish with ¼ cup chopped fresh cilantro and serve with lime wedges.
Cook Method Comparison
| Method | Time | Texture | Best For |
|---|---|---|---|
| Stovetop | 35 min | Fluffy & tender | Weeknight speed |
| Oven Finish | 45 min | Crispy edges | Party style |
| Slow Cooker | 4-6 hrs | Soft & integrated | Meal prep |
The difference between the stovetop and oven is mainly the crust. While the stovetop gives you a consistent texture, popping the skillet under a broiler for 3 minutes at the end can give you those shatter crisp cheese edges.
Solving Common Skillet Hiccups
Even with a simple recipe, things can go sideways. Most issues with a beef and rice skillet come down to heat management or the lid seal.
Rice Still Crunchy
If you pull the lid off and the rice is still hard in the center, you've likely lost too much steam. This happens if the lid doesn't fit tightly or if you peeked too many times. Add 2-3 tbsp of beef broth, put the lid back on, and simmer for another 5 minutes.
Sticking to the Bottom
Burnt rice at the bottom usually means the heat was too high during the simmer phase. Ensure your burner is on the lowest possible setting. If it happens, don't scrape the burnt layer into the rest of the dish; just scoop the top part out and leave the "socarrat" (burnt crust) behind.
Too Watery or Soggy
Sogginess usually comes from using too much liquid or not letting the rice rest. If it's too wet, leave the lid off and simmer on medium for 2-3 minutes to evaporate the excess moisture.
Common Fixes Table
| Problem | Root Cause | Solution |
|---|---|---|
| Mushy Rice | Too much stirring | Stir only once after adding liquid |
| Bland Taste | Under seasoned beef | Add a squeeze of lime or extra cumin |
| Greasy Pan | High fat beef used | Drain excess fat after browning |
To make sure your meal is a win, keep this checklist in mind before you start:
- ✓ Pat the beef dry with a paper towel to get a better sear
- ✓ Use a heavy bottomed pan to prevent hot spots
- ✓ Ensure the lid is tight fitting (use foil if needed)
- ✓ Let the rice rest for 2 minutes after the cheese melts
- ✓ Don't stir the rice during the 20 minute simmer
Switching Up the Spice
One of the best things about this recipe is how easy it is to pivot. If you want something with more heat, swap the green chilis for diced jalapeños. If you're craving a different profile, you can lean into the smoky side by adding a teaspoon of chipotle powder.
For those who want to skip the meat, this works brilliantly with a mix of cauliflower florets and extra black beans. Just keep the rice toasting step the same, as the starch needs that fat to stay fluffy. You can use olive oil or a bit of butter for the toasting phase if you're going vegetarian.
If you're feeling fancy, you can try a "creamy" version by stirring in a dollop of sour cream or Greek yogurt right before you add the cheese. It transforms the dish into something almost like a Mexican risotto. For a lighter touch, replace the frozen corn with fresh corn cut off the cob for a snap of sweetness.
Storage and Zero Waste
This meal is a meal prep dream. Store leftovers in an airtight container in the fridge for up to 4 days. When you reheat it, the rice can sometimes dry out, so add a splash of water or beef broth before microwaving to bring back that velvety texture.
For freezing, I recommend freezing the mixture before adding the cheese. Scoop the beef and rice into freezer safe bags or containers. It'll stay good for up to 3 months. To reheat from frozen, thaw overnight in the fridge and then warm in a skillet with a touch of water.
Add the cheese at the very end for the best melt.
To keep things zero waste, don't toss those lime wedges or onion scraps. Use the onion peels and ends in a freezer bag to start a homemade vegetable stock. If you have leftover cilantro stems, chop them finely and stir them into the beef during the sauté phase; they hold more flavor than the leaves.
Best Sides for the Meal
Since this dish is essentially a complete meal with protein, starch, and veg, you don't need much. But a few fresh additions can make it feel like a feast. A simple avocado salad with red onion and lime juice provides a cool contrast to the warm, spicy rice.
If you're hosting a bigger group and need more bulk, a side of refried beans or a fresh corn salad (Esquites) works perfectly. For those who love these flavors but want a different format, my Mexican Rice Casserole is another great way to get that cheesy, beefy satisfaction in a larger format.
Finally,, don't forget the toppings. A dollop of cool sour cream, some sliced radishes for crunch, or a few pickled red onions can turn this simple skillet into a restaurant quality spread. The key is balancing the richness of the cheese with something acidic and fresh.
High in Sodium
1040 mg 1040 mg of sodium per serving (45% 45% of daily value)
The American Heart Association recommends a daily limit of no more than 2,300 mg of sodium to maintain heart health and lower blood pressure.
Tips to Reduce Sodium
-
DIY Taco Seasoning-30%
Replace store-bought taco seasoning with a homemade blend of chili powder, cumin, garlic powder, and onion powder to avoid hidden salts.
-
Broth Alternative-20%
Substitute the low-sodium beef broth with water or a homemade salt free vegetable stock for a cleaner flavor.
-
No-Salt Canned Goods-20%
Use 'No Salt Added' versions of the fire roasted diced tomatoes and diced green chilis to cut processed sodium.
-
Modify Cheese-15%
Reduce the quantity of shredded cheddar or use an extra sharp variety to provide more flavor with less total cheese.
-
Bean Selection-10%
Switch to 'No Salt Added' black beans to further decrease the sodium content beyond just rinsing.
-
Boost Natural Aromatics
Increase the amount of fresh cilantro, lime juice, and minced garlic to enhance the dish's zest without needing extra salt.
Recipe FAQs
Can I use brown rice instead of long grain white rice?
No, stick with long grain white rice. Brown rice requires significantly more liquid and a longer simmering time, which would overcook the beef and vegetables.
How to get the ground beef mahogany colored?
Heat olive oil in a deep skillet over medium high heat. Cook the beef without stirring too frequently until it reaches a deep brown color.
Why is my rice still crunchy after simmering?
Ensure you are using a tight fitting lid. If steam escapes, the rice won't absorb enough liquid to soften. If you enjoyed mastering this one-pot steam technique here, see how the same principle works in our fluffy rice guide.
Is it true I must rinse the rice before adding it to the pan?
No, this is a common misconception. For this specific skillet method, adding dry rice directly to the oil helps toast the grains for better flavor and texture.
How to store leftovers for meal prep?
Place them in an airtight container. They will stay fresh in the refrigerator for up to 4 days.
Can I freeze this meal for later?
Yes, but omit the cheese. Scoop the beef and rice mixture into freezer safe bags and add the cheese only when reheating for the best results.
How to reheat the skillet without the rice drying out?
Add a splash of water or beef broth. Stir this in before microwaving to restore the velvety texture.
Mexican Beef Rice Skillet