Senior Year Celebration Cake: Velvety and Moist

- Time: 30 min active + 25 min baking + 15 min chilling
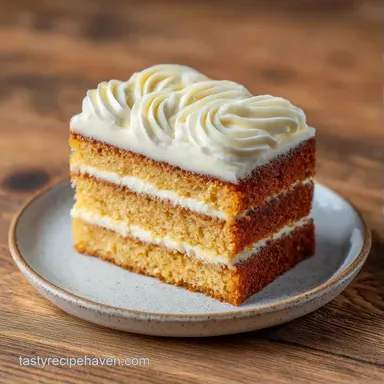
- Flavor/Texture Hook: Velvety, moist crumb with a silky, tart cloud cream finish
- Perfect for: Graduation parties, senior send offs, and large family gatherings
- Baking a Senior Year Celebration Cake
- Key Techniques Explained
- The Component Analysis
- Essential Baking Tools
- Step by Step Instructions
- Common Baking Fixes
- Troubleshooting Common Issues
- Swap for Diet Needs
- Adjusting the Batch Size
- Baking Myths
- Storage and Prep
- Serving Suggestions
- Recipe FAQs
- 📝 Recipe Card
The smell of vanilla bean paste hitting warm butter is one of those scents that just feels like a milestone. I remember the first time I tried to make a big party cake for a graduation. I was so stressed about the presentation that I forgot the most basic rule: room temperature ingredients.
I tossed cold eggs into creamed butter, and the batter broke. It looked like curdled milk, and the resulting cake was dense and gummy.
Since then, I've obsessed over the mechanics of the crumb. This recipe isn't about fancy decorations, though it looks great. It's about a cake that actually holds up under the weight of frosting and doesn't turn into a dry sponge by the time the party starts.
You can expect a cake that is tender but sturdy. The Senior Year Celebration Cake uses a specific ratio of fats and acids to ensure every slice is moist. We're going for a texture that is almost silky, paired with a frosting that isn't cloyingly sweet.
Baking a Senior Year Celebration Cake
To get a cake that feels professional, you have to treat it like a project. Most people rush the mixing or the cooling, and that's where the mistakes happen. For this specific recipe, we're focusing on a "low and slow" approach.
Baking at 163°C instead of the usual 175°C prevents the edges from drying out before the center is set.
When you're planning Senior Year Celebration Cake ideas, the goal is usually a balance between "wow factor" and "I can actually eat this." By using coconut sugar, we get a deeper, almost toasted flavor that pairs perfectly with the tang of the Greek yogurt.
It moves away from that generic supermarket cake taste and into something that feels more intentional.
If you're looking for a high school senior cake that feeds a crowd, this two layer approach is the way to go. It gives you enough height to look impressive on a cake stand, but it's stable enough that you won't be worrying about it sliding apart while you're trying to take photos with the graduate.
Key Techniques Explained
Instead of just following steps, it helps to know why we're doing them. Baking is basically just a series of chemical reactions that we're trying to control.
The Emulsion Stage: Beating butter and sugar creates tiny air pockets. Adding room temperature eggs one by one ensures those pockets stay intact, which is what makes the cake rise and feel light.
Acid Base Reaction: The Greek yogurt provides lactic acid, which reacts with the baking soda. This creates carbon dioxide bubbles that lift the heavy flour and sugar, resulting in a softer texture than using milk alone.
The Crumb Coat: Applying a thin layer of frosting and chilling it for 15 minutes traps the loose crumbs. This means your final layer of frosting stays pristine and smooth without streaks of cake showing through.
Low Temp Baking: By keeping the oven at 163°C, we avoid the "dome" effect. A flatter top makes stacking easier and means you don't have to waste cake by leveling the tops with a knife.
DIVTABLE_0
The Component Analysis
Understanding the role of each ingredient helps you troubleshoot on the fly. For example, if you've ever wondered why a High School Graduation Cake sometimes feels too heavy, it's usually a problem with the fat to flour ratio.
| Ingredient | Science Role | Pro Secret |
|---|---|---|
| Coconut Sugar | Caramelization & Moisture | Adds a depth of flavor that white sugar lacks |
| Greek Yogurt | pH Balance & Tenderness | Use full fat for a more velvety mouthfeel |
| Vanilla Bean Paste | Concentrated Flavor | The specks make the cake look high end |
| Baking Soda | Leavening Agent | Reacts instantly with yogurt for a quick lift |
Essential Baking Tools
You don't need a professional kitchen, but a few specific tools make this process foolproof. I always suggest a stand mixer such as KitchenAid for the frosting, though a hand mixer works if you don't mind a bit of a workout.
For the pans, two 9 inch round pans are standard. I highly recommend using parchment paper circles at the bottom. Grease the sides, but the parchment is non negotiable. I've had too many cakes stick to the pan because I thought the grease was enough.
A digital scale is your best friend here. Measuring 280g of flour is infinitely more accurate than using a cup, where you might accidentally pack the flour down and end up with a dry cake. Finally, an offset spatula is the secret to those smooth frosting sides.
Step by step Instructions
Phase 1: Preparing the Base
- Preheat your oven to 163°C. Grease two 9 inch round pans and line the bottoms with parchment paper. Note: Preheating fully ensures the cake starts rising immediately.
- Cream 170g softened butter and 200g coconut sugar in a large bowl. Beat until the mixture is pale and fluffy. Wait for it to look like a light paste.
- Beat in 3 room temperature eggs, adding them one at a time. Stir in 10ml vanilla bean paste and 240g Greek yogurt. Mix until the batter is smooth.
- Whisk together 280g flour, 7g baking powder, 3g baking soda, and 3g salt.
- Gradually add the dry ingredients to the wet mix, alternating with 120ml whole milk. Stir until just combined. Stop as soon as the flour streaks disappear to avoid overworking the gluten.
Phase 2: The Baking Stage
- Divide the batter evenly between the two pans. Bake for 25 minutes until a toothpick inserted in the center comes out clean.
- Remove the pans and let the cakes cool in the pans for 10 minutes before moving them to a wire rack. Note: Cooling completely is vital, or the frosting will melt into a puddle.
Phase 3: Assembling and Decorating
- Beat 225g softened butter, 360g sifted powdered sugar, 120g Greek yogurt, 5ml vanilla extract, and 1g salt. Mix until the texture is velvety and holds a stiff peak.
- Place one cake layer on a plate. Spread a thick layer of frosting, then top with the second cake.
- Cover the entire cake in a thin crumb coat. Chill in the fridge for 15 minutes. Apply the final smooth layer of frosting.
- Mix 30ml heavy cream with gel food coloring. Pipe decorations on top and garnish with fresh berries.
Common Baking Fixes

When you're making a Senior Year Celebration Cake, the pressure is high. If something looks off, don't panic. Most baking issues have a simple mechanical cause.
Troubleshooting Common Issues
| Issue | Solution |
|---|---|
| Why Your Cake Sank in the Middle | This usually happens because the oven door was opened too early, causing a temperature drop, or the baking soda was expired. If the structure hasn't set, the air bubbles collapse. |
| The Frosting is Too Runny | This is almost always due to the butter being too soft or the Greek yogurt being too watery. |
| Why is the Cake Crumb Too Dense | Over mixing the batter after adding the flour develops too much gluten, which turns a tender cake into a tough one. Always stir "just until combined." |
Common Mistakes Checklist
- ✓ Did you use room temperature eggs?
- ✓ Is the oven actually preheated to 163°C?
- ✓ Did you sift the powdered sugar for the frosting?
- ✓ Did you let the cake cool completely before frosting?
- ✓ Did you avoid over mixing the flour?
Swap for Diet Needs
Depending on who is attending the party, you might need to tweak the ingredients. Since this is a DIY Senior Year Celebration Cake, it's easy to adapt.
| Original Ingredient | Substitute | Why It Works |
|---|---|---|
| Coconut Sugar | Brown Sugar | Similar molasses notes. Note: Slightly sweeter/moister |
| Greek Yogurt | Sour Cream | Similar acidity and fat. Note: Slightly richer taste |
| All Purpose Flour | 1:1 GF Flour Blend | Maintains structure. Note: May be slightly grainier |
| Whole Milk | Almond Milk | Easy liquid swap. Note: Minimal flavor change |
Decision Shortcut
- If you want a more vanilla forward taste, double the vanilla bean paste.
- If you want a lighter frosting, replace 50g of butter with extra Greek yogurt.
- If you need to feed more than 24 people, use the scaling tips below.
Adjusting the Batch Size
If you're making a simple Senior Year Celebration Cake for a small family gathering, you can halve the recipe. Use two 6 inch pans instead of 9 inch. Reduce the baking time by about 20%, but start checking for doneness at 18 minutes.
When halving eggs, beat one egg in a cup and use only half of the liquid.
For larger crowds, I don't recommend doubling the batter in one bowl unless you have a very large professional mixer. Work in batches. For the frosting, you can 2x the recipe easily.
If you're doing a 2x bake, lower the oven temperature by another 10°C and extend the time slightly to ensure the larger volume of batter cooks through without burning the edges.
Baking Myths
Myth: You must cream butter for 10 minutes for a light cake. The truth is that over creaming can actually incorporate too much air, which causes the cake to rise too quickly and then collapse in the center. Three to five minutes until pale is plenty.
Myth: Sifting flour is unnecessary if you use a whisk. While whisking helps, sifting is critical for the powdered sugar in the frosting. Large clumps of sugar are nearly impossible to beat out once the butter is incorporated, leading to "sugar pockets."
Myth: Using "cake flour" is the only way to get a tender crumb. Not true. The acidity in Greek yogurt breaks down gluten strands, which gives you that same tenderness even when using standard all purpose flour.
Storage and Prep
This cake stays moist longer than most because of the yogurt. You can store it in the fridge for up to 5 days. Keep it in an airtight cake carrier or a large container to prevent the frosting from picking up "fridge smells."
For the freezer, I recommend freezing the cake layers before frosting. Wrap each cooled layer tightly in plastic wrap and then foil. They'll stay fresh for 3 months. When you're ready, thaw them in the fridge overnight before frosting.
Zero Waste Tip: If you have leftover cake scraps from leveling the tops, don't toss them. Crumble them up, mix with a bit of the leftover frosting, and roll them into "cake pops." They're a great snack for the baker.
Serving Suggestions
Since the Senior Year Celebration Cake is rich and velvety, it pairs well with something tart. Fresh raspberries or a side of macerated strawberries cut through the sweetness of the coconut sugar.
If you're serving this as part of a larger dessert spread, consider adding some lighter options. For example, if you've already made a Easy High School Sheet Cake, use this round cake as the center piece and the sheet cake for easy grabbing.
For a drink pairing, a cold glass of milk or a tart lemonade works wonders. If it's an evening party, a strong coffee balances the sweetness of the cloud cream frosting perfectly.
This graduation celebration cake is all about the balance of precision and flavor. By following the temperature rules and respecting the room temperature ingredients, you'll end up with a dessert that looks like it came from a bakery but tastes like home.
Whether you're making a graduation cake for boys or a graduation cake for girls, the classic vanilla and berry combo is always a winner. Trust the process, don't over mix, and enjoy the celebration!
Recipe FAQs
What is the best dessert for a graduation party?
This Senior Year Celebration Cake is a top choice. It serves 24 people and stays moist longer than typical cakes due to the Greek yogurt. If you prefer something chilled, consider a no bake dessert.
Why did my cake sink in the middle?
The oven door was likely opened too early. This causes a temperature drop that collapses air bubbles before the structure sets. Expired baking soda can also lead to this collapse.
How to prevent the cake crumb from becoming too dense?
Stir dry ingredients until just combined. Over mixing after adding the flour develops too much gluten, which turns a tender cake into a tough one.
How to get a smooth, professional frosting finish?
Apply a crumb coat and chill for 15 minutes. This initial thin layer seals in crumbs, allowing the final layer of frosting to be applied smoothly.
Is it true that this cake must be eaten immediately to stay moist?
No, this is a common misconception. Because of the Greek yogurt, this cake stays moist in the fridge for up to 5 days when kept in an airtight container.
How to store the cake for long term use?
Wrap cooled cake layers in plastic wrap and foil. This allows you to freeze the layers for up to 3 months before thawing and frosting.
What should I do if the frosting is too runny?
Check the temperature of your butter and yogurt. Runny frosting is almost always caused by butter that is too soft or Greek yogurt that is too watery.
Senior Year Celebration Cake