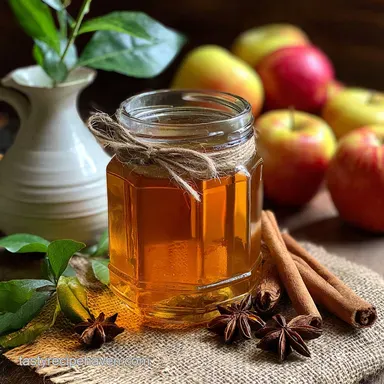
Apple Canning Recipe with Cinnamon
- Time: Active 45 minutes, Passive 20 minutes, Total 1 hour 5 mins
- Flavor/Texture Hook: Crisp, snap bright fruit in a velvety, spice kissed syrup
- Perfect for: Holiday gift giving, pantry stocking, or busy Tuesday night desserts
- Best Apple Canning Recipe with Cinnamon
- Why This Preserving Method Succeeds
- Vital Timeline and Batch Data
- Quality Elements and Flavor Science
- Essential Gear for Safe Preserving
- Precise Preparation and Packing Steps
- Preventing Common Fruit Canning Failures
- Practical Swaps and Flavor Twists
- Shelf Life and Waste Reduction
- Creative Uses for Canned Apples
- Recipe FAQs
- 📝 Recipe Card
The aroma of simmering cinnamon and tart apples hitting a hot pot is basically the scent of home. There is nothing like walking into a kitchen where the steam smells like a cozy autumn afternoon. For years, I avoided apple canning because I was terrified of ending up with seven jars of brown, grainy applesauce.
I wanted the slices to hold their shape, to have that satisfying "shatter" when you bite into them, even months after they were tucked away in the pantry.
But honestly, the first time I tried an old fashioned apple preserves recipe, it was a disaster. I didn't use enough acid, and the apples looked like they’d spent a week in the sun. It was a mushy, unappealing mess.
After a lot of trial and error (and many, many pies), I realized that canning isn't just about heat it's about managing the structure of the fruit itself.
We are going to walk through the process together. It's manageable, it's pantry based, and it's going to make your kitchen smell like a dream. Whether you’re looking for canned apple recipes easy enough for a Saturday morning or you want a reliable apple preserves recipe for canning, this is the one that actually works.
Trust me on this: once you hear those jars pinging on the counter, you'll never go back to the store-bought stuff.
Best Apple Canning Recipe with Cinnamon
The secret to why this recipe actually holds up is the interaction between the sugar and the fruit's cellular walls. When we poach the apples briefly in a spiced syrup before they go into the jars, we’re essentially replacing the air inside the fruit with a stable sugar solution.
This prevents the apples from shrinking and floating to the top of the jar once they're processed. It’s a small step that makes a massive difference in the final look and feel of your preserves.
The Science of Why it Works
Pectin Stabilization: The addition of bottled lemon juice lowers the pH, allowing the pectin to form a stable mesh that keeps the fruit firm. Osmotic Balance: The sugar syrup draws out excess moisture from the apple cells, preventing them from rupturing and turning mushy during the over high heat water bath.
Chef's Note: For a deeper flavor profile, toast your whole cloves in a dry pan for 30 seconds before adding them to the syrup. It releases the oils and adds a smoky depth that ground spices just can't match.
Why This Preserving Method Succeeds
Many beginners make the mistake of using a "cold pack" method where raw fruit is stuffed into jars. While that works for some things, apples are full of air. If you don't heat them first, that air escapes in the canner, causing the syrup to overflow and the fruit to brown.
Our hot pack method ensures the apples are already "exhausted" of air before the lid goes on.
| Aspect | Fresh Slices | This Canning Recipe |
|---|---|---|
| Texture | Snap crisp but browns fast | Firm, tender, and shelf stable |
| Flavor | Raw, acidic | Deeply infused with cinnamon |
| Utility | Immediate use only | Ready for Cinnamon Rolls recipe anytime |
By using a mixture of white and light brown sugar, we get the best of both worlds: the clean sweetness of white sugar and the subtle molasses notes of brown sugar. This creates a syrup that isn't just a liquid it's a sauce in its own right.
If you’ve ever tried an apple canning recipe with cinnamon and sugar from a big box cookbook, you’ll notice this version feels a bit more "old fashioned" because of that brown sugar depth.
Vital Timeline and Batch Data
To keep things manageable, I like to break this down into three distinct phases. Don't try to peel all 5.4 kg (12 lbs) of apples without a plan, or you'll be at the sink for three hours.
If you're working solo, peel and slice in batches of 2 kg to keep the fruit from sitting in the soaking bath for too long, which can lead to waterlogging.
- 1. The Prep Flow (30 mins)
- Wash, peel, and core the apples. Get them straight into the acidulated soaking bath (4 liters water + 120 ml lemon juice) to stop browning immediately.
- 2. The Simmer Flow (15 mins)
- Bring the syrup and apples to a boil. This is where the magic happens and the fruit softens just enough to pack tightly.
- 3. The Finish (20 mins)
- Fill the jars, wipe the rims, and process in the water bath. This is the "waiting game" where the seals are formed.
| Milestone | Target Metric | Why It Matters |
|---|---|---|
| Syrup Temp | Boiling (100°C) | Dissolves sugar and infuses spices |
| Headspace | 1.25 cm (1/2 inch) | Allows for expansion without seal failure |
| Processing Time | 20 minutes | Kills microorganisms for shelf stability |
Working in a rhythm is key. I usually have the syrup simmering on the back burner while I finish the final batch of slicing. It keeps the temperature consistent and ensures the apples don't spend unnecessary time oxidizing. It’s all about the flow!
Quality Elements and Flavor Science
When choosing your apples for an Apple Canning Recipe with Cinnamon, steer clear of "mealy" varieties like Red Delicious. They will turn to mush the second they hit the hot syrup. You want something with high density and good acidity.
Honeycrisp is my top pick because it stays firm, but a mix of Granny Smith and Pink Lady creates a wonderful balance of tart and sweet.
| Ingredient | Science Role | Pro Secret |
|---|---|---|
| 12 lbs Firm Apples | Structural integrity | Use a mix of 3 varieties for complex flavor |
| 5 Cinnamon Sticks | Infusion | Crack the sticks slightly to release more oils |
| 2 tbsp Bottled Lemon Juice | pH regulation | Always use bottled for consistent acidity levels |
| 1 cup Brown Sugar | Hygroscopic sweetener | Adds caramelized notes that white sugar lacks |
A little trick I learned from my grandmother: don't toss the cores and peels. You can simmer them with a bit of water and sugar to make a quick "cook's treat" jelly while the jars are in the canner. In this house, we don't believe in waste.
Using high-quality whole spices rather than ground ones also keeps the syrup clear. Ground cinnamon can make the liquid look muddy or "dirty," which isn't what we want in a beautiful jar of preserves.
Essential Gear for Safe Preserving

You don't need a high tech lab, but a few specific tools make this "manageable" instead of a "chaos." A large water bath canner is the standard, but any pot deep enough to cover the jars by at least 2.5 cm of water will work.
I use a stainless steel pot because it won't react with the acidic lemon juice in our soaking bath.
- Large Stockpot: For simmering the syrup and apples.
- Water Bath Canner: Or a very deep pot with a rack at the bottom.
- Jar Lifter: Absolutely essential for moving hot jars safely.
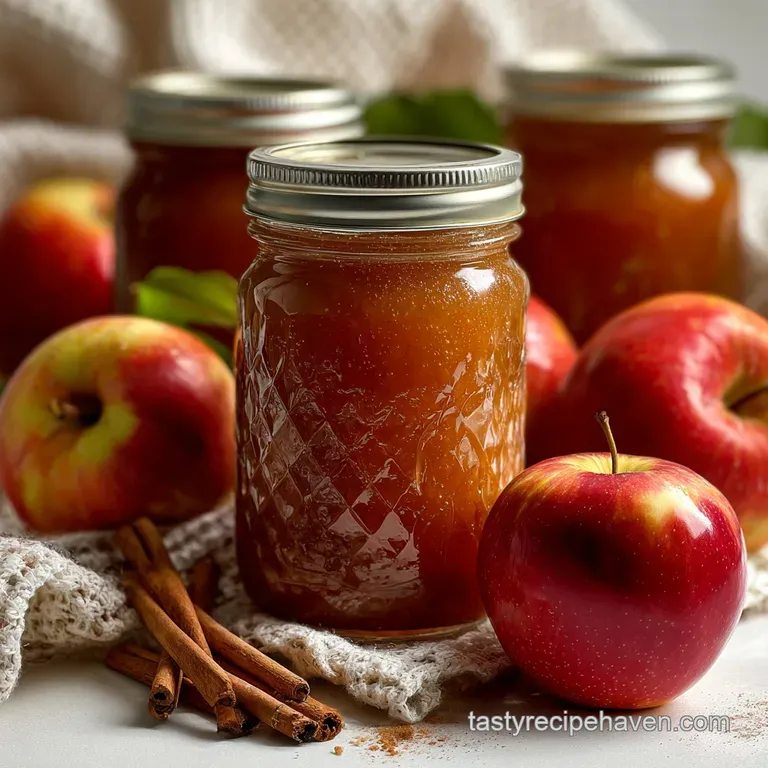
- 7 Pint Jars: Cleaned and kept warm to prevent thermal shock.
- Bubble Remover: Or a simple plastic spatula to clear air pockets.
Using a bubble remover is more important than people think. Those tiny trapped bubbles can expand during processing and push syrup out from under the lid (a mess called siphoning). If you don't have a dedicated tool, a thin silicone spatula works perfectly.
Just don't use a metal knife, as it can scratch the glass and lead to breakage later.
Precise Preparation and Packing Steps
Let's get into the nitty gritty. This is where we turn those 12 lbs of fruit into gold. Remember, we are aiming for 7 pint jars. If you have a bit of extra fruit, just keep it in the fridge for an Apple Fritter Bread recipe the next morning.
- Prepare the soaking bath. Mix 4 quarts cold water and 0.5 cup lemon juice in a massive bowl. Note: This prevents oxidation while you peel.
- Peel and slice apples. Cut into 1.5 cm thick wedges. Drop them immediately into the bath.
- Simmer the syrup. Combine 5 cups water, 3 cups white sugar, 1 cup brown sugar, cinnamon sticks, and cloves in your large pot. Bring to a rolling boil until the sugar is completely dissolved.
- Drain and poach. Drain the apples and add them to the boiling syrup. Simmer for 5 minutes until the apples are slightly translucent but still firm.
- Add final acid. Stir in the 2 tbsp of bottled lemon juice just before jar filling. Note: Bottled juice has a guaranteed pH for safety.
- Pack the jars. Use a slotted spoon to fill warm jars with apples, leaving space at the top.
- Add the liquid. Pour hot syrup over the apples, leaving 1.25 cm (1/2 inch) headspace.
- Remove air bubbles. Run your tool around the inside of the jar. Watch for the level to drop and top off with syrup if needed.
- Seal and process. Wipe the rims with a damp cloth, apply lids, and tighten rings to fingertip tight.
- Water bath. Submerge jars in boiling water. Process for 20 minutes until the timer rings.
After the 20 minutes are up, turn off the heat and let the jars sit in the water for 5 minutes. This "cooling down" period helps prevent the liquid from rushing out of the jars when you lift them into the cooler kitchen air.
It’s the secret to keeping your jars full and your seals tight.
Preventing Common Fruit Canning Failures
Canning can be intimidating, but most issues come down to temperature or timing. If your apples are floating, they likely weren't heated through enough in step 4. They still have air in their "lungs," and that air makes them buoyant. It’s not a safety issue, but it doesn't look as professional.
Why Your Apples Turned Mushy
This usually happens if the apples were overripe to begin with or if they were simmered too long in the syrup. Remember, they will continue to cook while they are in the water bath. You want them to feel "flexible" but not "soft" when they go into the jar.
| Problem | Root Cause | Solution |
|---|---|---|
| Floating Fruit | Trapped air in fruit cells | Simmer longer in syrup before packing |
| Liquid Loss | Siphoning from temp spikes | Let jars rest in hot water 5 mins post boil |
| Darkening | Oxidation or low acid | Increase lemon juice or use ascorbic acid |
If your syrup looks cloudy, don't panic. This often happens if you use ground spices instead of whole cinnamon sticks and cloves. It could also be from the starch in the apples leaching out. As long as the seal is tight and the jar was processed correctly, it's perfectly safe to eat. It just has "character!"
Practical Swaps and Flavor Twists
While I love this Apple Canning Recipe with Cinnamon exactly as it is, sometimes you have to work with what's in the pantry. If you're out of brown sugar, you can use all white sugar, though you’ll lose that deep "old fashioned" color.
Just don't mess with the lemon juice that's the safety guard that keeps the botulism away.
| Original Ingredient | Substitute | Why It Works |
|---|---|---|
| Light Brown Sugar | Dark Brown Sugar | Deeper flavor, but might darken the fruit significantly |
| Cinnamon Sticks | 1 tsp Ground Cinnamon | Note: Will make syrup cloudy but adds intense spice |
| Bottled Lemon Juice | Citric Acid (1/2 tsp) | Maintains acidity without adding citrus flavor |
If you want to get fancy, try adding a few slices of fresh ginger to the syrup. It gives the apples a zesty kick that pairs beautifully with savory dishes, like a pork roast or even as a side to a Mac And Cheese recipe.
- For Pie Filling
- Add 1 tablespoon of cornstarch (mixed with water) to the jar after opening, then bake.
- For Topping
- Keep the slices thick for a "chunky" texture on ice cream.
- For Gifts
- Place one of the cinnamon sticks from the pot into each jar for a gorgeous visual.
Shelf Life and Waste Reduction
These jars are best enjoyed within 12 to 18 months. Store them in a cool, dark place exposure to light can cause the beautiful golden color to fade into a dull grey over time. Always check the seal before opening; the lid should be sucked down tight and shouldn't flex when you press the center.
Zero Waste Tips:Apple Scrap Vinegar: Take those peels and cores, put them in a jar with water and a bit of sugar, and let them ferment for a few weeks. It’s the best vinegar you’ll ever taste.
Syrup Leftovers: If you have extra syrup, don't pour it down the drain! Boil it down until it’s thick and use it as a glaze for ham or a sweetener for tea.
Once a jar is opened, it needs to live in the fridge. It’ll stay fresh for about two weeks, but let’s be honest: in most houses, a jar of cinnamon apples doesn’t last more than two days. It’s just too easy to grab a spoon and dig in right out of the fridge.
Creative Uses for Canned Apples
The best part of this Apple Canning Recipe with Cinnamon is how versatile the final product is. Sure, you can eat them plain, but they are the ultimate "shortcut" ingredient for busy nights. Because the apples are already cooked and seasoned, you've done 90% of the work for a dozen different recipes.
One of my favorite ways to use them is in a quick "mock" cobbler. I just dump a pint of apples into a baking dish, top it with a mix of oats, butter, and flour, and bake until bubbly. It takes five minutes to prep and tastes like you spent the whole afternoon in the kitchen.
They are also incredible stirred into morning oatmeal or yogurt. The syrup acts as the sweetener, and the apples add a nice textural contrast. If you're feeling adventurous, try dicing the slices and folding them into a muffin batter.
Since they’ve already been poached, they won't release a ton of water and make your muffins soggy, which is a common problem with fresh fruit. Honestly, having these on the shelf is like having a "delicious" insurance policy for your kitchen. Right then, I think you're ready to get started.
Just take it one step at a time, and don't forget to listen for those pings!
Recipe FAQs
What does putting cinnamon on apples do?
It infuses warmth and depth. Cinnamon complements the apple's natural tartness, adding a sweet, aromatic spice that enhances its overall flavor profile.
Can cinnamon apples be canned?
Yes, absolutely. Canning is a fantastic way to preserve cinnamon apples, allowing you to enjoy their warm, spiced flavor long after apple season ends. The key is to use a proper canning method like this recipe to ensure texture and safety.
How much cinnamon to add to an apple?
Start with about 1/2 teaspoon ground cinnamon per medium apple, or 1 whole cinnamon stick for a batch. Adjust to your preference; this recipe uses whole cinnamon sticks for a more subtle infusion.
How much cinnamon to put in stewed apples?
For a pot of stewed apples, use 1 to 2 whole cinnamon sticks or 1 to 2 teaspoons of ground cinnamon. This recipe uses whole sticks for a clear, flavorful syrup that is perfect for canning.
Why do my canned apples turn mushy?
This usually happens from over ripeness or over simmering. Apples with a firmer texture and shorter simmering time in the syrup (before canning) hold their shape better during the water bath processing.
How do I prevent canned apples from floating?
Ensure the apples are fully heated through before packing. Simmering them in the syrup until slightly translucent, rather than just packing them raw, removes trapped air and prevents them from becoming buoyant.
Can I use ground cinnamon instead of sticks?
Yes, but it will affect the syrup's clarity. Ground cinnamon imparts a strong flavor but can make the syrup cloudy. For a clearer syrup, whole sticks are preferred, similar to how you'd achieve clarity in a delicate broth.
Apple Canning Recipe Cinnamon