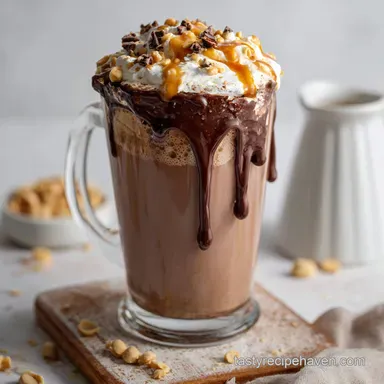
Peanut Butter Chocolate Milkshake: Rich & Velvety
- Time: Active 5 minutes, Passive 0 minutes, Total 5 minutes
- Flavor/Texture Hook: Velvety cocoa base with a salty, nutty finish and crunchy cacao nib shatter.
- Perfect for: High protein dessert cravings, post workout treats, or budget-friendly home "date nights."
- Creating the Best Peanut Butter Chocolate Milkshake
- The Secret Science of Creamy Blends
- Fast Prep for Instant Cravings
- Selecting Quality Ingredients for Deep Flavor
- Essential Tools for a Velvety Finish
- Step-By-Step Guide to Blending Excellence
- Fixing Common Milkshake Blunders
- Simple Variations for Creative Twists
- Storing and Repurposing Your Shake
- Presentation Tips for Maximum Wow
- Peanut Butter Chocolate Milkshake FAQs
- 📝 Recipe Card
Creating the Best Peanut Butter Chocolate Milkshake
There is a specific sound a blender makes when it hits the "sweet spot" of a thick shake a deep, low frequency hum that tells you the vortex has finally conquered the frozen masses. I remember the first time I tried to make a version of this in my tiny college apartment.
I used cheap syrup and way too much milk, resulting in a watery mess that tasted more like sad chocolate milk than an indulgence. It was a lesson in the physics of frozen fats that I never forgot.
Now, when I pull the jar of creamy peanut butter from the pantry, the aroma alone triggers a Pavlovian response. This isn't just a drink; it's a calculated construction of temperature and texture.
We are looking for that specific moment where the straw struggles just enough to let you know the shake is substantial, but gives way to a silky, chilled flow that coats the palate. It is the ultimate comfort for those afternoons when the pavement is radiating heat and only a cold, nutty treat will do.
We are going to move away from the "more is better" philosophy that ruins most shakes. You don't need a gallon of ice cream or expensive gadgets to reach this level of luxury. By using a few smart pantry staples and one specific dairy swap, you can create something that rivals any boutique ice cream shop for a fraction of the cost.
Let’s get the blender ready and talk about why this specific combination of ingredients is a total win for your taste buds and your wallet.
The Secret Science of Creamy Blends
The Emulsion Bridge: Peanut butter contains natural lecithins and fats that, when blended, help stabilize the air bubbles in the ice cream, resulting in a much denser, slower melting structure.
Acidic Counterbalance: The inclusion of Greek yogurt provides lactic acid, which chemically "brightens" the heavy fats of the chocolate and peanut butter, preventing the flavor from becoming one dimensional or cloying.
Hygroscopic Depth: Dutch processed cocoa powder is treated with alkali to neutralize its acidity, allowing it to provide a much darker, earthier chocolate note that anchors the sweetness of the ice cream.
Viscosity Control: Chilling the milk and the blender jar ensures that the kinetic energy from the blades doesn't immediately melt the ice cream crystals, preserving the "frosty" mouthfeel.
| Texture Target | Milk Ratio | Blend Time | Visual Cue |
|---|---|---|---|
| Ultra Thick | 0.25 cup | 20 seconds | Heavy ridges on top |
| Classic Sip | 0.5 cup | 30 seconds | Smooth, slow vortex |
| Thin/Smooth | 0.75 cup | 45 seconds | Flat surface, fast swirl |
Choosing the right consistency is the first step in your journey toward the Peanut Butter Chocolate Milkshake. If you prefer eating your shake with a spoon, stick to the lower milk ratio, whereas the classic sippable version thrives with the measurements we've laid out in the official recipe data.
Fast Prep for Instant Cravings
When we talk about precision in the kitchen, we aren't just being fussy. For a shake to be truly successful, the temperature differential is everything. If your ice cream is too soft, you'll end up with a soup. If your milk is room temperature, you’re fighting a losing battle against physics.
I always suggest putting your glass in the freezer about ten minutes before you start. It’s a small step that makes a massive difference in how long that first sip stays frosty.
Chef’s Tip: If your peanut butter has separated (natural style), give it a vigorous stir or a quick 10 second zap in the microwave to make it fluid before measuring. This ensures it incorporates into the cold milk rather than turning into "peanut butter pebbles."
| Ingredient | Science Role | Pro Secret |
|---|---|---|
| Chocolate Ice Cream | Primary Fat & Sugar | Use "premium" brands with low overrun (less air) for a denser, richer shake. |
| Peanut Butter | Emulsifier & Flavor | Natural creamy varieties provide a more intense roasted nut flavor than stabilized "no stir" brands. |
| Greek Yogurt | Texture Stabilizer | The high protein content keeps the shake from "breaking" or separating as it sits. |
The interaction between the ice cream and the yogurt is where the magic happens. While the ice cream provides the sweetness, the yogurt adds a body that stays thick even as the temperature rises. This is a trick I learned while trying to replicate professional shakes on a budget, and it's a technique I also use when making my No Bake Chocolate Peanut recipe for a quick afternoon pick me-up.
Selecting Quality Ingredients for Deep Flavor
To make a Butter Chocolate Milkshake that truly stands out, you need to be intentional about your components. We aren't just throwing things in a jar; we are layering flavors. For example, using Dutch processed cocoa powder instead of a syrup means you get all the chocolate intensity without the extra corn syrup and artificial preservatives found in most store-bought bottles.
- 1.5 cups (225g) premium chocolate ice cream: Why this? The base provides both the chill and the primary sweet notes.
- 0.5 cup (122g) whole milk, chilled: Why this? High fat content ensures a velvety mouthfeel compared to skim.
- 0.25 cup (60g) plain full fat Greek yogurt: Why this? Adds thickness and a subtle tang that balances the sugar.
- 3 tbsp (48g) natural creamy peanut butter: Why this? Pure roasted peanut flavor without added palm oils.
- 1 tbsp (5g) Dutch processed cocoa powder: Why this? Deepens the chocolate profile without adding excessive sweetness.
- 1 tsp (3g) cacao nibs: Why this? Provides a bitter, crunchy contrast to the smooth shake.
- 1 pinch (0.5g) flaky sea salt: Why this? Salt is a flavor enhancer that makes the chocolate "pop."
| Original Ingredient | Substitute | Why It Works |
|---|---|---|
| Whole Milk | Oat Milk (Full Fat) | High starch content mimics the creaminess of dairy milk very well. |
| Greek Yogurt | Sour Cream | Similar acidity and fat levels. Note: Adds a slightly richer, savory note. |
| Dutch Cocoa | Raw Cacao Powder | More antioxidants and a fruitier, sharper chocolate flavor profile. |
Using these substitutes won't ruin the experience, but they will subtly shift the character of the Peanut Butter Chocolate Milkshake. For instance, if you're looking for an even more decadent experience, similar to a Vegan Dessert recipe, swapping in a high-quality oat milk can add a lovely toasted grain flavor that complements the peanuts perfectly.
Essential Tools for a Velvety Finish
You don't need a $500 blender to make a great shake, but you do need to understand the limitations of what you have. A standard high speed blender (like a Ninja or Vitamix) will handle this in seconds, but a smaller bullet style blender works just as well.
The key is the "Vortex" the circular motion that pulls the heavy ice cream down into the spinning blades.
If you are using a lower powered blender, I have a trick for you: freeze your peanut butter in small "dollops" on a piece of parchment paper first. This prevents the motor from struggling to incorporate a big glob of room temperature nut butter into the frozen ice cream. Also, always keep a long, thin spatula nearby.
You’ll likely need to scrape down the sides once to ensure every bit of that cocoa powder is fully integrated and not stuck to the dry walls of the jar.
Step-by-step Guide to Blending Excellence
- Chill the glass. Place your serving glass in the freezer. Note: This prevents the shake from melting the second it touches the glass.
- Pour the milk. Add 0.5 cup (122g) chilled whole milk to the blender base first. Note: Liquids at the bottom help the blades spin freely without cavitating.
- Add the yogurt. Spoon in 0.25 cup (60g) Greek yogurt. Note: The yogurt acts as a buffer between the liquid milk and the solid ice cream.
- Introduce the peanut butter. Add 3 tbsp (48g) peanut butter directly into the center. Note: Placing it in the middle prevents it from sticking to the blender walls.
- Sift the cocoa. Add 1 tbsp (5g) Dutch processed cocoa powder and the pinch of sea salt. Note: Salt is crucial for balancing the sweetness of the Peanut Butter Chocolate Milkshake.
- Load the ice cream. Scoop 1.5 cups (225g) chocolate ice cream on top of the other ingredients. Look for "hard frozen" scoops for the best texture.
- Pulse and blend. Pulse five times to break up the ice cream, then blend on medium high for 20-30 seconds until the mixture is glossy and uniform.
- Add the crunch. Toss in 1 tsp (3g) cacao nibs and pulse twice just to distribute. Stop before they turn to dust to keep that "shatter" texture.
- Pour and serve. Transfer to your chilled glass and enjoy immediately while the frost is still visible on the rim.
Fixing Common Milkshake Blunders
One of the most frustrating things is pouring a shake only to find a massive "plug" of unblended peanut butter at the bottom. This usually happens because of the order of operations. If you put the heavy ice cream in first, it crushes the other ingredients against the blades, preventing a proper mix.
The Problem of the "Thin Shake"
If your shake comes out looking more like a chocolate latte, you've likely over blended or used milk that wasn't cold enough. The heat from the blender's motor is real if you run it for two minutes, you're essentially cooking your shake. Keep the blend time under 45 seconds.
If it's already too thin, you can "save" it by blending in two additional ice cubes, though this will slightly dilute the flavor.
The Hidden Cocoa Clumps
Cocoa powder is hydrophobic, meaning it hates water. If you don't blend it thoroughly, you'll end up with "flavor bombs" of dry, bitter powder. Always ensure the cocoa is sandwiched between the yogurt and the ice cream so it's forced into the liquid phase during the initial pulse.
| Problem | Root Cause | Solution |
|---|---|---|
| Grainy Texture | Un dissolved cocoa or salt | Blend the liquids, cocoa, and salt for 10 seconds before adding ice cream. |
| Separation | Lack of stabilizers | Increase Greek yogurt by 1 tbsp or use a higher fat ice cream. |
| Weak Peanut Flavor | Dilution from milk | Use 1 tbsp of peanut flour or PB2 in addition to the creamy peanut butter. |
- ✓ Always add liquids to the blender jar first to create a lubricant for the blades.
- ✓ Never use "frozen dessert" products labeled as such; look for the word "Ice Cream" to ensure real dairy fats.
- ✓ Pat the measuring spoon with a tiny bit of oil before scooping peanut butter; it will slide right off.
- ✓ Pulse the blender at the start rather than just turning it on high to prevent air pockets from forming around the blade.
- ✓ Taste a small drop before pouring; if it's too sweet, add a tiny extra pinch of salt to balance it out.
Simple Variations for Creative Twists
While the classic Peanut Butter Chocolate combination is a heavyweight champion, there are ways to adjust this to fit different moods. For a "Morning Boost" version, you can replace half of the milk with chilled espresso. The bitterness of the coffee plays incredibly well with the earthiness of the Dutch cocoa.
If you are looking for something lighter, you can actually make a Peanut Butter Chocolate shake with frozen bananas instead of ice cream. It changes the flavor profile to be more "smoothie like," but it's a great budget friendly swap when the ice cream tub is empty. For those who love a bit of nostalgia, try adding a handful of crushed pretzels on top instead of cacao nibs for a salty, malty crunch that reminds me of my Peanut Butter Cookies recipe.
- For Two (2x)
- Use 3 cups ice cream, 1 cup milk, and 0.5 cup yogurt. Reduce the salt slightly (just a large pinch) to avoid over seasoning.
- For a Crowd (4x)
- Work in two separate batches. Blenders struggle with the volume of four shakes, and the bottom half will melt while the top stays frozen.
- Single Small Serving (1/2)
- Use a small immersion blender or a "bullet" jar. Keep the cacao nibs at the full teaspoon for the best texture contrast.
Storing and Repurposing Your Shake
Let's be honest: a Chocolate Milkshake is best enjoyed the second it leaves the blender. However, life happens. If you can't finish it, don't just leave it on the counter to become a lukewarm puddle. You can pour the leftovers into a silicone popsicle mold.
These "shake sicles" are a brilliant zero waste hack and make for a great snack the next day.
In the fridge, the shake will only stay "thick" for about 20 minutes. After that, the ice crystals melt and the air incorporated during blending escapes. If you must store it in the fridge, keep it in an airtight Mason jar.
Before drinking, give it a very vigorous shake or a quick 5 second re blend with a single ice cube to restore some of the frothiness.
Zero Waste Tip: Don't rinse that "empty" peanut butter jar yet! If you have just a tablespoon left at the bottom, pour your warm milk into the jar, shake it up to loosen the peanut butter, and then pour that "peanut milk" into your blender.
It captures every last bit of flavor and saves you a messy cleanup.
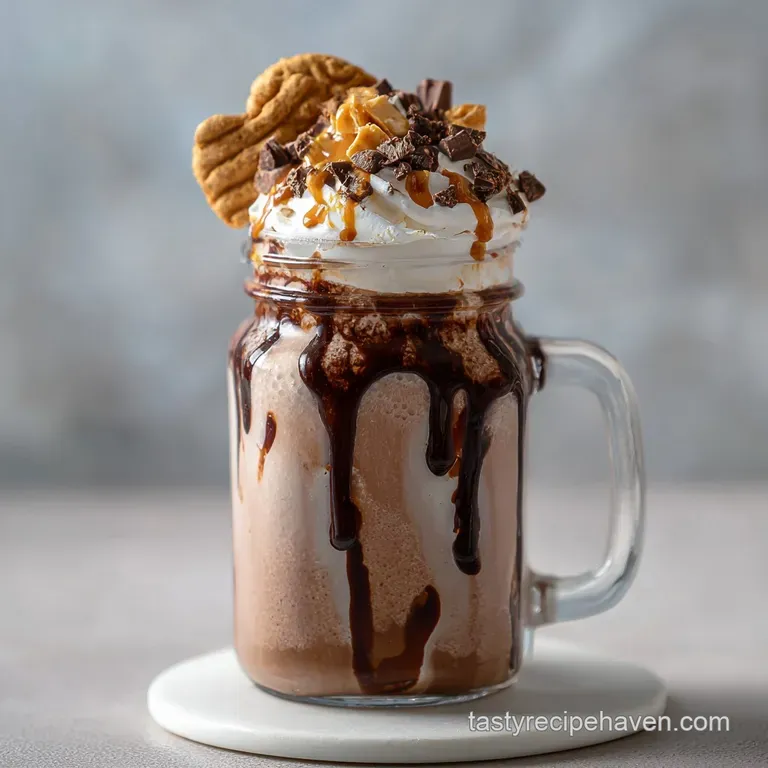
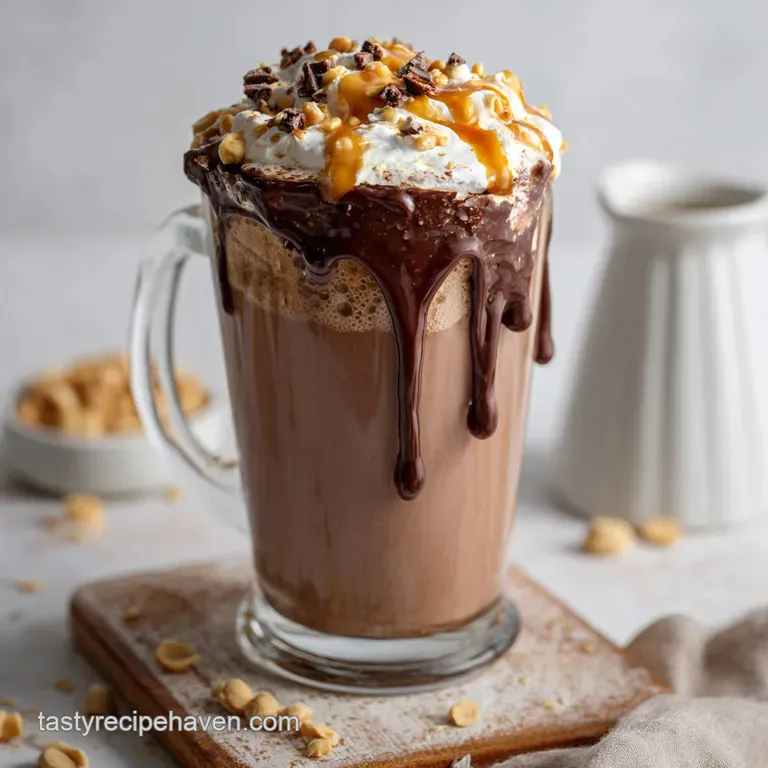
Presentation Tips for Maximum Wow
Presentation isn't just about looking "fancy" it affects how we perceive the flavor. A tall, chilled glass makes the shake feel colder, and a wide straw allows those cacao nibs to actually reach your mouth instead of getting stuck.
If you want to go the extra mile, take a spoon and "paint" a few swirls of peanut butter on the inside of the glass before pouring. It looks professional and gives you little bursts of pure peanut flavor as you drink.
I also love to top this with a light dusting of extra cocoa powder or even some crushed peanuts for extra texture. If you're serving this for a special occasion, like after a meal featuring a Valentine Chocolate Heart recipe, a small sprig of mint or a single raspberry can provide a beautiful color contrast against the deep browns of the Peanut Butter Chocolate Milkshake. Trust me, taking thirty seconds to garnish makes the experience feel like a true event rather than just a quick snack. Keep it simple, keep it sweet, and most importantly, keep it cold!
Peanut Butter Chocolate Milkshake FAQs
What are the key ingredients for an ultra thick peanut butter chocolate milkshake?
Use premium chocolate ice cream, full fat Greek yogurt, and whole milk. These ingredients provide the necessary fat and protein content for a rich, dense texture without a high powered blender.
How can I prevent my milkshake from becoming too thin?
Chill your serving glass and ensure your milk is very cold. Using frozen ingredients and a cold glass slows down the melting process, maintaining the shake's thickness.
Can I substitute dairy milk in this recipe?
Yes, but use a full fat version for best results. High fat oat milk works well, mimicking the creaminess of dairy milk, similar to how it enhances texture in other recipes like No Bake Vegan Salted Caramel Tart.
What is the secret to a deep chocolate flavor without syrup?
Use Dutch processed cocoa powder. This type of cocoa has a darker, earthier chocolate flavor that balances the sweetness of the ice cream and peanut butter.
How should I layer ingredients in the blender for the best mix?
Start with liquids, then soft ingredients, and finally the frozen ice cream. This order helps the blender blades spin freely and efficiently incorporate everything, preventing air pockets and ensuring a smooth blend.
What's the best way to add crunchy elements like cacao nibs?
Add them last and pulse only a few times. This preserves their "shatter" texture and prevents them from becoming completely pulverized into the shake.
Can I make this milkshake ahead of time?
No, it's best enjoyed immediately for optimal texture. Leftovers can be frozen into "shake sicles" or re-blended with an ice cube, but they won't retain the original thick, frosty consistency.
Peanut Butter Chocolate Milkshake