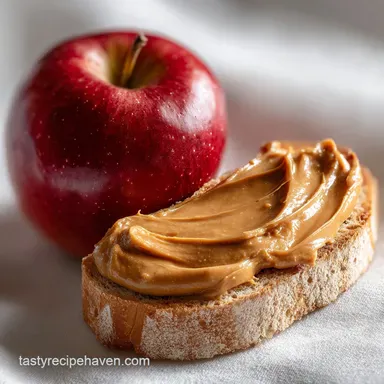
Apple and Peanut Butter Snack
- Time: Active 10 minutes, Passive 0 minutes, Total 10 minutes
- Flavor/Texture Hook: Shattering granola over velvety cinnamon peanut butter
- Perfect for: Healthy after school snack idea with apple and peanut butter for kids
- Why This Snack Always Wins
- Quick Stats for Busy Parents
- Fresh Picks and Pantry Staples
- Essential Gear for Easy Prep
- How to Build the Rings
- Fixing the Soggy Apple Dilemma
- Smart Swaps for Allergy Safety
- Scaling the Recipe for Groups
- Myths About Apple Prep
- Storage and Zero Waste Tips
- Tasty Sides for Snack Time
- Recipe FAQs
- 📝 Recipe Card
Imagine the sound of a cold, firm apple being sliced into perfect rings. The juice sprays slightly, and that sharp, fresh aroma fills the kitchen. This healthy apple and peanut butter snack is the perfect after school treat for your kids.
I used to just hand my kids a whole apple and a jar of peanut butter, but the mess was legendary and the fruit usually ended up brown and abandoned under the sofa.
Then I realized that if I treated the apple like a canvas, everything changed. By cutting them into rings rather than wedges, you get more surface area for the "good stuff" like dark chocolate and coconut.
It turns a boring piece of fruit into something that feels like a decadent pastry, but without the sugar crash later. Honestly, it's the only way we eat them now.
We've all been there: you prep a beautiful snack, and five minutes later, it looks like a rusty relic. This method fixes that entirely. It’s all about the prep work and the order of operations.
Let's get into how we keep things bright, crunchy, and kid approved without spending more than 10 minutes in the kitchen.
Why This Snack Always Wins
I spent years wondering why my sliced apples turned into a soggy mess while the ones at the fancy cafes stayed white and crisp. It isn't magic, it's just basic kitchen chemistry. When you understand the "why," you can stop stressing about the "how." This After School Snack Idea with Apple and Peanut Butter For Kids works because it respects the structure of the fruit.
- Oxidation Control: Citric acid in the lemon juice creates a low pH environment on the apple's surface, which denatures the polyphenol oxidase enzyme responsible for browning.
- Osmotic Balance: The cold water bath keeps the apple cells hydrated and turgid, ensuring that "snap" when you bite into it.
- Protein Satiety: Peanut butter provides the necessary fats and proteins to slow the absorption of the fructose in the apple, preventing blood sugar spikes.
- Texture Contrast: The granola and coconut provide a mechanical "crunch" that satisfies the brain's desire for varied textures in a single mouthful.
The Science of Why it Works
The lemon juice acts as a sacrificial antioxidant, reacting with oxygen before the apple's enzymes can. This preservation of the cell walls ensures the fruit maintains a crisp, shattering bite rather than becoming mealy.
| Method | Prep Time | Texture | Best For |
|---|---|---|---|
| Raw Rings | 10 minutes | Crisp and juicy | Hot afternoons |
| Warm Baked | 20 minutes | Soft and jammy | Cold rainy days |
| Dehydrated | 4 hours | Chewy and tough | Long road trips |
Choosing the right method depends on your schedule. For a School Snack Idea with Apple and Peanut Butter For Kids, the raw rings are undoubtedly the winner because they require zero cooking.
If you have more time, baking them for a few minutes can turn the peanut butter into a molten sauce, but for a quick fix, raw is king.
Quick Stats for Busy Parents
Before you start slicing, it's helpful to see what you're working with. I like to call this the "decision phase." Are you making this for one toddler or a whole soccer team? This snack is incredibly easy to scale, but knowing the baseline helps you stay organized.
This School Snack Idea with Apple and Peanut Butter For Kids is designed to be manageable even when the kitchen feels like a high traffic zone.
| Servings | Apple Count | Peanut Butter | Prep Time |
|---|---|---|---|
| 2 Kids | 1 Large Apple | 1/4 cup | 5 minutes |
| 4 Kids | 2 Large Apples | 1/2 cup | 10 minutes |
| 8 Kids | 4 Large Apples | 1 cup | 15 minutes |
Chef's Tip: If you're using natural peanut butter (the kind that separates), give it a vigorous stir, then pop the whole jar in the fridge for 10 minutes before you start. It helps the oil re emulsify so your toppings don't slide off the apple ring like they're on a water slide.
Fresh Picks and Pantry Staples
Selecting your fruit is the most important step. I usually go for Honeycrisp or Fuji because they have a high "shatter" factor. You want an apple that fights back when you bite it. If you use a Red Delicious, it’s going to turn to mush the second the peanut butter hits it.
Trust me, I've made that mistake so you don't have to.
- Honeycrisp or Fuji Apples: 2 large. Why this? These varieties hold their shape and provide the necessary structural "snap."
- Cold Water: 2 cups. Why this? Keeps the fruit chilled and prevents premature softening.
- Fresh Lemon Juice: 1 tablespoon. Why this? The essential acid needed to block the browning process.
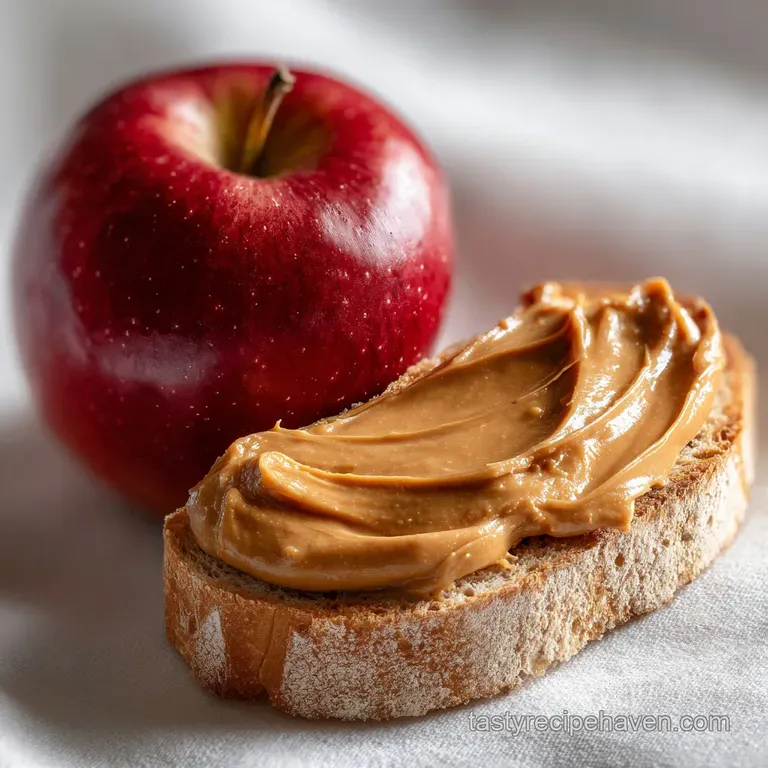
- Creamy Natural Peanut Butter: 1/2 cup (120g). Why this? High protein content and velvety texture for easy spreading.
- Ground Cinnamon: 1/2 teaspoon. Why this? Adds warmth and masks any slight tang from the lemon juice.
- Honey: 1 teaspoon. Why this? Acts as a "glue" for the lighter toppings like coconut.
- Low sugar Granola: 1/4 cup (30g). Why this? Provides a major crunch factor without excessive sweetness.
- Mini Dark Chocolate Chips: 1 tablespoon. Why this? A small hit of antioxidants and a treat for the kids.
- Unsweetened Shredded Coconut: 1 tablespoon. Why this? Adds a subtle nutty flavor and beautiful visual contrast.
| Ingredient | Science Role | Pro Secret |
|---|---|---|
| Lemon Juice | Oxidation Inhibitor | Use fresh, not bottled for better pH |
| Peanut Butter | Emulsified Fat | Stir natural oils well before measuring |
| Honeycrisp Apple | Structural Integrity | Keep skins on for extra fiber and color |
If your kids love the combo of nuts and sweetness, they might also enjoy making these Peanut Butter Blossom Cookies recipe. It’s a great way to use up any leftover peanut butter from this snack prep. Using fresh ingredients really makes this After School Snack Idea with Apple and Peanut Butter For Kids stand out from the store-bought versions.
Essential Gear for Easy Prep
You don't need a professional kitchen, but a few specific tools will make this Apple and Peanut Butter For Kids recipe look like it came from a gourmet cafe. I once tried to core an apple with a butter knife. It was a disaster, and I ended up with a bruised apple and a very frustrated toddler.
Spend the five bucks on a real corer.
- Apple Corer: This is non negotiable for the "ring" look. It removes the seeds cleanly while leaving the structural circle intact.
- Mandoline or Sharp Chef's Knife: A mandoline ensures every slice is exactly the same thickness, which is great for even topping distribution.
- Small Mixing Bowl: To whisk your peanut butter, cinnamon, and honey together into a velvety spread.
- Large Shallow Bowl: For the lemon water bath.
- Offset Spatula: This makes spreading the peanut butter much cleaner than using a regular spoon.
How to Build the Rings
Ready to get started? This process is fast, so have your toppings lined up like a little assembly line. This Apple and Peanut Butter For Kids method ensures that every bite has the perfect ratio of fruit to fat to crunch.
- Prep the Bath: Combine 2 cups of cold water and 1 tablespoon of fresh lemon juice in a large bowl. Note: This prevents the fruit from browning while you work.
- Core the Fruit: Push your apple corer through the center of the 2 large Honeycrisp apples. Do this firmly until you hear the snap of the core releasing.
- Slice into Rings: Cut the apples into 1/4 inch thick rings. Stop once you have even, flat circles.
- Soak the Slices: Place the rings in the lemon water for 3 minutes. Look for the flesh to remain bright white.
- Dry Thoroughly: Remove slices and pat them very dry with a clean kitchen towel. Note: Peanut butter won't stick to a wet apple.
- Mix the Spread: In a small bowl, whisk 1/2 cup of peanut butter, 1/2 teaspoon of cinnamon, and 1 teaspoon of honey. Stir until the mixture is silky and velvety.
- Apply the Base: Spread a generous layer of the mixture onto each apple ring. Ensure the coating reaches almost to the edges.
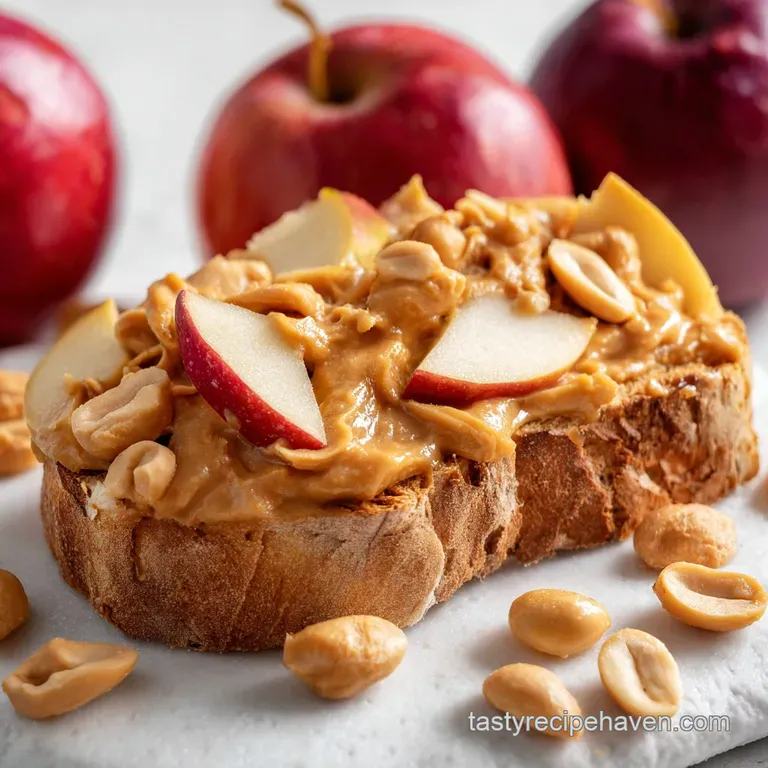
- Add the Crunch: Sprinkle 1/4 cup of granola and 1 tablespoon of shredded coconut over the rings. Press down slightly so they adhere.
- Finish with Chocolate: Scatter 1 tablespoon of mini dark chocolate chips over the top. Watch for the chips to nestle into the peanut butter.
- Serve Immediately: Plate the rings and serve while the apples are still cold and crisp.
For a more portable protein hit, I sometimes whip up this No Bake Chocolate Peanut recipe. It uses similar pantry staples but in a grab and-go ball format. When making the Apple and Peanut Butter For Kids, I find that the assembly line method keeps the kitchen much cleaner.
Fixing the Soggy Apple Dilemma
Even the simplest recipes have their pitfalls. If your apples are turning brown or your peanut butter is sliding off like a melting ice cream cone, don't worry. I've ruined plenty of snacks learning these lessons. Most problems come down to moisture or temperature.
Why Your Apples Turn Brown
The main culprit is oxygen. If you skip the lemon bath or don't use enough acid, the enzymes in the apple react with the air. This doesn't just look bad; it actually changes the texture of the fruit, making it softer and less satisfying.
Why Your Toppings Slide Off
This is usually because the apple ring wasn't dried properly. Water and oil (from the peanut butter) do not mix. If there is a thin film of lemon water on that slice, the peanut butter will just glide right off.
| Problem | Root Cause | Solution |
|---|---|---|
| Brown Slices | Air Exposure | Submerge in lemon water immediately |
| Runny Butter | Natural Separation | Chill butter for 10 mins before spreading |
| Toppings Fall | Surface Tension | Press toppings firmly into the honey PB mix |
Common Mistakes Checklist:
- ✓ Using a dull knife (this bruises the apple cells and speeds up browning)
- ✓ Forgetting to pat the slices dry (moisture is the enemy of adhesion)
- ✓ Slicing the apples too thin (they won't be able to support the weight of the toppings)
- ✓ Using "old" apples that are already mealy (starting with fresh fruit is non negotiable)
- ✓ Over soaking in lemon water (this can make the apples taste too tart)
Smart Swaps for Allergy Safety
Not everyone can do peanuts, and that's okay. We have a lot of friends with allergies, so I've tested almost every nut free butter on the market. The good news is that the mechanics of this Apple and Peanut Butter For Kids recipe remain the same regardless of what spread you use.
| Original Ingredient | Substitute | Why It Works |
|---|---|---|
| Peanut Butter | Sunflower Seed Butter | Same creamy texture. Note: Nut free and school safe. |
| Lemon Juice | Pineapple Juice | High acidity. Note: Adds a sweeter, tropical punch. |
| Honey | Maple Syrup | Liquid sugar bond. Note: Makes the snack fully vegan. |
If you have a child who prefers a softer texture, you can actually bake these rings. Place the prepared rings (minus the chocolate) on a parchment lined tray at 350°F for about 8 minutes. The apple softens into a pie like consistency, and the peanut butter gets wonderfully gooey.
Just add the chocolate chips at the very end so they don't burn.
If you're looking for a warm fruit treat that lasts longer than an afternoon, this Apple Canning Recipe is a classic. It’s a great way to use up a massive haul of apples from the orchard.
Scaling the Recipe for Groups
If you're hosting a playdate or a birthday party, you can't just make two apples. You'll have a riot on your hands. However, scaling up requires a bit of strategy to keep the apples from browning while you work through a large batch.
Scaling Down (Single Serving): Use half a large apple and about 2 tablespoons of peanut butter. You can mix the cinnamon and honey directly on top of the slice to save on washing a bowl.
Scaling Up (Parties): When doing 10+ apples, work in batches of three. Keep the un spread slices submerged in the lemon water until the very moment you are ready to top them. If you dry 20 slices at once, the last 10 will start to oxidize before you reach them.
For the spices, only increase the cinnamon to 1.5x the original amount even if you quadruple the apples, otherwise, it becomes overwhelming.
| Serving Size | Apple Prep | Topping Strategy |
|---|---|---|
| 1 Person | Slice as you go | Individual bowls |
| 5-10 People | Assembly line | Pre mixed PB spread |
| 20+ People | Large water bin | Buffet style topping bar |
Myths About Apple Prep
There is a lot of bad advice floating around the internet about keeping fruit fresh. Let's clear some of that up so you can stop wasting time on things that don't work.
- Myth 1: Salt water is better than lemon water. While salt water does work to prevent browning, it leaves a lingering savory taste that clashes with the peanut butter and chocolate. Lemon juice provides a much better flavor profile for sweet snacks.
- Myth 2: You have to peel the apples. Actually, the peel contains most of the fiber and prevents the ring from falling apart. Unless your child has a sensory issue with skins, leave them on for better structural integrity.
- Myth 3: High fat peanut butter is "unhealthy." In this context, the fat in the peanut butter is what makes the snack satisfying. If you use a "low-fat" powdered PB, your kids will be hungry again in twenty minutes. Stick to the full fat, natural stuff.
Storage and Zero Waste Tips
This is primarily a "fresh" snack, but you can prep certain parts ahead of time. I don't recommend storing fully assembled rings for more than 2 hours, as the granola will lose its "shatter" and become soft.
Storage: Store the lemon soaked apple rings in an airtight container with a damp paper towel for up to 24 hours in the fridge. Keep the peanut butter mixture in a separate small jar at room temperature. Assemble right before serving for the best texture.
Zero Waste: Don't throw away those apple cores! I keep a bag in my freezer for apple "scraps." When the bag is full, I boil them with a bit of water and cinnamon to make a quick stovetop apple juice or the base for a fruit syrup. You can also compost the cores to give back to your garden.
If you have leftover peanut butter mix, it’s incredible swirled into morning oatmeal or spread on a piece of toast.
Tasty Sides for Snack Time
While this snack is a powerhouse on its own, sometimes you want to turn it into a full "snack board." Pairing is all about balancing the sweetness of the apple and the richness of the peanut butter.
I love serving these rings alongside some sharp cheddar cheese cubes. The saltiness of the cheese cuts through the honey and chocolate perfectly. If you want more crunch, some pretzel sticks or carrot batons provide a nice savory counterpoint.
For a drink, a simple glass of cold milk or a hibiscus iced tea works beautifully.
This Apple and Peanut Butter For Kids recipe is so versatile that it fits into almost any meal plan. Whether it’s a quick bite after soccer practice or a fun weekend project, these rings always bring a smile. Just remember: keep the apples cold, the peanut butter velvety, and the granola crunchy!
Recipe FAQs
Is peanut butter and apple a good post workout snack?
Yes, absolutely. The protein and healthy fats in peanut butter paired with the carbohydrates from the apple provide excellent fuel for muscle recovery and replenishment after exercise.
Is peanut butter and apples a good healthy snack?
Yes, it's a fantastic healthy snack. This combination offers a great balance of protein, healthy fats, and complex carbohydrates, keeping you full and satisfied without a sugar crash.
What goes well with apples and peanut butter?
Many things! Consider a sprinkle of cinnamon, chia seeds, flax seeds, or even a few mini dark chocolate chips for added flavor and texture. For a more substantial treat, try pairing it with our Perfect Bar Recipe for an extra protein boost.
What is a healthy snack to have after school?
Apple slices with peanut butter is a top-notch healthy after school snack. It's quick to prepare, satisfying, and provides sustained energy for homework or playtime.
Can I use other nut butters with apples?
Yes, definitely. Almond butter, cashew butter, or sunflower seed butter all pair wonderfully with apples and offer similar nutritional benefits. If you enjoy a nutty spread, you might also like experimenting with our Peanut Butter Cookies recipe.
Is this snack suitable for kids?
Yes, it's an ideal snack for kids. It's nutritious, easy for them to eat, and the combination of flavors and textures is usually a hit. You can even turn it into fun shapes or add toppings for extra appeal.
How can I make peanut butter and apple more interesting?
Get creative with toppings! Try adding granola for crunch, shredded coconut for a tropical twist, or a drizzle of honey. For a sweet, wholesome option, explore our Healthy Chia Pudding Recipe with Oats, which uses similar nutrient dense ingredients.
Apple Peanut Butter Snack