Brown Butter Dubai Pistachio Cookie Bars
- Time: Active 25 minutes, Passive 25 minutes, Total 50 minutes
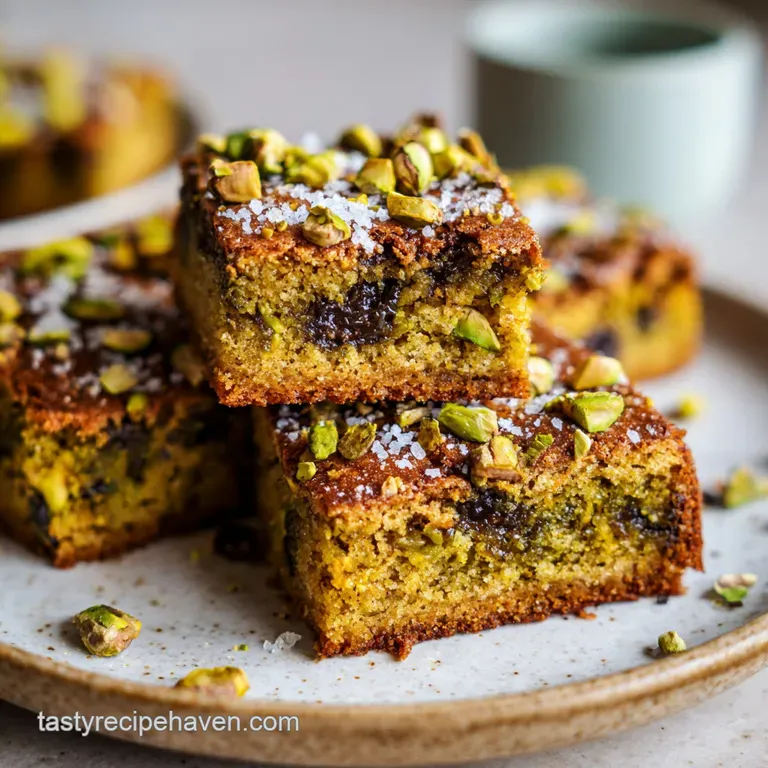
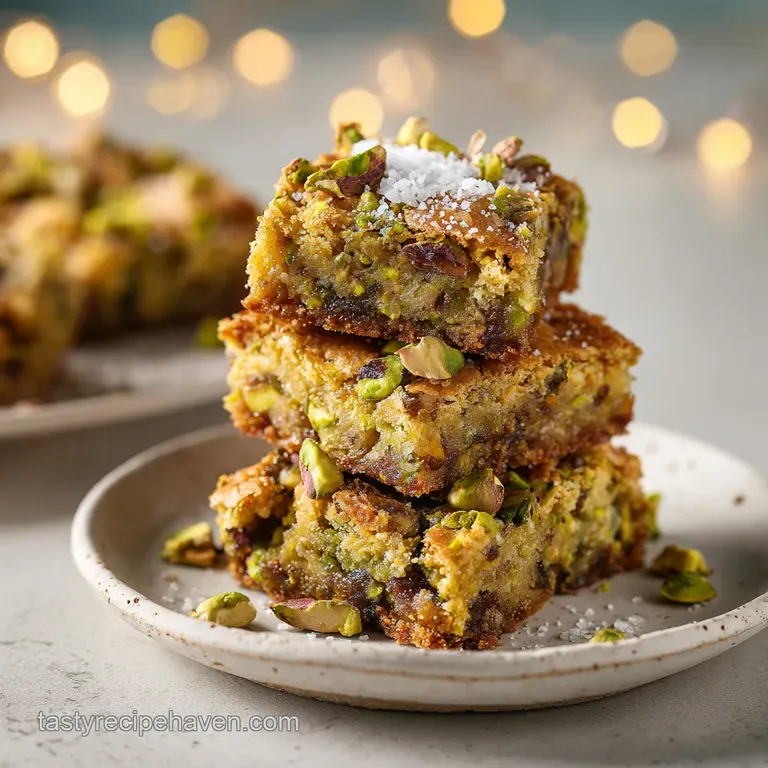
- Flavor/Texture Hook: Fudgy chocolate chip base with a shattering, pistachio cream crunch
- Perfect for: High end gifting or impressing a crowd at your next dinner party
- Achieving the Shattering Crunch of a Brown Butter Dubai Pistachio Cookie Bar
- Understanding the Precision Behind the Texture
- Component Analysis for the Ultimate Cookie Bar
- Strategic Shopping List and Smart Substitutions
- Tools for Architectural Baking Success
- Step-by-Step Orchestration of Flavors
- Solving Common Textural Failures
- Adjusting Ratios for Crowd Sized Batches
- Debunking Common Baking Myths
- Preservation Secrets for Long-Term Crispness
- Aesthetic Finishing for the Viral Reveal
- Recipe FAQs
- 📝 Recipe Card
Achieving the Shattering Crunch of a Brown Butter Dubai Pistachio Cookie Bar
The first time I attempted to recreate that viral chocolate bar in cookie form, it was a literal disaster. I ended up with a greasy, floppy mess where the kataifi pastry just turned into a soggy sponge in the middle of the dough.
It was heartbreaking because those ingredients aren't exactly cheap, and the aroma of the browning butter had promised so much more than the heavy, oily slab I pulled out of the oven.
I realized then that you can't just throw things together; you have to understand the moisture balance between the pistachio cream and the cookie dough. Discover our featured recipe for the unforgettable Brown Butter Dubai Pistachio Chocolate Chip Cookie Bar with Sea Salt.
The magic happens the moment that 1 cup of unsalted butter hits the light colored skillet. You’ll hear that aggressive sizzle as the water evaporates, followed by a gentle crackling as the milk solids begin to toast.
When those tiny brown specks appear and the kitchen smells like toasted hazelnuts, you know you’re on the right track. This recipe is designed to fix the "soggy middle" problem by precisely toasting the kataifi and using a hint of tahini to stabilize the pistachio cream.
It's a technical bake, but we're going to walk through the precision points together so your first batch is the one everyone talks about for weeks.
We are aiming for a specific architectural build here. The bottom layer needs to be sturdy enough to support the weight of the pistachio filling, while the top layer needs to meld perfectly without squishing the filling out the sides. It is a delicate dance of temperatures and timing.
If you have ever felt intimidated by the idea of working with kataifi or making your own pistachio filling, don't worry. We are going to treat this like a delicious science experiment where the variables are controlled, and the result is a velvety, salt flecked masterpiece that shatters with every bite.
Understanding the Precision Behind the Texture
Before we get into the heavy lifting, we need to talk about why this specific method works. This isn't your standard chocolate chip cookie bar; it is a multi layered pastry that requires us to manage fat and water content meticulously.
- Maillard Mastery: By browning the butter first, we remove roughly 15-18% of its water content, which prevents the cookie dough from becoming too cakey or steaming the kataifi filling.
- Structural Integrity: The inclusion of an extra egg yolk adds lecithin and fat, creating a fudgy, dense crumb that acts as a waterproof barrier for the moist pistachio center.
- Thermal Stability: Toasting the kataifi in 2 tbsp of butter until it turns deep gold creates a hydrophobic coating, ensuring it stays crispy even when encased in pistachio cream.
- The Tahini Buffer: Adding 1 tbsp of tahini introduces a subtle bitterness that cuts through the high sugar content of the pistachio cream while acting as an emulsifier to keep the oils from separating during the bake.
Below is a quick guide to ensure you hit the right marks during the process. Getting these visual and temperature cues right is the difference between a professional grade bar and a home kitchen "oops."
| Thickness | Internal Temp | Rest Time | Visual Cue |
|---|---|---|---|
| 1 inch (Total) | 175°F (79°C) | 2 hours 0 mins | Edges pull away from the pan |
| 0.5 inch (Filling) | Room Temp | 15 minutes | Kataifi looks like spun gold |
| Cookie Base | N/A | 30 minutes | Dough feels tacky but not greasy |
The cooling stage is just as important as the baking stage. If you try to slice these while they are warm, the pistachio cream will flow out like lava, and you'll lose that distinct layered look. Patience is the most difficult ingredient in this recipe, but it is the one that guarantees success.
Component Analysis for the Ultimate Cookie Bar
Success in baking is often about choosing the right tools for the job. For this recipe, the quality of your chocolate and the specific type of pistachio cream you use will dictate the final flavor profile. I always suggest using a high-quality pistachio cream the kind that lists pistachios as the first ingredient, not sugar or palm oil. If you are looking for other textured treats, my Christmas Cookie Bars offer a similarly satisfying density but with a festive twist.
| Ingredient | Science Role | Pro Secret |
|---|---|---|
| Kataifi (1.5 cups) | Provides the "Dubai" crunch | Chop it into 1cm pieces before toasting for even browning. |
| Pistachio Cream (0.5 cup) | Adds velvety moisture | Keep it at room temp so it spreads without tearing the dough. |
| Dark Chocolate Chips (1 cup) | Balances sweetness | Use 60% cacao or higher to contrast the sweet pistachio filling. |
| Vanilla Bean Paste (1 tbsp) | Depth of flavor | The flecks provide a visual cue of quality that extract lacks. |
The interaction between the tahini and the pistachio cream is a masterclass in flavor balancing. Tahini contains sesamol, which provides a savory backbone that prevents the bars from feeling cloying.
Even if you aren't a huge fan of tahini on its own, do not skip it here; it disappears into the background but does the heavy lifting of balancing the sweetness.
Strategic Shopping List and Smart Substitutions
When you head to the store, look for kataifi in the frozen section, usually near the phyllo dough. It looks like a ball of shredded wheat or vermicelli. If you can't find it, don't panic there are workarounds that still provide that signature shatter.
The Essential Dough Components
- Unsalted Butter (1 cup): Used for the base. Why this? Allows total control over the salt levels in the final bar.
- Brown Sugar (1 cup packed): For chewiness. Why this? The molasses content reacts with baking soda for a deep rise.
- Granulated Sugar (0.5 cup): For crisp edges.
- Egg & Egg Yolk (1 each): The yolk provides the fudgy texture.
- Vanilla Bean Paste (1 tbsp): Adds floral notes.
- All Purpose Flour (2.125 cups): The structural backbone.
- Baking Soda (1 tsp): For browning and lift.
- Dark Chocolate Chips (1 cup): 60% cacao is the sweet spot.
The Viral Dubai Filling
- Kataifi (1.5 cups): Shredded phyllo dough.
- Butter (2 tbsp): For toasting the kataifi.
- Pistachio Cream (0.5 cup): The heart of the filling.
- Tahini (1 tbsp): The secret stabilizer.
- Roasted Pistachios (0.25 cup): For extra crunch.
- Flaky Sea Salt (1 tsp): To finish.
- Dark Chocolate (0.25 cup): Melted for the drizzle.
| Original Ingredient | Substitute | Why It Works |
|---|---|---|
| Kataifi | Crushed Rice Cereal | Provides crunch, though less delicate than the traditional dough. |
| Pistachio Cream | Almond Butter + Honey | Similar fat content. Note: Changes flavor profile significantly. |
| Vanilla Bean Paste | Pure Vanilla Extract | Use a 1:1 ratio. You lose the bean flecks but keep the aroma. |
| Dark Chocolate Chips | Milk Chocolate Chips | Sweeter profile. Best for those who dislike bitter notes. |
If you find yourself with leftover pistachios and chocolate, you might want to try making Salted Pistachio Chocolate Cookies next weekend. They use a similar flavor profile but in a classic drop cookie format.
Tools for Architectural Baking Success
Precision requires the right equipment. You don't need a lab, but a few specific items will make your life much easier when dealing with layered bars.
- 9x9 inch Baking Pan: This specific size ensures the layers are the correct thickness. A larger pan will result in thin, dry bars.
- Light Colored Skillet: Crucial for browning butter. If the pan is black or dark blue, you won't be able to see the milk solids changing color, and you'll likely burn them.
- Parchment Paper: Do not just grease the pan. These bars are fudgy and sticky; you need the parchment "sling" to lift them out cleanly.
- Silicone Spatula: Best for scraping every single toasted bit of butter out of the skillet. Those brown specks are pure flavor gold.
- Fine Mesh Sieve: If your flour has been sitting for a while, sifting it with the baking soda ensures no clumps in your fudgy dough.
Chef's Tip: Before you start, freeze your butter for 10 minutes. Grating it or cutting it into very small cubes before melting it in the skillet ensures it browns evenly without the water evaporating too slowly.
Step-by-step Orchestration of Flavors
The key to this recipe is the order of operations. We need to allow things to cool at specific stages to maintain the structural integrity of the layers.
- Brown the butter: Melt 1 cup of butter in a light colored skillet over medium heat. Stir constantly as it foams and crackles until it develops brown specks and a nutty aroma. Immediately transfer to a heat proof bowl. Note: This takes about 5-8 minutes depending on your stove.
- Combine the fats and sugars: Whisk the browned butter with brown sugar and granulated sugar in a large bowl. Add the egg, egg yolk, and vanilla, whisking until the mixture lightens in color and looks glossy.
- Fold the dry ingredients: Add the flour and baking soda to the wet mix. Fold gently with a spatula until no white streaks remain, then stir in the 1 cup of dark chocolate chips.
- Initial layer setup: Press exactly half of the dough into the bottom of your parchment lined 9x9 pan. Use a flat bottomed glass to press it into an even layer.
- Toast the kataifi: Melt 2 tbsp butter in a clean skillet over medium heat. Add the chopped kataifi and toss constantly for about 4-6 minutes until deep golden brown and fragrant. Remove from heat and cool completely.
- Mix the filling: Combine the cooled kataifi with the pistachio cream, tahini, and chopped roasted pistachios in a medium bowl until the pastry is evenly coated and looks like wet sand.
- Layering the center: Spread the pistachio mixture over the bottom dough layer. Use an offset spatula to get it into the corners.
- Seal the top: Crumble the remaining cookie dough over the top and press down gently with your palms until the pistachio layer is completely covered.
- The Bake: Bake at 350°F (175°C) for 25 minutes. The edges should be golden, and the center should look set but still slightly soft.
- The Finish: Let the bars cool completely in the pan for at least 2 hours. Drizzle with 0.25 cup melted chocolate and sprinkle with sea salt before lifting and slicing into 16 servings.
Solving Common Textural Failures
The most common issue with these bars is the "Greasy Bottom." This happens if the bottom layer isn't pressed firmly enough or if the butter wasn't browned long enough to remove the water. If the dough feels too oily while you're pressing it in, try chilling it for 15 minutes first.
Why Your Middle Layer Is Soggy
If your kataifi loses its crunch, it’s usually because it was mixed with the pistachio cream while it was still warm. Heat creates steam, and steam is the enemy of crispiness. Always ensure the toasted pastry is cold to the touch before adding the cream.
Why Your Bars Are Crumbly
A crumbly bar usually indicates over baking. Remember, these will continue to firm up as they cool in the pan due to residual heat. If you wait until the center looks "hard" in the oven, they will be dry once they cool.
| Problem | Root Cause | Solution |
|---|---|---|
| Greasy base | Butter didn't brown long enough | Ensure you see those brown specks and the crackling stops. |
| Soggy middle | Kataifi mixed while hot | Let the toasted pastry cool to room temp for 20 mins. |
| Separated filling | No tahini used | The tahini acts as an emulsifier; don't skip it. |
Common Mistakes Checklist:
- ✓ Never use margarine; the water content is too high and will ruin the dough.
- ✓ Pat the roasted pistachios dry if they seem oily before chopping.
- ✓ Line the pan with enough parchment overhang to act as "handles."
- ✓ Wait the full 2 hours before slicing; the structure depends on it.
- ✓ Use a light colored pan for the butter to prevent burning.
Adjusting Ratios for Crowd Sized Batches
If you're making these for a big party, you might be tempted to just double everything. However, browning 2 cups of butter takes significantly longer and carries a higher risk of burning the milk solids.
Scaling Down (Small Batch)
To make an 8 serving batch in a loaf pan, halve all ingredients. For the 1 large egg plus 1 yolk, beat one whole egg in a small cup and use exactly 2 tablespoons of it, then add a separate yolk. Reduce the baking time by about 5 minutes, checking for those golden edges at the 20 minute mark.
Scaling Up (Double Batch)
When doubling for a 9x13 inch pan, keep the salt and baking soda at 1.5x the original amount rather than 2x. This prevents the bars from tasting metallic or rising too aggressively. You will likely need to add 5-8 minutes to the baking time since the thermal mass is greater.
If you are looking for a simpler way to feed a crowd, my Perfect Bar Recipe is a great alternative that requires no baking at all and scales effortlessly.
| Servings | Pan Size | Cookie Dough | Filling Volume | Bake Time |
|---|---|---|---|---|
| 16 bars | 9x9 inch | Full Recipe | ~2 cups | 25 minutes |
| 8 bars | Loaf Pan | 0.5x Recipe | ~1 cup | 20 minutes |
| 32 bars | 9x13 inch | 2x Recipe | ~4 cups | 32 minutes |
Debunking Common Baking Myths
There is a common misconception that you should use "cold" pistachio cream to keep the layers separate. In reality, cold cream is difficult to spread and will tear the bottom layer of cookie dough. Use room temperature cream for a smooth, even layer that doesn't compromise the dough's structure.
Another myth is that "more kataifi equals more crunch." If you overstuff the middle, the cookie dough won't be able to "grip" the top and bottom layers, and your bars will slide apart when you try to eat them. Stick to the 1.5 cup ratio for the perfect balance.
Finally, some say you can skip browning the butter to save time. While you'll still get a cookie bar, you will lose the complex nutty notes that define this specific dessert. The chemical change that occurs during browning the toasted milk solids is what transforms this from a standard sweet to a gourmet treat.
Preservation Secrets for Long Term Crispness
Storing these bars is all about protecting the kataifi from humidity. In an airtight container, they will stay fresh for up to 5 days at room temperature. However, if you live in a very humid climate, I recommend keeping them in the fridge.
- Fridge
- Up to 7 days. The cold temperature makes the filling even fudgier, which some people actually prefer.
- Freezer
- These freeze remarkably well. Wrap individual bars in plastic wrap and then foil. They will stay perfect for up to 3 months. Thaw at room temperature for 30 minutes before eating.
- Zero Waste
- If you have leftover kataifi, toss it with some cinnamon and sugar and bake it until crispy. It makes an incredible topping for Greek yogurt or vanilla ice cream. Any leftover pistachio cream can be swirled into your morning oatmeal or used as a dip for apple slices.
Aesthetic Finishing for the Viral Reveal
To get that "viral" look, the drizzle technique is everything. Instead of just pouring the melted chocolate over the top, use a small spoon or a piping bag with a tiny hole. Move your hand in a fast, zig zag motion across the entire pan before slicing. This creates thin, professional looking lines.
The flaky sea salt should be applied while the chocolate drizzle is still wet. Don't be shy with it the salt is what activates the flavor of the pistachios and makes the dark chocolate pop. For the cleanest slices, wipe your knife with a warm, damp cloth between every single cut.
This prevents the pistachio cream from smearing onto the beautiful dark cookie layers, giving you those sharp, defined edges that make these bars so photogenic. If you've followed the cooling instructions, you should see three distinct, beautiful layers: the fudgy base, the vibrant green crunch, and the chocolatey top.
Recipe FAQs
How to tell when the butter is perfectly browned?
Watch for the color change and listen for the sounds of the butter. Keep stirring over medium heat until the foam subsides, the mixture smells nutty, and you see distinct brown specks forming at the bottom of your light colored skillet.
Can I use regular phyllo sheets instead of kataifi?
No, stick with kataifi for this recipe. Shredded phyllo dough provides the essential crispy, crunchy texture that defines the center layer; standard sheets will not achieve the same structural result.
How to ensure the pistachio filling doesn't leak during baking?
Press the edges of the top and bottom dough layers firmly together to seal the bars completely. If you enjoyed mastering this technique of layering fillings, you can apply the same structural logic to our 4 ingredient cookie bars.
Is it true the bars can be sliced while still warm?
False, the bars must cool completely in the pan before slicing. The pistachio filling needs time to set as it cools, otherwise, the bars will fall apart when you try to cut them.
How to keep the kataifi filling crunchy?
Toast the kataifi until it is deep golden brown before mixing it with the pistachio cream. Letting the mixture cool completely before spreading it between the dough layers also prevents the heat from softening the delicate pastry strands.
Should the oven temperature be adjusted for a glass pan?
No, maintain the oven at 350°F (175°C). Glass bakeware tends to retain heat longer than metal, so monitor the edges closely around the 25-minute mark to ensure they reach a golden brown color without burning.
How to store these bars to maintain freshness?
Keep them in an airtight container at room temperature. Storing them this way helps preserve the crunch of the kataifi layer and the chewiness of the cookie base for up to three days.
Brown Butter Pistachio Bars

