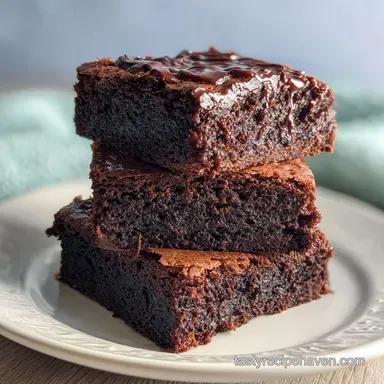
Cake Mix Brownies: Fudgy & Rich
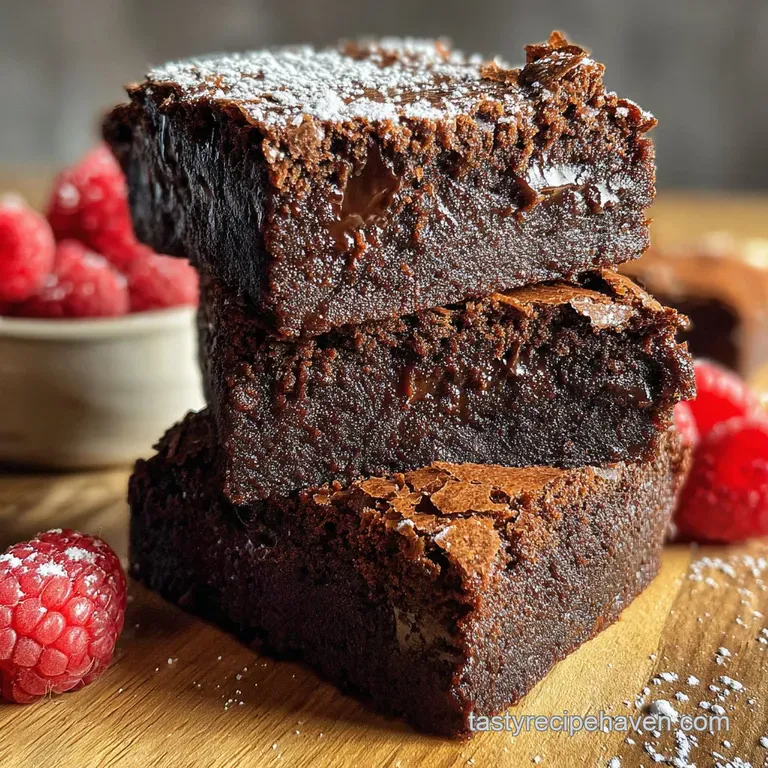
- Time: Active 10 minutes, Passive 20 minutes, Total 30 minutes
- Flavor/Texture Hook: Intensely chocolatey with a molten center and a paper thin, crackling crust
- Perfect for: Last minute bake sales, late night cravings, or beginners who want a foolproof win
- Secrets to the Most Fudgy Cake Mix Brownies
- Why This Crinkle Top Method Succeeds
- Essential Numbers for Your Baking Success
- Selecting the Best Ingredients for Fudginess
- Simple Tools for Stress Free Baking
- Step by Step Path to Brownie Success
- Fixing Common Mistakes for Flawless Results
- Tailoring the Batter to Your Specific Needs
- Maintaining Softness and Reducing Kitchen Waste
- Sweet Companions to Complete the Experience
- Recipe FAQs
- 📝 Recipe Card
Secrets to the Most Fudgy Cake Mix Brownies
Have you ever pulled a pan of brownies out of the oven only to find they taste... like cake? It’s a total heartbreak when you’re craving that dense, chewy, almost truffle like bite.
I remember the first time I tried to turn a box of Devil's Food mix into brownies, I followed the box instructions exactly and ended up with a literal chocolate cake in a square pan. It was fine, but it wasn't a brownie.
The trick, as I eventually learned through many sticky trials, is all about manipulating the moisture levels to prevent the gluten from getting too excited.
We’ve all been there, staring at a pantry that’s mostly empty except for that one lonely box of mix. The beauty of this recipe is its sheer simplicity, but it does require a bit of restraint. You’ll want to reach for the water bottle, but don't.
We are going to lean into the fat and the eggs to create that velvety texture we all love. It’s about taking something basic and using a few smart swaps to make it taste like you spent the whole afternoon tempering chocolate.
Right then, let's crack on with what makes this work. We are ditching the water entirely and upping the fat. This isn't just about making things easy, it's about understanding why a brownie is different from a sponge.
We want weight, we want richness, and we want that gorgeous crinkle on top that shatters when your fork hits it. Trust me on this, once you try the cream cheese swirl version I’m going to show you, you’ll never look at a box of mix the same way again.
Why This Crinkle Top Method Succeeds
The secret to a successful batch of Cake Mix Brownies lies in the ratio of fat to flour. When you make a standard cake, the goal is aeration, but with brownies, we want to minimize air and maximize density.
By skipping the water and using only oil and eggs, we create a batter that is thick and heavy, which prevents the brownies from rising too much and becoming spongy.
The Science of Why it WorksStarch Gelatinization: Reducing the liquid limits how much the flour starches can swell, resulting in a dense, fudgy structure rather than a light crumb.
Fat to Sugar Synergy: The high fat content from the oil and eggs coats the flour proteins, inhibiting gluten development for a more tender bite.
| Method | Time | Texture | Best For |
|---|---|---|---|
| Standard Oven | 20 minutes | Classic crackle top, soft center | Traditional brownies |
| Stovetop (Water Bath) | 35 minutes | Ultra fudgy, almost like a ganache | Moist, dense treats |
| Air Fryer | 15 minutes | Extra crispy edges, very soft middle | Small batches |
Baking in the oven is my preferred method because the dry heat is what gives us that iconic, paper thin crust on top. The stovetop method is interesting if you want something that feels more like a steamed pudding or a very thick fudge, but it lacks that satisfying "shatter" when you take a bite. If you're looking for another easy bake that uses pantry staples, my Applesauce Coffee Cake Recipe is a fantastic companion for a weekend brunch.
Essential Numbers for Your Baking Success
Precision matters, even with a mix. I’ve found that using room temperature eggs is the single biggest "small" change you can make. Cold eggs can seize up the oil and make the batter harder to mix, which leads to over mixing and a tougher brownie.
We want to be gentle with this batter once the dry and wet ingredients meet.
| Component | Science Role | Pro Secret |
|---|---|---|
| Vegetable Oil (120 ml) | Tenderizer | Use a neutral oil like grapeseed for the cleanest chocolate flavor. |
| Large Eggs (2 units) | Structure & Emulsion | Whisk the eggs with vanilla first to ensure even distribution without overworking the flour. |
| Chocolate Chips (170 g) | Moisture & Texture | Toss them in a spoonful of the dry mix to keep them from sinking to the bottom. |
Using the right oil is key here. While butter tastes great, vegetable oil actually produces a chewier brownie because it stays liquid at room temperature. If you want that classic "box brownie" chew but with a premium flavor, oil is actually your best friend.
Selecting the Best Ingredients for Fudginess
You don't need a huge grocery list for this one, but quality still counts. When you're picking your chocolate cake mix, look for "Devil's Food" or "Triple Chocolate." These usually have a higher cocoa content, which gives you a deeper color and a more intense flavor.
For the Base Batter
- 1 box (432 g) Chocolate Cake Mix: Why this? Provides the base flour, sugar, and cocoa in a pre sifted, stable format.
- Substitute: Any brand works, but Betty Crocker or Duncan Hines are consistent performers.
- 120 ml Vegetable Oil: Why this? Provides the fat needed for a fudgy, chewy texture that doesn't dry out.
- Substitute: Melted coconut oil (adds a slight tropical note).
- 2 Large Eggs: Why this? Acts as the binder and provides the lift without making it too cakey.
- Substitute: 1/2 cup plain Greek yogurt (will be denser and tangier).
- 5 ml Vanilla Extract: Why this? Enhances the chocolate notes and adds a floral aroma.
- Substitute: 1 tsp espresso powder dissolved in the oil.
For the Texture Boosters
- 170 g Semi sweet Chocolate Chips: Why this? Creates molten pockets of chocolate throughout the brownie.
- Substitute: Chopped walnuts or pecans for a salty crunch.
- 1 pinch Flaky Sea Salt: Why this? Balances the sweetness and makes the chocolate pop.
- Substitute: Standard table salt (use half the amount).
For the Optional Cream Cheese Swirl
- 113 g Cream Cheese: Why this? Adds a tangy, creamy contrast to the rich chocolate.
- Substitute: Mascarpone for a richer, smoother finish.
- 15 g Powdered Sugar: Why this? Sweetens the cream cheese so it doesn't get lost in the cocoa.
- Substitute: Granulated sugar (pulse it in a blender first).
Simple Tools for Stress Free Baking
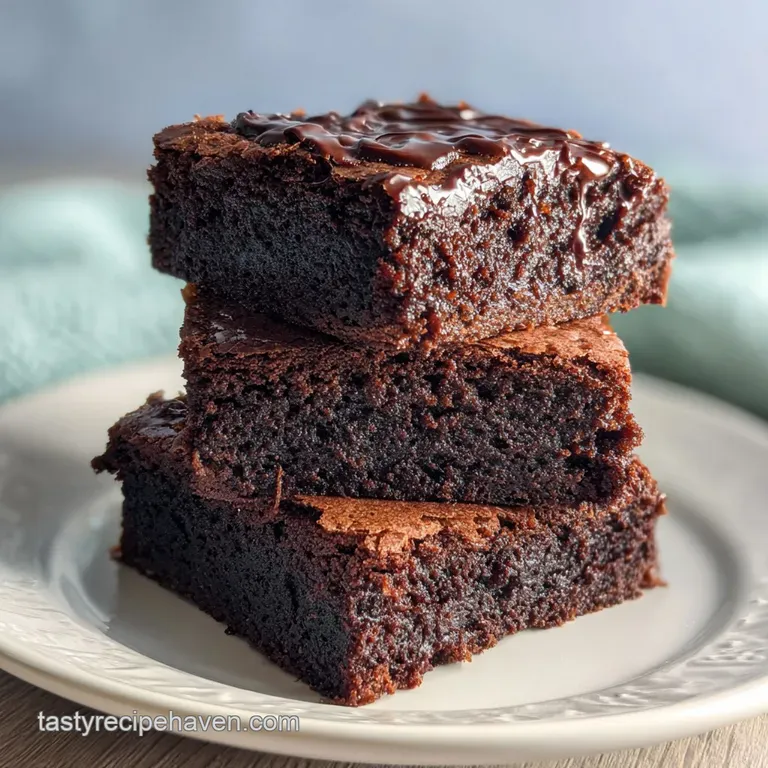
You really don't need a stand mixer for this. In fact, I prefer doing this by hand because it prevents me from over mixing. A big bowl and a sturdy spatula are your primary weapons here.
If you're feeling fancy, you can use a hand mixer for the cream cheese swirl to get it really silky, but a fork and some elbow grease work just as well.
Chef's Note: Always line your pan with parchment paper, leaving an inch of overhang on the sides. This "sling" allows you to lift the entire block of brownies out of the pan once cooled, making for much cleaner slices.
The pan choice is also vital. A metal 20x20 cm (8x8 inch) square pan is the gold standard. Glass pans take longer to heat up and can lead to overcooked edges before the middle is set. If you only have glass, lower your oven temperature by about 10 degrees Celsius and keep a close eye on it. This recipe is also great for special occasions, much like my Valentines Day Recipe for lava cakes, which also focuses on that molten chocolate center.
Step by step Path to Brownie Success
The key here is the order of operations. We want to create a smooth emulsion of the wet ingredients before we ever touch the cake mix. This ensures that every bite has the same level of richness and structure.
- Preheat and Prep. Set your oven to 175°C (350°F). Line a 20x20 cm square baking pan with parchment paper. Note: This ensures the brownies don't stick and helps with clean removal.
- Whisk the Wet. In a large bowl, whisk the 120 ml vegetable oil, 2 eggs, and 5 ml vanilla extract until the mixture is pale and slightly frothy.
- Add the Mix. Pour in the 432 g chocolate cake mix. Use a spatula to fold the dry into the wet until no streaks of white flour remain. Note: The batter will be very thick, much thicker than normal cake batter.
- Fold in Gems. Gently fold in the 170 g chocolate chips. Stop mixing as soon as they are distributed to avoid developing too much gluten.
- Prepare the Swirl. In a separate small bowl, beat the 113 g softened cream cheese and 15 g powdered sugar until smooth and velvety.
- Layer the Batter. Spread the chocolate batter into the prepared pan. It may be stubborn, so use the back of a spoon to push it into the corners.
- Create the Pattern. Drop spoonfuls of the cream cheese mixture onto the batter. Use a butter knife to swirl it through, until you see a marbled pattern appearing.
- Bake the Batch. Place in the center of the oven and bake for 20 minutes until the edges are firm and the top looks dull rather than shiny.
- The Salt Finish. Immediately upon removing from the oven, sprinkle the pinch of flaky sea salt over the top while the chocolate is still tacky.
- Cool and Set. Let the brownies cool completely in the pan for at least 30 minutes. Wait until the center feels firm before attempting to slice.
Fixing Common Mistakes for Flawless Results
The biggest mistake people make with this recipe is treating it like a cake. If you over bake these, they turn from fudgy to dry and crumbly in a matter of seconds. Remember that the brownies will continue to cook from the residual heat of the pan once you take them out.
This is called carry over cooking, and it's your best friend for a moist result.
Why Your Brownies Turned Out Cakey
If your brownies have a sponge like texture, you likely added too much liquid or over beaten the eggs. When you whip eggs too much, you incorporate air bubbles that expand in the oven, creating a light, airy structure. For brownies, we want to keep those eggs just combined.
Also, check your cake mix box; if it's a "super moist" variety, it might have extra leavening agents that contribute to a cakier rise.
| Problem | Root Cause | Solution |
|---|---|---|
| Greasy surface | Oil didn't emulsify | Whisk eggs and oil more thoroughly before adding dry mix. |
| Brittle edges | Over baked or pan too thin | Check 5 mins early; use a heavy duty metal pan. |
| Sinking middle | Under baked or opened oven too often | Keep oven door closed; bake until a toothpick comes out with moist crumbs. |
Common Mistakes Checklist
- ✓ Use room temperature eggs to prevent the oil from thickening and becoming difficult to mix.
- ✓ Don't over mix once the cake mix is added; stop as soon as the dry bits disappear.
- ✓ Use a metal baking pan for the best heat conduction and even browning on the bottom.
- ✓ Let the brownies cool completely before slicing to allow the starches to set into a fudgy texture.
- ✓ Measure your oil precisely; too much will make them greasy, too little will make them dry.
Tailoring the Batter to Your Specific Needs
Scaling this recipe is straightforward, but you need to be careful with the pan size. If you want to double the recipe, use a 23x33 cm (9x13 inch) pan. However, don't just double the time. Large pans cook differently, so start checking for doneness around the 25 minute mark.
Downscaling (1/2 Batch): If you only want a small treat, you can halve the ingredients. Use a loaf pan instead of a square pan. Since you can't easily halve an egg, beat one egg in a small bowl and use about 2 tablespoons of it.
Reduce the baking time by about 5 minutes, as the smaller mass will heat through faster.
Upscaling (2x-3x Batch): When doubling, keep the spices and vanilla at 1.5x rather than a full 2x to avoid overwhelming the chocolate. If you're making a massive batch for a party, it's often better to bake two separate 20x20 cm pans rather than one giant one, as the middle of a very large pan often stays raw while the edges burn. If you enjoy the nutty profile of a larger bake, consider trying my Butter Pecan Cake Recipe, which handles scaling beautifully.
1. The "Cakey" Trap
The idea that adding an extra egg makes brownies "fudgier" is a total myth. In reality, adding an egg adds water and protein, which creates more structure and lift making them cakier. If you want more fudge, add an extra yolk only, as the fat in the yolk provides richness without the drying effect of the white.
2. Over Baking the Core
Many people wait for a toothpick to come out completely clean. If you do that with brownies, they are already overdone. You want the toothpick to come out with a few moist, sticky crumbs clinging to it. If it’s wet batter, give it 3 more minutes. If it's clean, you've gone too far.
3. Brand Variation
Not all cake mixes are created equal. Some brands include "pudding in the mix," which can make the batter even thicker and the final result more moist. If your batter feels impossibly thick (like cookie dough), don't panic! That’s actually a sign you’re going to have a very dense, fudgy result.
| Premium Ingredient | Budget Alternative | Flavor Impact | Savings |
|---|---|---|---|
| Ghirardelli Mix | Store Brand Mix | Store brands are often less "dark" in cocoa flavor | Save $2-3 |
| Pure Vanilla Bean | Vanilla Extract | Very little difference in a baked chocolate dish | Save $5+ |
| Real Butter | Vegetable Oil | Oil actually provides a better "chewy" texture | Save $1-2 |
Maintaining Softness and Reducing Kitchen Waste
Storage: These brownies are actually better on day two! Store them in an airtight container at room temperature for up to 4 days. To keep them ultra soft, tuck a small piece of white bread into the container; the brownies will absorb the moisture from the bread.
If you've added the cream cheese swirl, it's safer to keep them in the fridge, but let them sit at room temp for 20 minutes before eating so the fat can soften up.
Freezing: These freeze like a dream. Wrap individual squares tightly in plastic wrap and then place them in a freezer bag. They’ll stay fresh for up to 3 months. To reheat, just pop a frozen square in the microwave for 15-20 seconds for that "fresh out of the oven" molten feel.
Zero Waste Tips: Don't throw away the "ugly" edge pieces or crumbs! I like to crumble the leftover bits over vanilla bean ice cream or mix them into a milkshake. You can also roll brownie crumbs with a little bit of frosting or leftover cream cheese to make "brownie truffles." Dip them in melted chocolate for a whole new dessert.
If you have extra chocolate chips, they can be stored in the freezer indefinitely to prevent that white "bloom" from forming on the surface.
Sweet Companions to Complete the Experience
If you're looking to turn these into a full dessert course, a tart raspberry coulis is the way to go. The acidity of the berries cuts right through the heavy richness of the chocolate and cream cheese.
A simple scoop of salted caramel ice cream is also a classic for a reason the cold creaminess against a slightly warm brownie is pure heaven.
I’ve also found that these brownies pair exceptionally well with a cold glass of milk or a stiff espresso. If you're feeling adventurous, try serving them alongside a small dish of fresh orange segments. The citrus oils brighten up the cocoa notes in a way that feels very sophisticated. For more ideas on how to use chocolate in creative ways, check out my Heart Shaped Cheesecake recipe which uses a similar marbling technique but with a brownie base.
One final thought: don't be afraid to experiment with the mix ins. While I love chocolate chips, tossing in some crushed pretzels or a handful of butterscotch chips can change the entire vibe of the dish. It’s a budget friendly way to keep your baking exciting without needing a whole new recipe.
Enjoy the process, and don't forget to lick the spatula that’s the cook’s tax!
Recipe FAQs
Can you use a cake mix to make brownies?
Yes, absolutely. Using a cake mix is a fantastic shortcut to achieving a rich, fudgy brownie texture without the fuss of measuring dry ingredients from scratch.
What's the difference between brownie mix and cake mix?
Brownie mixes are formulated for density and chewiness, while cake mixes aim for lightness and airiness. Brownie mixes typically have a higher fat-to-flour ratio and less leavening. You can adapt a cake mix by reducing liquid and increasing fat to mimic brownie texture.
How to make brownies using Betty Crocker cake mix?
Combine one box of Betty Crocker Devil's Food cake mix with 2 large eggs and 120ml (1/2 cup) of vegetable oil. Do NOT add water or any other liquid called for on the box. Mix until just combined, fold in chocolate chips, and bake at 175°C (350°F) for 20-25 minutes in a lined 8x8 inch pan.
What is in a Killer Brownie?
A Killer Brownie typically features a dense, chewy brownie base layered with caramel and pecans, all enrobed in chocolate. While homemade versions can mimic the taste and texture, the specific proprietary recipe and ingredient ratios are unique to the bakery.
Can I substitute oil for butter in cake mix brownies?
Yes, and it's often recommended for fudgier brownies. Oil stays liquid at room temperature, contributing to a chewier texture compared to butter, which solidifies and can make baked goods firmer. If you enjoyed mastering the fat ratio here, see how we use oil for moisture in our Vegan Dessert: Decadent No-Bake Salted Caramel Chocolate Tart.
Why are my cake mix brownies cakey instead of fudgy?
This usually happens if you follow the cake mix instructions too closely or overmix the batter. Using the full amount of liquid and leavening from the box will create a cake like crumb. Ensure you significantly reduce or omit liquid, and mix only until the dry ingredients are incorporated.
How do I get a crinkle top on my cake mix brownies?
A crinkle top is primarily achieved through the sugar and egg ratio, and proper baking temperature. When sugar dissolves in the batter and reacts with eggs during baking, it creates that signature crackled surface.
Ensure your oven is preheated to the correct temperature, around 175°C (350°F), to encourage this reaction.
Cake Mix Brownies