Chewy Chocolate Crinkle Cookies: Fudgy and Rich
- Time:20 minutes active + 3 hours 10 mins chilling/baking = 3 hours 30 mins total
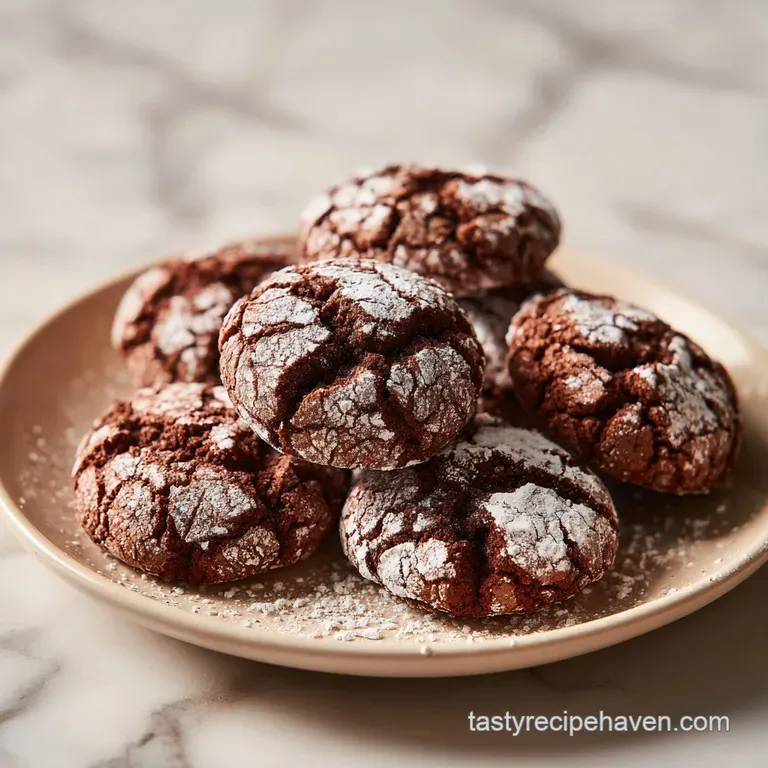
- Flavor/Texture Hook: Fudgy, velvety chocolate center with a shattering sugar crust
- Perfect for: Holiday gift tins, weekend baking projects, or chocolate cravings
- Achieving The Ultimate Chewy Chocolate Crinkle Cookies
- Why These Cookie Mechanics Succeed
- Ingredient Deep Dive Analysis
- Essential Components for Fudgy Results
- Required Kitchen Tools for Success
- Executing the Perfect Baking Method
- Fixing Common Cookie Baking Errors
- Scaling the Batch Size Safely
- Flavor Swaps and Creative Adaptations
- Storage Tips and Freshness Secrets
- Serving Styles and Pairing Ideas
- Recipe FAQs
- 📝 Recipe Card
Achieving The Ultimate Chewy Chocolate Crinkle Cookies
The moment these cookies hit the oven, your kitchen transforms into a cocoa scented sanctuary. I remember the first time I pulled a tray of these out; the contrast between the stark white powdered sugar and the dark, volcanic fissures of chocolate was so striking I almost didn't want to eat them.
But then the smell reached me that deep, earthy aroma of Dutch processed cocoa mingled with warm vanilla. When you bite into one, the exterior gives way with a slight crunch, leading immediately into a center that feels more like a dense, fudgy truffle than a standard biscuit.
We’ve all seen crinkle cookies that look a bit sad the sugar melts into a greyish glaze, or the "cracks" never actually appear. It’s frustrating when you put in the effort and the results don't match the vision.
I spent a long time tweaking my approach until I realized it wasn't just about the ingredients, but how they interact during those critical minutes in the heat. Getting that high contrast "shatter" look requires a bit of patience and a few tricks with sugar stability that we are going to dive into today.
This isn't a "whip it up in ten minutes" kind of recipe, mostly because the dough is incredibly soft and needs a long nap in the fridge to behave. But trust me, that wait is exactly what allows the flavors to mature and the texture to become truly velvety.
If you’ve been looking for a cookie that looks professional but feels like home baked comfort, you are in the right place. Let’s get into the mechanics of why this specific method works every single time.
Why These Cookie Mechanics Succeed
To get that iconic look and texture, we have to respect the way fats and sugars behave under pressure. Here is why this specific formula creates such a consistent result:
- Sugar Dehydration: The initial coating of granulated sugar draws moisture away from the surface of the dough ball, creating a dry "skin" that allows the powdered sugar to sit on top without dissolving.
- Alkaline Depth: Using Dutch processed cocoa powder provides a smoother, darker chocolate profile and reacts with the leaveners to create a controlled rise that forces the surface to crack.
- Cold Fat Stability: Chilling the dough ensures the butter stays solid longer in the oven, preventing the cookies from spreading into flat puddles before the structure sets.
- Emulsification Balance: The addition of a small amount of milk provides just enough hydration to keep the center moist without making the dough too sticky to handle after its rest.
The following table will help you plan your batch size depending on the crowd you are hosting, ensuring you have the right pan space and timing.
| Servings | Ingredient Adjustments | Pan Size | Cook Time |
|---|---|---|---|
| 12 Cookies | 0.5x all ingredients | 1 Half sheet | 10 minutes |
| 24 Cookies | Use Schema quantities | 2 Half sheets | 10 minutes |
| 48 Cookies | 2x all ingredients | 4 Half sheets | 12 minutes (batch) |
When you are working with cocoa heavy doughs, the hydration levels are much higher than a standard chocolate chip cookie. This means the dough will feel almost like a thick frosting before it goes into the refrigerator. Don't panic and add more flour; the chilling process is what does the heavy lifting here.
Ingredient Deep Dive Analysis
Success in baking is about choosing the right components for the job. Not all cocoa powders or salts are created equal, and in a recipe with so few ingredients, each one has a major role to perform.
| Ingredient | Science Role | Pro Secret |
|---|---|---|
| Dutch Cocoa | Provides color and fat | Sift it twice to remove stubborn lumps |
| Granulated Sugar | Structure and "skin" | Use it as the first rolling layer |
| Unsalted Butter | Tenderness and flavor | Ensure it is soft but not melting |
| Baking Powder | Primary lift | Check expiration for a dramatic crackle |
You might be tempted to use natural cocoa powder if that’s all you have in the pantry. While it works, the cookies will be lighter in color and have a slightly more acidic, fruity bite. For that classic Oreo dark appearance, the Dutch processed version is non negotiable. For a festive twist, these resemble Chocolate Christmas Cookies but with a focus on a more fudge forward interior.
Essential Components for Fudgy Results
Having your ingredients prepped and at the right temperature is the difference between a smooth mixing process and a frustrated one. Here is exactly what you need:
- 1 cup all purpose flour: Why this? Provides the structural framework without making the cookies tough or bread like. (Substitute: 1:1 gluten-free baking blend)
- 0.5 cup unsweetened Dutch processed cocoa powder: Why this? Delivers the intense chocolate flavor and dark color characteristic of this style. (Substitute: Natural cocoa powder, though results will be lighter)
- 1 tsp baking powder: Why this? Creates the upward pressure needed to crack the sugar coating. (Substitute: 0.25 tsp baking soda + 0.5 tsp cream of tartar)
- 0.25 tsp baking soda: Why this? Aids in browning and works with the cocoa for a tender crumb. (Substitute: Omit if using natural cocoa)
- 0.5 tsp kosher salt: Why this? Sharpens the chocolate notes and balances the heavy sugar coating. (Substitute: 0.25 tsp fine table salt)
- 0.25 cup unsalted butter, softened: Why this? Provides the fat needed for a velvety, melt in-your mouth texture. (Substitute: Refined coconut oil, chilled until solid)
- 0.75 cup granulated sugar: Why this? Sweetens the dough and assists in the creaming process for aeration. (Substitute: Light brown sugar for a chewier, more caramel like finish)
- 1 large egg, room temperature: Why this? Binds the dough and adds rich proteins for structure. (Substitute: 1/4 cup unsweetened applesauce)
- 1 tsp pure vanilla extract: Why this? Acts as a background aromatic that makes the cocoa taste more "chocolatey." (Substitute: Almond extract for a cherry chocolate vibe)
- 2 tbsp whole milk: Why this? Adds just enough moisture to keep the dough fudgy after baking. (Substitute: Heavy cream or oat milk)
- 0.25 cup granulated sugar (for coating): Why this? The "secret" first layer that prevents powdered sugar from melting. (Substitute: Castor sugar)
- 0.5 cup powdered sugar: Why this? Creates the stark white contrast and the iconic crinkle appearance. (Substitute: None; this is essential for the look)
Required Kitchen Tools for Success
You don't need a professional laboratory to bake these, but a few specific tools make the process much cleaner. This dough is notoriously sticky, so being prepared is key.
A stand mixer or a reliable hand mixer is your best friend here. You need to cream the butter and sugar for a full 3 minutes to incorporate enough air for that soft texture.
Without a mixer, your arms will get quite the workout trying to reach that "pale and fluffy" stage.
A fine mesh sieve is also vital. Cocoa powder is naturally clumpy, and those little pockets of dry cocoa will stay in your dough and create bitter spots if they aren't sifted out. Finally, use a 1 tablespoon cookie scoop.
This ensures every cookie is the exact same size, which means they all finish baking at the same time. If some are bigger than others, you'll end up with a mix of burnt edges and raw centers.
Executing the Perfect Baking Method

- Whisk together the flour, cocoa powder, baking powder, baking soda, and salt in a medium bowl. Note: Use a sieve for the cocoa to avoid biting into a bitter clump later.
- Cream the softened butter and 0.75 cup granulated sugar together in your mixer for 3 minutes. Stop when the mixture looks pale and significantly lighter.
- Add the room temperature egg, vanilla, and milk. Beat on medium speed until the mixture is fully emulsified and looks like a thick, glossy cream.
- Fold the dry ingredients into the wet mixture using a spatula. Mix only until no white flour streaks remain to avoid over developing the gluten.
- Cover the bowl tightly with plastic wrap and chill in the refrigerator for at least 3 hours. This step is mandatory; the dough must be firm to the touch.
- Preheat your oven to 350°F (175°C) and line two baking sheets with parchment paper.
- Scoop 1 tablespoon portions of the cold dough and roll them into smooth, round balls between your palms.
- Roll each ball first in the 0.25 cup granulated sugar, ensuring a light coating. This creates a moisture barrier.
- Immediately roll the ball in the powdered sugar, being very generous with the coating. It should look like a snowball.
- Place balls 2 inches apart on the sheets and bake for 10 minutes until the edges are set and the cracks have fully formed. Cool them entirely on the pan to allow the fudgy center to set.
Fixing Common Cookie Baking Errors
Even with a clear plan, things can go sideways in the kitchen. Most issues with crinkle cookies come down to temperature control or sugar management.
Why Your Powdered Sugar Disappeared
If your cookies come out of the oven looking mottled and grey rather than snowy white, the sugar has dissolved into the dough. This usually happens because the dough was too warm when rolled, or you skipped the granulated sugar step.
The granulated sugar acts as a sacrificial layer; it absorbs the initial moisture so the powdered sugar can stay dry and white.
Why Your Cookies Are Flat
Flattened cookies usually indicate that the butter was too warm or the dough wasn't chilled long enough. If the fat melts before the structure of the flour and egg can set, the cookie will spread into a pancake. Always ensure your dough is cold from the fridge when it hits the oven.
| Problem | Root Cause | Solution |
|---|---|---|
| No Cracks | Oven too cool | Check temp with an oven thermometer |
| Tough Texture | Over mixing dough | Fold flour in by hand until just combined |
| Burnt Bottoms | Dark baking sheet | Use parchment paper or a silicone mat |
Common Mistakes Checklist
- ✓ Sift your cocoa powder twice to ensure a velvety, lump free dough.
- ✓ Don't skip the 3 hour chill time; the dough is too sticky to handle otherwise.
- ✓ Use room temperature eggs so they emulsify properly with the butter.
- ✓ Coat the dough balls heavily in powdered sugar more than you think you need.
- ✓ Let the cookies cool on the pan for at least 10 minutes to finish "setting" their centers.
Scaling the Batch Size Safely
If you are baking for a large party or just for yourself, you can adjust this recipe easily. For a half batch, simply divide all ingredients by two. Since the recipe calls for one egg, beat the egg in a small cup and use exactly 2 tablespoons of the beaten egg to keep the ratios precise.
When doubling the recipe for a crowd, keep the spices and leaveners at 1.5x rather than a full 2x to avoid a chemical aftertaste. You should also work in batches; keep half the dough in the fridge while the first set of cookies is in the oven. If the dough sits out on the counter while you wait for the pans to cool, it will soften too much and lose its ability to crinkle properly. For another decadent treat to add to your tray, try Salted Pistachio Chocolate Chunk Cookies.
| Method | Time | Texture | Best For |
|---|---|---|---|
| Standard Oven | 10 minutes | Soft & Fudgy | Classic Crinkle |
| Convection | 8 minutes | Crispy Edges | Busy Bakers |
| Small Batch | 10 minutes | Uniform Cracks | Solo Cravings |
Flavor Swaps and Creative Adaptations
Once you've mastered the base version, you can start playing with the profile to suit your mood.
A Spicy Mexican Chocolate Twist
Add 1 teaspoon of ground cinnamon and a tiny pinch of cayenne pepper to the dry ingredients. The heat from the cayenne subtly enhances the chocolate, while the cinnamon adds a warmth that feels incredibly cozy during the winter months.
The Peppermint Crunch Version
Replace the vanilla extract with peppermint extract and fold in half a cup of crushed candy canes or peppermint bark bits. This version is a staple for holiday cookie swaps and smells like a chocolate covered candy cane while baking.
Making Them dairy-free
You can easily make these dairy-free by swapping the butter for a high-quality vegan butter stick (ensure it is the kind meant for baking, not a tub spread) and using almond or oat milk. The texture remains remarkably similar because the cocoa powder provides so much of the structural body.
Storage Tips and Freshness Secrets
Proper storage is key to maintaining that delicate contrast between the soft center and the dry crust. These cookies are best enjoyed within the first 48 hours, but they will keep well if handled correctly.
- Storage: Keep the cookies in an airtight container at room temperature for up to 5 days. Do not store them in the fridge once baked, as the humidity will cause the powdered sugar to become sticky and damp.
- Freezing: You can freeze the baked cookies for up to 3 months. Place them in a single layer on a tray to freeze solid before transferring them to a zip top bag to prevent the sugar from smearing.
- Zero Waste: If you end up with "failed" flat cookies or broken bits, don't toss them! Crush them up and use them as a topping for vanilla bean ice cream or fold them into a batch of brownie batter for an extra layer of texture.
Serving Styles and Pairing Ideas
These cookies are quite rich, so they benefit from being served with something that can cut through the intensity of the Dutch cocoa. A cold glass of whole milk is the classic choice, but a sharp, hot espresso is even better for adults. The bitterness of the coffee highlights the earthy notes in the cocoa.
If you are putting together a dessert board, pair these with fresh raspberries or strawberries. The tartness of the fruit provides a beautiful counterpoint to the sugary "crust" of the cookies. You can also serve them alongside a bowl of lightly sweetened whipped cream for dipping. However you choose to serve them, make sure they are at room temperature so the center is at its most velvety. If you crave more chocolate variety, these pair beautifully with a Strawberry Dark Chocolate Cookie for a fruit forward contrast.
Chef's Tip: If you want the cracks to be even more pronounced, give the baking sheet a firm bang on the oven rack halfway through the baking time. This "deflates" the cookie slightly and forces the surface to split further.
Recipe FAQs
What is the secret to crinkle cookies?
The secret is the contrast between two sugar coatings. Rolling the dough balls first in granulated sugar, then in a heavy layer of powdered sugar, ensures the crackled look stands out against the dark dough.
What is the secret to a chewy cookie?
Proper chilling and oven timing are essential. By chilling the dough for at least 3 hours and pulling them out when centers remain soft, you lock in moisture. If you enjoyed mastering the dough consistency here, explore how we apply similar hydration principles to our chewy peanut butter cookies.
How to make your crinkles chewy?
Bake only until the edges are set but the centers remain soft. Since these cookies continue to firm up while cooling on the pan, removing them from the 350°F oven at the 10-minute mark is the best way to maintain a soft, fudgy interior.
What makes a cookie chewy instead of crunchy?
Moisture content and baking time dictate the texture. This recipe uses whole milk and butter to maintain a tender crumb, while the 3-hour chill time prevents the fats from melting too fast, which would result in a thin, crunchy spread.
Is it true I can skip the 3-hour chill time?
No, this is a common misconception. The dough is far too sticky to roll into balls without chilling, and the rest period allows the flour to hydrate properly, which creates the desired chewy texture.
How to store baked crinkle cookies?
Keep them in an airtight container at room temperature. Storing them in the refrigerator will pull moisture into the powdered sugar, causing it to dissolve into the cookie surface and lose the iconic white crinkle appearance.
How to ensure the cocoa powder incorporates smoothly?
Sift the cocoa powder into the dry ingredients. Cocoa powder is prone to clumping, and sifting ensures it distributes evenly with the flour, baking powder, and baking soda for a consistent, deep chocolate flavor in every bite.
Chewy Chocolate Crinkle Cookies

