No-Bake Peanut Butter Balls Recipe
- Time: Active 20 minutes, Passive 30 minutes, Total 50 minutes
- Flavor/Texture Hook: Silky peanut butter center with a chocolate snap
- Perfect for: Holiday gift tins, budget-friendly potlucks, or rainy day snacks
- Making the Best Ever Peanut Butter Balls
- The Physics of the Perfect Peanut Butter Balls
- Why Simple Ingredients Make These Peanut Butter Balls Shine
- Smart Swaps for Your Peanut Butter Balls Pantry
- Basic Tools to Shape Your Peanut Butter Balls
- Step by Step Guide to Making Peanut Butter Balls
- Avoid These Common Mistakes with Peanut Butter Balls
- Practical Scaling for Large Batches
- Delicious Variations for Your Easy Peanut Butter Balls
- How to Store and Freeze Peanut Butter Balls
- Perfect Pairings for Your Sweet Peanut Butter Balls
- Dispelling Common Kitchen Myths
- Recipe FAQs
- 📝 Recipe Card
Making the Best Ever Peanut Butter Balls
The kitchen was quiet except for the rhythmic clack clack clack of a wooden spoon hitting the side of my favorite chipped ceramic bowl. I remember the first time I tried making these; I was terrified the chocolate wouldn't set or the centers would be too gritty.
But as the aroma of roasted peanuts filled the air, I realized that the best recipes aren't about fancy techniques, they're about the simple magic of mixing things by hand.
I’ve spent years tweaking this recipe to make it work for a real life budget without sacrificing that rich, nostalgic flavor we all crave. We’ve all seen those expensive truffles in fancy shops, but honestly, these home style treats beat them every single time because you can control the salt and the crunch.
You don't need a degree in pastry arts or a kitchen full of expensive gadgets to get that professional "shatter" on the chocolate coating.
We're going to use basic pantry staples to create something that tastes like a million bucks. Whether you're making these for a school bake sale or just because it's a Tuesday and you need a sweet pick me-up, I've got you covered.
Let's get into the nitty gritty of how to make these work perfectly on your very first try.
The Physics of the Perfect Peanut Butter Balls
The Lipid Bond: Butter and peanut butter contain different fat structures that, when creamed together, create a stable emulsion that holds the powdered sugar in suspension. This prevents the centers from feeling oily or separating while they sit at room temperature.
- The Sugar Shield: Sifted powdered sugar acts as a structural skeleton, absorbing moisture from the butter to keep the ball firm.
- Thermal Tempering: Adding coconut oil to the chocolate chips lowers the melting point slightly, creating a glossy finish that snaps rather than crumbles.
- Cereal Insulation: The rice cereal provides air pockets that prevent the dense peanut butter from becoming too heavy on the palate.
- Cold Stabilization: Chilling the dough before dipping ensures the surface fat is locked down so the warm chocolate doesn't slide off.
| Prep Method | Total Time | Texture Outcome | Best For |
|---|---|---|---|
| Fast Method | 25 minutes | Soft and fudgy | Immediate snacking |
| Classic Method | 50 minutes | Firm with a "snap" | Gifting and parties |
| Deep Chill | 2 hours | Dense and truffle like | over High heat environments |
If you choose the fast method, just know the chocolate might be a bit streakier, but the taste remains top notch. For those looking for a different kind of snack, you might enjoy my Protein Balls recipe which uses a similar "roll and set" technique but focuses on different nutritional goals.
Why Simple Ingredients Make These Peanut Butter Balls Shine
| Component | Science Role | Pro Secret |
|---|---|---|
| Creamy Peanut Butter | Primary Fat & Flavor | Use standard brands like Skippy for better structural stability. |
| Powdered Sugar | Structural Binder | Always sift to avoid "sugar rocks" in the velvety center. |
| Refined Coconut Oil | Gloss Agent | Refined oil has zero coconut taste but provides the best shine. |
| Crispy Rice Cereal | Texture Contrast | Fold this in last to keep the bubbles from crushing. |
Smart Swaps for Your Peanut Butter Balls Pantry
When you're working on a budget, you have to be smart about your ingredients. I always have a jar of creamy peanut butter (375g) in the pantry. It’s the backbone of this recipe, providing that rich, roasted base.
If you're out of the unsalted butter (115g), you can use salted, but just skip the extra sea salt later in the steps.
The 3 cups (360g) of powdered sugar is non negotiable for the texture, though you can experiment with the brand. For the coating, I swear by 2 cups (340g) of semi sweet chocolate chips because they balance the sweetness of the center.
If those are too pricey, even a chopped up discount chocolate bar works wonders as long as you add that 1 tbsp (14g) of coconut oil for the melt.
| Original Ingredient | Substitute | Why It Works |
|---|---|---|
| Creamy Peanut Butter | SunButter (Sunflower) | Similar viscosity. Note: Color may turn slightly greenish but tastes great. |
| Unsalted Butter | Margarine | High water content but works if chilled longer. |
| Semi Sweet Chips | Dark Chocolate (70%) | Cuts the sweetness significantly for a more mature flavor. |
| Crispy Rice Cereal | Crushed Cornflakes | Stays crunchy even longer than rice cereal. |
If you find yourself with extra peanut butter after this, you really should try my Peanut Butter Chocolate recipe for a quick afternoon treat. It’s a great way to use up those last few tablespoons in the jar.
Basic Tools to Shape Your Peanut Butter Balls
You don't need a stand mixer for this, though you can use one if your arms are tired. A sturdy spatula and a large mixing bowl are your best friends here. I prefer using a small cookie scoop (about 1 tablespoon size) to keep the portions consistent, which ensures they all chill at the same rate.
For the dipping stage, a simple dinner fork works better than fancy dipping tools. The tines allow the excess chocolate to drip off easily. You'll also need some parchment paper or a silicone mat.
This is the one "pro" tool I recommend because it prevents the chocolate from sticking to the tray, saving you from a crumbly mess when you try to move them.
Chef's Tip: Freeze your baking sheet for 10 minutes before lining it with parchment. This helps the chocolate base set instantly when you put the dipped balls down, preventing those large "chocolate puddles."
Step by step Guide to Making Peanut Butter Balls
- Cream the butter. Mix 0.5 cup (115g) softened butter with 1.5 cups (375g) peanut butter until completely smooth and pale. Note: This air incorporation prevents the balls from being too dense.
- Season the base. Add 1 tsp (5ml) vanilla extract and 0.25 tsp (1.5g) fine sea salt to the mixture.
- Sift the sugar. Slowly add 3 cups (360g) powdered sugar into the bowl.
- Incorporate the sugar. Stir until a stiff, non sticky dough forms.
- Add the crunch. Gently fold in 1.5 cups (45g) crispy rice cereal. Note: Do this by hand to avoid crushing the cereal.
- Shape the centers. Roll the dough into 1 inch balls and place on parchment.
- Chill the dough. Refrigerate for 30 minutes until firm to the touch.
- Melt the coating. Heat 2 cups (340g) chocolate chips and 1 tbsp (14g) coconut oil in 30 second bursts.
- Dip and coat. Use a fork to submerge each ball, tapping off the excess.
- Final set. Place back on parchment and let sit until the chocolate is matte and hard.
Avoid These Common Mistakes with Peanut Butter Balls
One of the biggest heartbreaks is when your beautiful treats start to "sweat" or the chocolate cracks. Usually, this happens because of temperature shocks. If you move them from a freezing freezer to a hot kitchen too fast, moisture will condense on the surface.
Why Your Dough is Too Crumbly
If your dough won't hold a ball shape, it's usually because the peanut butter was too dry or the sugar was packed too tightly. Every brand of peanut butter has a different oil to protein ratio. If you're using a "natural" brand that requires stirring, you might need a tablespoon more butter to get the right tackiness.
| Problem | Root Cause | Solution |
|---|---|---|
| Chocolate is streaky | Overheated chocolate | Melt in shorter intervals; stir more, heat less. |
| Balls are flat | Butter was too melted | Chill the dough for 15 extra minutes before rolling. |
| Cereal is soggy | Added to warm mixture | Ensure peanut butter base is room temp before folding cereal. |
Common Mistakes Checklist
- ✓ Sift the powdered sugar every single time to ensure a velvety mouthfeel.
- ✓ Use refined coconut oil for the coating to get that professional looking shine.
- ✓ Tap the fork against the side of the bowl 5-6 times to remove excess chocolate.
- ✓ Don't skip the salt; it's essential to balance the heavy sugar content.
- ✓ Work in small batches when dipping so the balls stay cold.
Practical Scaling for Large Batches
If you're making these for a big holiday party and need to double the recipe, you can't just double everything blindly. When you scale up, the mixing becomes much harder on your arms.
I recommend doubling the peanut butter and butter, but add the powdered sugar in three stages to make sure it's fully incorporated without flying all over your kitchen.
For a half batch, it's very simple. Since we aren't using eggs, you can literally cut every measurement in half. Just be aware that a smaller amount of chocolate is harder to melt in the microwave without burning, so use a smaller, deeper bowl to keep the heat concentrated. If you're looking for more classic bakes for a crowd, my Peanut Butter Cookies recipe is another fantastic budget friendly option.
Delicious Variations for Your Easy Peanut Butter Balls
- The Healthy Twist: Swap half the powdered sugar for oat flour. The texture will be denser, but it adds a lovely toasted flavor.
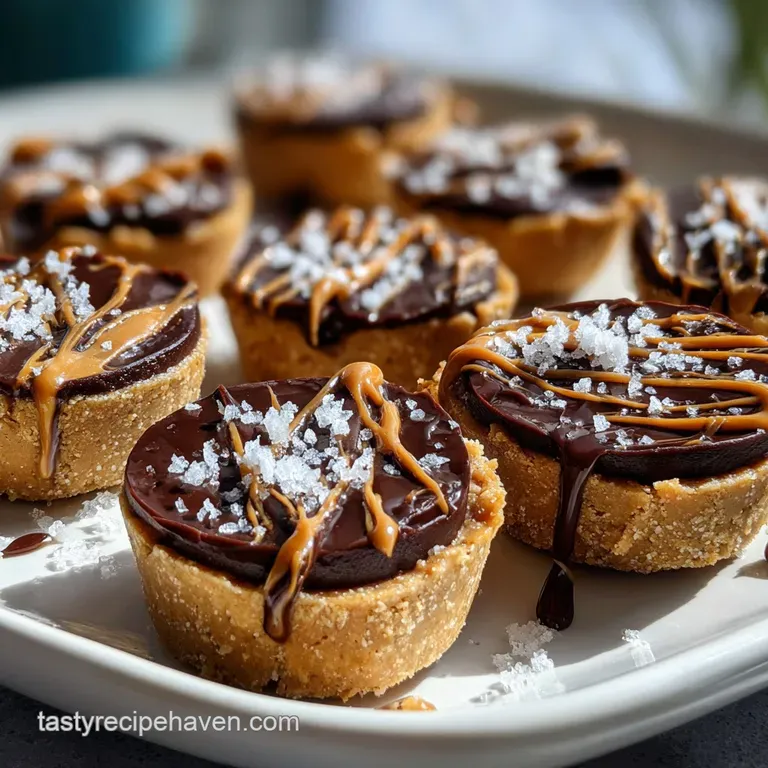
- Dark and Salty: Use 70% dark chocolate for the coating and sprinkle a tiny pinch of flaky Maldon salt on top before the chocolate sets.
- Extra Nutty: Use crunchy peanut butter instead of creamy. You can skip the rice cereal entirely if you go this route, as the nut chunks provide the texture.
- Tropical Vibes: Add 1/2 cup of toasted shredded coconut to the peanut butter dough for a chewy, island inspired center.
| Ingredient Shortcut | Benefit | Cost Impact |
|---|---|---|
| Store brand chocolate | Meltable and cheap | Save $2.00 per batch |
| Vanilla essence | Basic flavor | Save $5.00 over real extract |
| Crushed graham crackers | Sturdy texture | Uses up pantry leftovers |
How to Store and Freeze Peanut Butter Balls
These treats are incredibly hardy. You can keep them in an airtight container in the fridge for up to 2 weeks. I actually think they taste better after two days because the flavors have time to marry and the cereal softens just a tiny bit into the peanut butter.
If you want to freeze them, place the set balls on a tray in a single layer for an hour, then toss them into a freezer bag. They’ll stay fresh for up to 3 months. When you're ready to eat, just let them sit on the counter for 10 minutes.
Don't microwave them, or you'll end up with a puddle of chocolate and a very sad snack.
For zero waste, save any leftover melted chocolate. Spread it thin on a piece of parchment, sprinkle with any leftover rice cereal or crushed nuts, and let it harden. You've just made a quick chocolate bark!
Perfect Pairings for Your Sweet Peanut Butter Balls
These are quite rich, so I always suggest serving them with something that has a bit of acidity or bitterness to balance the palate. A cold glass of milk is the classic choice, but a sharp espresso or a tart hibiscus tea works beautifully too.
If you're putting together a dessert board, these look stunning next to some fresh raspberries or sliced green apples. The tartness of the fruit cuts right through the heavy fat of the peanut butter. If you're in the mood for more baking after mastering these, check out my Peanut Butter Blossom Cookies recipe for another crowd pleasing combination of chocolate and nut butter.
Dispelling Common Kitchen Myths
One big myth is that you need "expensive" chocolate for a good coating. In reality, expensive chocolate often has a higher cocoa butter content which makes it harder to work with for beginners because it requires precise tempering.
Standard chocolate chips are designed to hold their shape and melt smoothly, making them the superior choice for a foolproof home recipe.
Another misconception is that "natural" peanut butter is always better. While it’s great for toast, the separation of oil in natural peanut butter can make these balls greasy or prone to falling apart.
The stabilizers in brands like Skippy or Jif are actually a baker's friend in no bake recipes because they ensure a consistent, structural result every single time. Trust the science of the processed jar for this one!
Recipe FAQs
How do you make Paula Deen's peanut butter balls?
The core technique involves creaming softened butter, peanut butter, and powdered sugar together. For the classic version, you combine these ingredients until a firm dough forms, roll into balls, chill them completely, and then dip them into melted semi sweet chocolate.
How to make 4 ingredient protein balls?
Combine 1 cup peanut butter, 1/2 cup honey or maple syrup, 1 cup protein powder, and 1/2 cup oats. Mix until uniform, roll into balls, and chill until firm. If you enjoyed mastering the binding technique here, see how the same principle works in our Espresso Protein Balls recipe.
Do you need to refrigerate peanut butter balls?
Yes, refrigeration is highly recommended for best texture and stability. The butter and fats in the filling stay firm when cold, preventing the balls from softening too much and becoming greasy, especially if they contain cereal.
How to keep peanut butter balls from sticking to hands after rolling?
Lightly dust your hands with powdered sugar or lightly spray them with non-stick cooking spray. The sugar barrier prevents the sticky fats from adhering to your skin, allowing you to shape them cleanly before the chilling stage.
Is it true that I must use crunchy peanut butter for the best texture?
No, this is a common misconception. Creamy peanut butter provides a smoother, more velvety center that contrasts better with the crispness of added rice cereal.
What is the secret to getting a glossy, crack free chocolate coating?
Incorporate a small amount of refined coconut oil or shortening into the melted chocolate. This lowers the melting point and slightly thins the chocolate, resulting in a smooth dip and a satisfying "snap" when set, which is similar to the fat science used when setting up the texture in our Snickerdoodle Cookies Recipe.
How long can peanut butter balls be stored safely?
Store them in an airtight container in the refrigerator for up to two weeks. For longer storage, they freeze beautifully for up to three months; just let them temper on the counter for about 15 minutes before serving.
No Bake Peanut Butter Balls